

JeremyL
Well Known Member
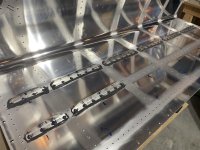
Here we go, time to seal the tanks. A bit of anxiety at first, but with the few stiffeners riveted so far, it’s not so bad. The worst part is I won’t know if any of this is good until it’s complete and almost impossible to fix. So we shall see. Cheers! (*the plans stated it was ok to have the stiffeners flipped like you see in the picture to aid in sealant application, hopefully it doesn’t cause any interference. If anyone has experience here, let me know)
 The memorynis better than the broken leg.
