What's new
Van's Air Force

Don't miss anything! Register now for full access to the definitive RV support community.

RV-6A Very Slow Build, Western Australia

PaulvS

Well Known Member
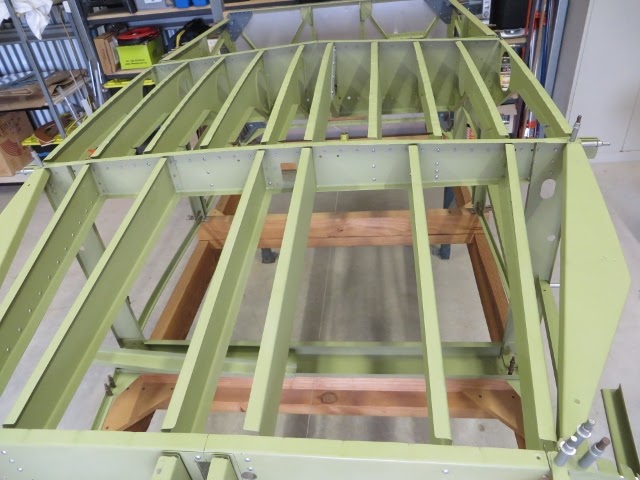
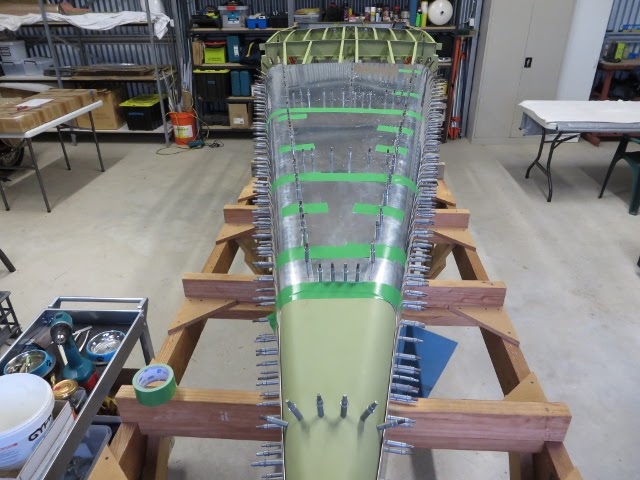
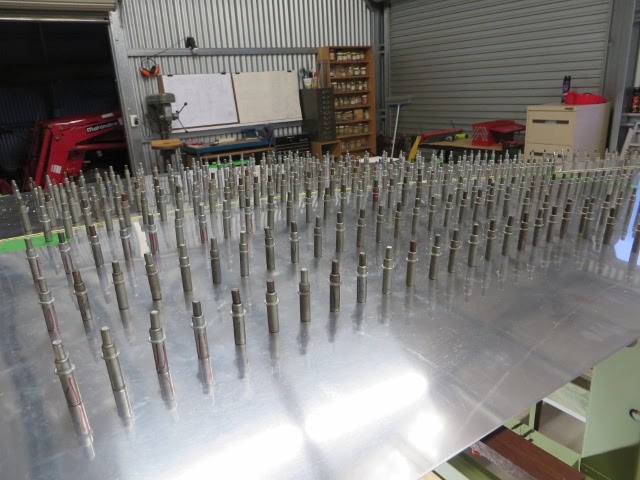
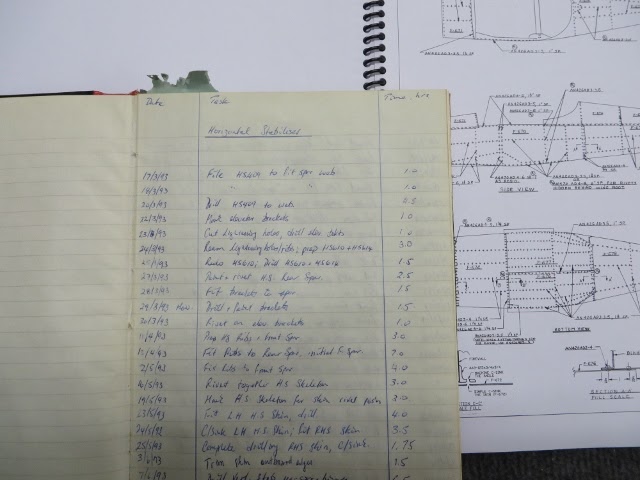
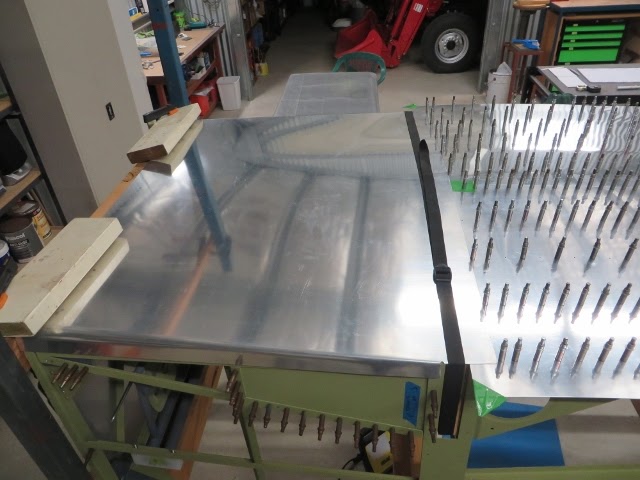
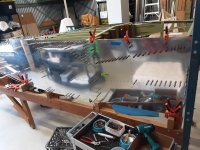
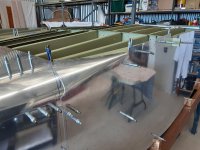
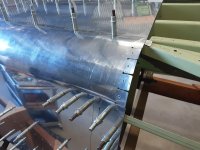
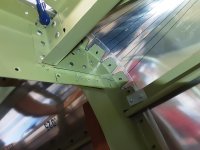
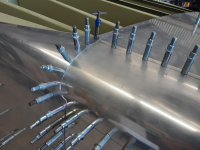
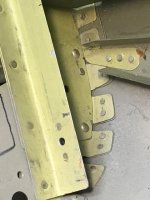
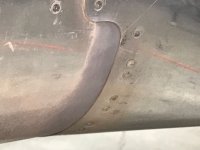
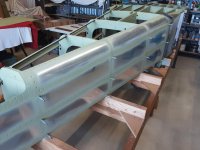
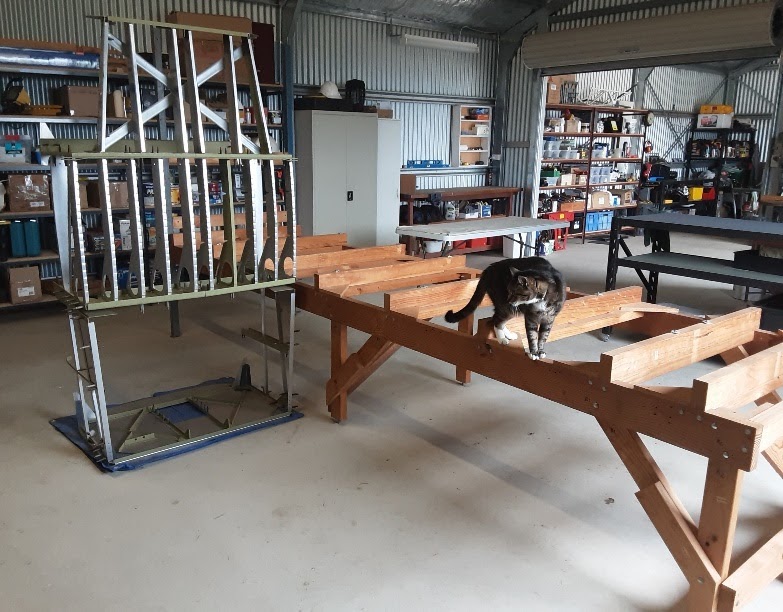
A younger version of me started this slow build RV-6A just after Oshkosh '92. I completed the empennage and wings in my spare time and got started on the fuselage. Then other things in life took priority and the RV project went on hold for 21 years.

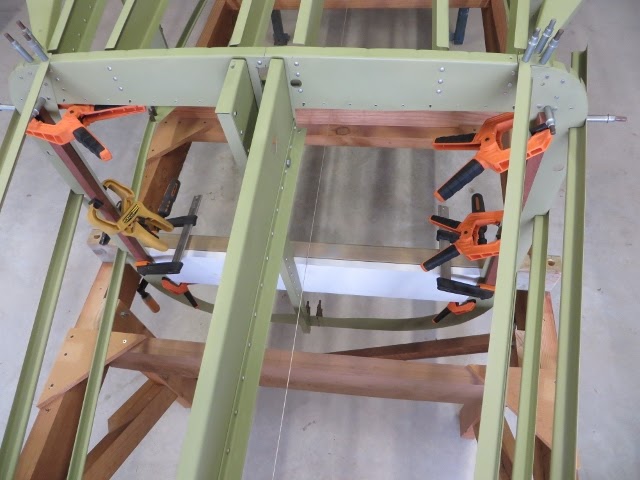
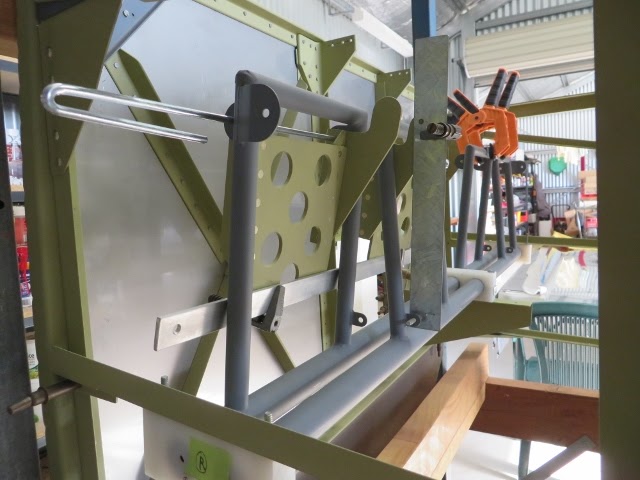
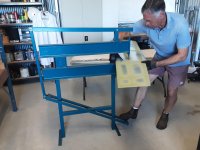
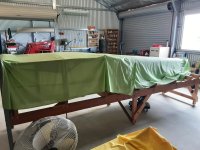
We've moved house a few times and the fuselage frame had to come out of the jig for the most recent shift. I'm now getting the workshop organised and ready to start building again.

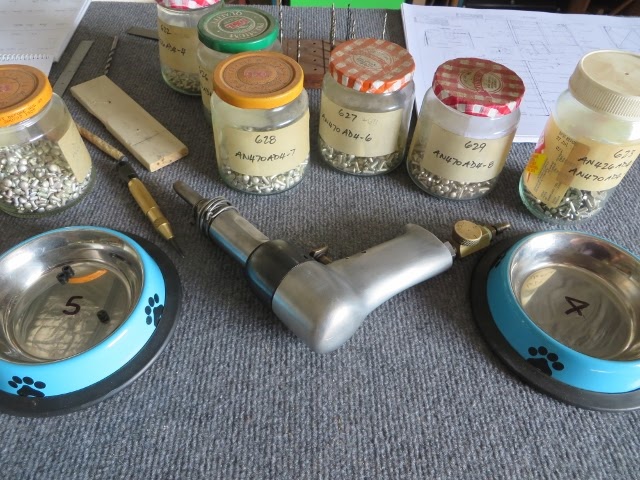
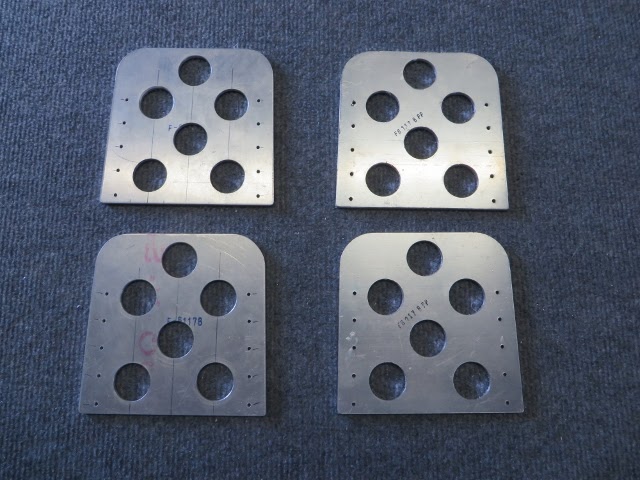
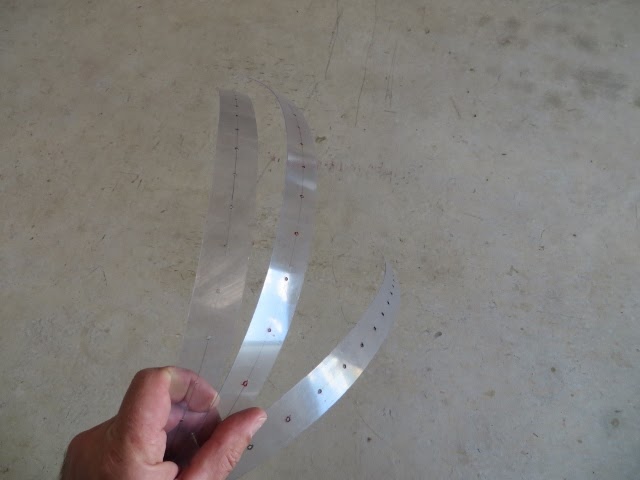
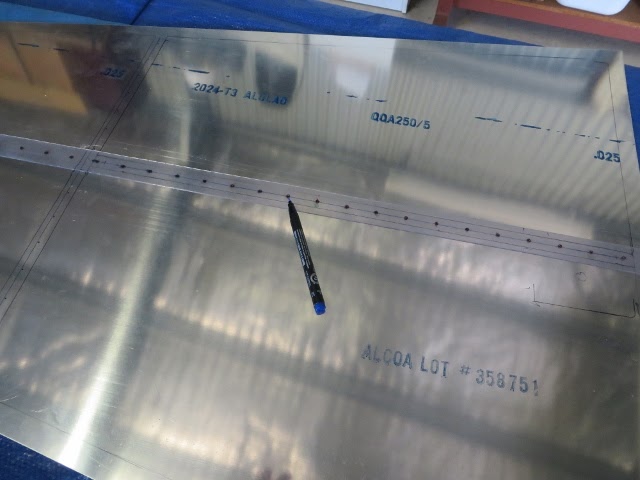
Back in '92 there were only three RV models to choose from. And Van's was just talking about quick build kits. The plans are hand drawn and the only factory made holes were in the wing spar. The new kits look way easier and it would probably be quicker to assemble a new project than to finish this old one, but I kinda like this orphan relic from the 90's!


6nQMgQ2b02iTM5Nb2PAusdzjCzwd8kNWDQPTmRf-A1cy81ftaccxVtg23HPQCiwy4uuYAYvyxZubUuGRjXpbRbs80rVGPzsEaJ4R6fmstoYBT7O7vcGIuYws1WN0lktyeVtRG_YRYnGNAS9aZj6oQBaiACVh2ae6mCkSTTIefVPILQpjZ1Zi6uDzZW9x4MogAX8nrw8p1F6tnzGhd4NN9fB8ookRIgmVnlxajt6N-KjIlryIKBhx9tKp6Zglm_g6P8o1jp2TZ45FQQ5XXfBoNTPPxIW5QTCOpFoXtyrW-VApCJqNU73oHr0q7kLLJGggmGVV7uVAk00pZiySE--UHlx4kbR55OjOljgxJ0a_a3y6Y7tsPCeXGv8RbpqgER71yjk_LI50VaKQAeupNgxakdhmhZWUa9Roo5QWMBxnm6UDrXSjywFcP_lGApOk9xb2PWSWY_MzJXu_O5hzBLeIqFZOZRY3A60UXImg7E0Bix_qCUbpT23_VIZQ_HkA4lmTzIPFUGvOEvZXW2U7dtcS95ILfOrPoGa6VyEkAOrjfHvEtW9IX4igCXteMDXner6Zp8d98mo-mI3-5XSOTLW_Eu-44siznaqZZUCIgpRHQxbhO_maMCKa_X3_T41m5TSiAz7dTwOWO3CyI9hwKxpg6c3_RGIvwbsolB2OIpXMrQ9Ttmnn63YbVb6h33HwV9I=w1680-h881-ft
 
Last edited:
will be a great aircraft

I'm close to completion of a similar vintage RV-6A in Ottawa, Canada, find having done a non-prepunched kit a very satisfying experience. Like the look of the smaller tail than the 7. Easy to incorporate a few of the improvements that the 7 has; the firewall mounted Odyssey battery, the fuel pump center tunnel, a 7 style instrument panel without the vertical brace.
Enjoy.
Bill Brooks
 
that's a cool story! get her done! my projekt was sitting at a farm for 7 years and now she's at the final inspection for first flight.

nice thing about RV pojects is that you can let them abandond for years or decades and then start again when life allows it. i did that and it wasn't a big deal.
 
Glad to hear you are back in the saddle! I finished an early slow build -6 in 1991, it was an enjoyable experience. Just curious, your photo shows the forward part of the fuselage, but no longerons? The very first step in the slow build fuselage was to bend the longerons and clamp them to the jig. Am I missing something?
Good Luck with the build!
 
Longerons

Glad to hear you are back in the saddle! I finished an early slow build -6 in 1991, it was an enjoyable experience. Just curious, your photo shows the forward part of the fuselage, but no longerons? The very first step in the slow build fuselage was to bend the longerons and clamp them to the jig. Am I missing something?
Good Luck with the build!

Thanks! The longerons were originally bent and clamped in the jig but I took everything off for transport, including the rest of the bulkheads and J stringers to the tail end. It all needs to go back into the jig now and get realigned. There is also still some priming to do before I can begin riveting together the frame. The forward part of the fuselage was easy enough to transport as a clecoed sub-assembly.
 
Not sure what vintage finishing kit you have but would recommend installing overhead rudder pedals if you have the floor mount style. They changed over sometime back in the early 90s late 80s to the overhead style, (much better). Also the top of the firewall was tipped out some at the top for better cowling fitment. This required different upper forward ribs. Just a couple of thoughts to throw in there. I happen to have built our 6 around that time frame and remember those changes. :) Happy to see you get going.
 
Get the updated instructions

If you haven?t done it yet you will be amazed at the level of detail in the current plans/details. And if you order any kit parts the prepunched and CNC cuts will blow your mind.
 
Kit vintage

Not sure what vintage finishing kit you have but would recommend installing overhead rudder pedals if you have the floor mount style. They changed over sometime back in the early 90s late 80s to the overhead style, (much better). Also the top of the firewall was tipped out some at the top for better cowling fitment. This required different upper forward ribs. Just a couple of thoughts to throw in there. I happen to have built our 6 around that time frame and remember those changes. :) Happy to see you get going.

The finishing kit shipped in 2000 so I have the overhead rudder pedals (but not yet the revised nose gear leg and fork). The empennage kit shipped in 1992, and the wing+fuselage in 1993. It looks like the firewall top got tipped forward in 1994, so I will need to order or fabricate the revised upper forward ribs. I will also probably need to check that the top skin is the right size. Thanks for those thoughts.
 
Updated plans

If you haven?t done it yet you will be amazed at the level of detail in the current plans/details. And if you order any kit parts the prepunched and CNC cuts will blow your mind.

I have seen the instructions for the RV-14 and I am amazed, they are light years ahead of what I am using. At present I am needing to jump between about 10 different hand drawn sheets to check off the fuselage structure.

I got the plans CD for the RV-6, which has all the drawing revisions incorporated, so that is a help.

The Vans construction manual for the fuselage is not very easy to follow so I have used the Frank Justice manual. I found the wings and empennage to be much easier, the fuselage seems considerably more complicated!
 
Been there

Have scars from my time building a non pre punched 6 , bought the empennage in 94 as well ,,, took until 2016 before she was ready to fly but have had 200 hrs of pure joy flying her so far! If you try and get some deals by shopping for panel parts , props Etc here it makes our poor currency is a little more palatable , Stay the course brother ! How does that go ,,, it?s not the destination but the journey ;).
 
Patience and Percieverence

Well done, mine was sent to me in 97, the emp. Then I began in earnest to build by ordering the wings in 2012 and the QB fuse 2014. I am now painting the bird and sending painted parts to rented hanger for assembly and first flight to happen around June 1 or July.

Awsome that you are still building and I would advise to buy the QB fuse it certainly helped me to get things rolling faster.

So many hours now i have lost track but close to 1600 building and 3000 researching and reading!

Build on and enjoy

Dave
 
Back to the future

I'm back on the tools and building again now, after a 20 year break, and picking up where I left off on the part-build fuselage. Before moving house for the third time, I took pictures of the fuselage skeleton to help with putting it back together again at the new workshop. The old workshop was 14 feet by 20 feet and I found it a bit awkward to build efficiently in a small-ish place.

https://lh3.googleusercontent.com/V2P2lTUCUNhPl33li1C2Wx18C8w6Gv99GsHr-J7B4juWxNvcDSakpr1dN2GN4_OcQfZSTbVgc1uQLlEMB4QTy1yRa0VmqKhVuItdhU1iin2RvoFrOeBPPTscB4KaqYwqQ0oOfOajw9rDkbozvHWGqr6NdGeYDGQLpXxP1Om9EyZ4hRKPMVB7kZEeqY-hxO3uFUkBtcVVysWXkaFvjLBGmSzB4jrX-N-dp2xCVv3XZYuR3FfCLY9VcjI50eebW5x33XyYjyj4ubVMKirDYGFOuHMCFo4UvJyrmKJh-CPpgcgDDGQoZmJKj03SNFHypAFobxRXnmAzYQuW18OZFabBeEr-ebEM7l0rTVRLtGtAxPKG2gkD1pUnAwiwHS9Hc_2S3hAH6NW1E_aC455yqF31KlBxGswFWrII742pEKk2_9iqLBbvDw0ila9auJ1TOyyZCQuFW0mn3PxE0Wh1gRCI57a6d2LDisoqwoUiOJsNSMvf_-iq_aPHd_nH99-TZFggyVc_hxwYYXf5UOdgY-lwaJ22J22r2HDR1qiUZTsb9w43M8OSizUL9fkWiFHVSFikeUt7djdkkWqZdZ6jqcaC3oiQ-ngoj1Q8k0gA0lcUCLGWpUxUXL2-ihrXpLIl1pYr7BFcjGBgcUKe5O8tHXe8zv9WnB_cJsOpIlYcpPakTIvKP71KukEjmiwAe3Ab4tLyk0d9FQ=w1680-h881-ft

I partially disassembled the fuselage frame by separating the section behind the baggage compartment. The front section fit into a box trailer and the jig went on top of my Toyota for the 400km drive. I took the wings on a separate trip, on the same trailer, sitting on top of a foam mattress.

https://lh3.googleusercontent.com/a2i7UrA_sUd3qldye7WpDfvgXSvEOmtlsAu2L_kbLJscbgiwXX3cNH8nLxUsmJtRVsAMVDc0P00hQp3yo6CHWjhWZ5kR1ur56Vgaf-mh79PsGipm3OtmmZDg1CDUJnJ_X9up9OBfYeu4bqi9HxHuUBs2qdXWXTdNfD4AgQ_8ZHa1jW83wLCI37flGG6txf5Eiv9Bh7eBOOEcmbXWZu4QTD5MMoqxloPT1_9aDKV-OWtKXvJigFamx594_UJzgGv1IRf4Co2OhK8Q2HJZweFgKn6dRbzheNC58eqkTTzw4gKGhjvSK6nst2JfCWbslyTnE_qoer61g2Xx2YSj-53QdRqTBCnpsF97pqtejY18hi4ATRNOqc4bZ87EDW_e097HQPWkfzTQjuwVgbY0YPxOMsLog1b-ISPWHIYRZ-CS-y3Bmts0rPPLvFnpyBiFIPIhc9LIFfTaFy05d6wj1DSQ32yaPzCFW6qxFDFZyfIo9BrKsghbgqVUB4G_5wAXaUX8BMSfrJs5xYvjhsf1MesvDwhRHzruCQSbKvD3GojljgC09r-YrtTDpYjojJzVjwX2V2ibi8Lj4s2lVIDEJ42spNuqYemWF1UUIFPr4MAfNl4Y9WaYdQf-6rU39ZsWAwObAzWUCh8NIjCPHR6PH8oo9GSEif0J7sw79MVtNmiqs6bY1c27hu7L1ZXbwjwKKgJoXdzmVg=w1680-h881-ft

Now at the new workshop, which is much bigger, I have reassembled the jig and the fuselage frame and also took the opportunity to de-burr and prime those parts that I did not get to do 20 years ago.

https://lh3.googleusercontent.com/wBtyAvim-FHXsPw9V3HHERb8dG9-jY-EqNTnC9zD7RHcWzGNem0MbLMqjOfXd6PdPo4UBuPAs6Ej91GhJkyrhxCLNN14sk2Ij2eSzk5kbmlXxLRPwDOM7dK34V_vy3YiuWKf1rwvrtrt0kdjQeF522bYoGWjw_cMOoRhmFoRHPbNmQrrdn6CpZC5L4qgAztCYLKSef0Hn7rAo6vrmcHP4RYwC6Sh9R_PVGMSz0TzNHEpTh_4bP9s9SboR8TP1sBVQeMSVUkFM6GM5jMAfZk7ksu6nPwz8TiJX4Mw2FhRP0MO6SO-mrzLAJIu6G9q6X9-EUCJP3DJ6lP4S7UMGg0X8_eFfHmdA_jswrm0fWxkd6GtT4SXxHz70CwKK1STENTSNQ6SKWoQH3-sH94YvIvAfDuXxub85Fx31_DIswVc_EaJRrbuVqOEBr_zXmUNWpKTPhk2PlCcm7IXPGlY-WkshtbnJMriwX_bwUyfI53sqREMx1YDQFGLdliVJDTGrSJ_9pmXVfL-rwznPlj1-Is1yojRnTKnescFYEOryYrq3kSHCRID97209fJ6hwtFcTUpWepwZU0TY3X0ZWOb4hgu7QBGk7aOhrDJ_KR8en8pP6mf5zXMK1JABPwDWkf372HROYJBR9mBHbeRyB4ITINKl0YJH0sI_CvN_nHvHYQ3xofTMqhyBuR1Ns9TfV41rg9Vh21UWQ=w1680-h881-ft

So far I have been really enjoying working on the project again. It is helpful to have a bit of a distraction from the crazy virus thing that is affecting all of us at the moment.

I am going slowly and carefully and checking over everything that Younger Me did. Most of it is making sense and I've found a couple of mistakes that I've fixed. I've got the latest plans on CD and have been checking back and forth against the paper drawings that originally came with the kit. I'm following the Frank Justice manual and the extra detail is helpful.

Of course VAF has been a great help to get me motivated again and to know that this can be done! Building on in interesting times!!
 
Last edited:
retrofit nose gear

To add an additional complication, I am in the middle of retrofitting the new design engine mount and nose gear to my similar vintage RV-6A. The install is going well, it is a very well designed and executed piece. If you are inclined to do it, now is the ideal time, before you have done engine, cowl and baffles.
 
To add an additional complication, I am in the middle of retrofitting the new design engine mount and nose gear to my similar vintage RV-6A. The install is going well, it is a very well designed and executed piece. If you are inclined to do it, now is the ideal time, before you have done engine, cowl and baffles.

I agree it is a worthwhile investment and intend to order when I get closer to installing the engine mount. My firewall has preliminary holes only for the engine mount which came with the kit. It will also save having to modify the old nose gear leg per the Vans SB.

Another change I'm considering is 380-150 x 5 tyres on the mains, and I understand the wheel spats will need to be raised. I will operate from a grass strip and the bigger tyres should roll better.
 
Last edited:
Going in a circle

I went around in a circle today, April 1st carried over!

I've been checking over the fuselage frame and noticed the smallest F-612 bulkhead at the tail end was installed with the flanges facing forward. But there is a one-line statement in the construction manual that says to orient flanges backward for the -6A (versus the -6 which has two parts riveted together, one facing forward, one facing back).

I decided to make another bulkhead, similar to the 6, so as to have flanges facing backward as well as forward.

https://drive.google.com/file/d/1RmtMUIYIrXYbl6gNBhvZUgOcnNHHbEQB/view?usp=drivesdk

Made the part, went to drill the parts together, checked the rivet spacing on the plans and noticed a revision to have the flange face forward on the -6A!

So a morning's work for nothing (other than some ongoing education).:eek:
 
Last edited:
Old But Good Rivets

I'm on to the next stage of the fuselage skeleton and have been riveting the frame together. The central section took a bit of head scratching and body contortion around the seat and baggage ribs because of the narrow space and shared rivets. I riveted the most inaccessible rivets first so I could pivot the rib other end aside enough to get in with the rivet gun and bucking bar. The VAF trick of using a small bit of rubber hose helped to keep the flanges tight. There's an extra rivet on the flange on the third from right seat rib, because, well because there needed to be one... that location should have been easy but it was near the end of the day.

oKwNxCctS0A6Qu5HkDrKS1wrtDm-CaJvSBxdBWTsGDfValbb3FjFEH2TTBjX0hPhEKDtJE6WKu3XF0HmuWilQJWKTHl3BuOnUuN8yf_J8gTlcXk-Hlfv7f09QcjHSgiYv7ZYeosEy_dNPWKluZHxOKMtYr7GDiKehHHhNI2clRmivTixt7Tgx8pqpcl9E-V5pA9zxGQ_tfejHO2Yh0ShfLCzPSFB_9TYuF4HBsIQpUC9_uLOxqix5kIxhkQt32dRXNIS5788v2OSzAkaqYktD7JceVUE_gclw7fXxompkZT2GjHU_phbOuioyD5OPdjp-qhIcitWW5gwTPAfDeDL1FPOboOhOgIj7qwNb3rcNvKqafRqjw-yRj9QVbSM87Ve4bUY-Mm7Wq5dnq0kqutFcoUXTICTStC0Y_mkSrt8c1udYYC9GohREwlFlVKYyFjU0s8wzCundBve4uJ_uFyM1ctWtXwKX68USWKgVA_IdutEiV9-Fd04CQq7iZWu2CUZ-VZOM2A01pjgoI8f5D1sbKAkb8qrqFmMOwsTxTFRNidbIKJ7Qy9NU86nwe5gg5DJhliRctTGtzCqGLo8YYxEe9xngt_-BVEKvCgbFMrVzYPWeYglocHwLF7CbXf6LsmRxnZh3Ilp7OmdB5YnQgvntK75C36HJ1XL3Lz82eJjS8sKaDW0bRriG4wpkEVgThTHMlEgaw=w1680-h881-ft


My old rivet gun from Oshkosh 92 second hand fly market is still going fine. Because it was made in Chicago I guess!!
Rivets are from back when I got the kit, so they are 27 years old. I thought they might have passed a use by date, but they still seem OK.

WRwFVnVPo7vMFjOwQN54RIEHCHE1lF6VyxFdxJnYGBCNZ73ZFOcCvQoqZRD4-ayWT7SmvQ0LgOlf2SfKUaRy9ZR8RofSKqyO1miGQKkVUXZ8YFNz0z30WasCOBZnAxYUGHgn6hTYGno5q3ot58wZ3ZJB96_EGk7v_ZKrYk4k8zSjZ6Zm9p-Tz0nTN487BLguot4Z8dPbov_qcvmEjQsAth9adlmwwsrY27LOq7bWgzSiZsSNU9483R5C7KM1aEhRUThIISzse668Gt3xe-7Zz6kCXKMTHwMbuBHYm8fMUDq4ySlKnnwhbL2z4rBWXYKlgYjcdrtpPG3UEnyZ9es_uZCupLIaBAt3wVkBhCSCzjXCIlkazDl972CwYiT04UfZgbgLBL3wPPmvicjuwLc7wICjcPePXQtThrfedL4yF_LC9SE11arBqvoFjU4L_FzcNt6I-YhdNlwxLEWvWRVFB2hZAraH29X-w23TcwozjCfCY6BClS5bFjWi55BiwhisUb6OlRhHmgpwc6GmOc4IS6hG4vIGOo56ontlwQK74dDRUNNYkDQdymLrkzSrC-b0mvkLGo3RleEbVU9IztqVA8VC2IV1rcDePygtkLlI6m4gOttV6zJjMtvFLoofWWgMLPqWdO9Kfx6FGoFk-RS6U0eEheKkK5JXutW75SmD2-S_KXtuXdo0se3LqVi75eQbUE39wA=w1680-h881-ft


I have still got some original primer, unfortunately this product is no longer available, it was made under license from AKZO. Still works. We all prime our RV's around here.

K7FSRW4amR__X5yQI8CqIJM_DYz_SEtnryQ7NTlFb9VVgjq3WPXym1y9P8mv6xd1vVe0OwSLaGC6oKnsQ3TnDd18Lyd0nu8ft-2_ZN4IxVG-bXnQSddANLwvkEWEoanfOXft-2Qc64EjiC3Rq5Tdpvs1FKfmDMlHjsZ1TT7ifACnFZHJREDd7DJMzx-TW29_uZlnCDh-abEGWfLg8p3rdCzQwac5iC8sByhXvr3IYQAxCuIOPoY38goIeRutKWCAkQbSWf60pms_c1AWv-W9I98wktGOUU2Tgv1uJa7VaQXMgCCsBf74XYnm6q7k3JBTXxcaQPVbSK5rTjotzzt52qmx_TjHOTNYzu82e_KnIdaE1RbB2WkaYxkSHDDeHpN4z1Jk3-HcI8HhE98UdXNhoQa8F3HyXFX4OgD17KkDUqONbGGMdi1dFOrXunfixBs5MvzuQvmLGTsYqQZLDVddFIUQK7mrtT8xCNWYMXQCpzDDmBm3kdzubFD7TtSP7xr2OytJFZiMsGhMBOhUx0eKZLpWgtJ-mWiNAdfJa6ZtXR_AUnKuuemz4T8lpPHm8CJDv-YUIAxwKuSVht8-VSYcERZnh1HhiogxJrHUY56Wwe_Thcr7ENPFAqhfARTRyClMsWFqNJ7Xrpw6kKQrknFH4f0P8OXQ_zNPComsMsPkruvueuf-pLey9t8c-JWJCgPSu_tJ6Q=w1680-h881-ft


Part of the timber ladder jig frame caused an obstruction when I went to fit the channel for the elevator bell crank. The jig was built per plan dimensions but this "cut out and brace" modification was needed so the channel would fit.

pbyBrUzxtJ9g54bB0oCOE6XOCyJ08kJb3A3K9iU6wWONe-zL8nSHuzyhsFLXDpoE5zJx_u9z_gwzs1pxXvmABk_svXoyeqGMSvHcYIJ2ch49SGw6lR_e-Sr2DoysHn0Zmr3kRnfd1zLRcuH1u0TixQBv7YPJnWiYAqCJbThVrxRiWtL3ErrmCRHhS84XmFci6KWUTMyKNgZRxOz31B-J7txeAW_jCW8OygGdBGZjD-k4nDDAMA5OgJLKzm5GkJZZjnnj89V_cd-ReMEoeTa62aFJc75Y7AWuG7CxrhnIhobK3DnjlJUKdP8x50FiNVfmLzM9MtMcdzN1exgefzpyOjYiwp0mCWGvtI7NpGEcnf0uQZgxFbFEexo-8dljkBkrWoZGtLYvJdviRI_VqSQs8trXukv0XEBO-io0yHVejnM6FlC0GCyKRuxARFiOxeX4ZCgOmyfZfUBBquRAug3iNiUVxSY7FdYq7jF-pHYsP8eVqISvljhDNRStLlmv6X2VdBIJ7bga00Jz_l8PPhQXrAJTnljZoBDSfwYKX7nibqVPe1znGrPtdsYYsuSUO-oLL5IoWh2U8AuEO6wd_YVJL4I8mOIamsR2iHIkNTm33krPzI4u2-jx3tM6VKCAlx0s1JV-vda48bLhtF3CcsibnuYPXwlrI1hLmSQZqg0PBsiggdg0iai7PfO06gGfWWs8CiKphQ=w1680-h881-ft


Next there was an alignment problem with the rear baggage bulkhead sides and the front edge of the bell crank channel. This would have caused a concave back for the baggage compartment. I triple checked all dimensions against the plans but ended up having to adjust the position of the bulkhead to get things to fit better. The jig needed another modification so that the top of the baggage bulkhead could move back about 1/2", it meant ripping out and replacing the first jig mod.

TsjBHL1owi-bklek75UyqgnaChEt787k9f2Xpw-WTsZ7wqQ7Txm5bPPoOxnezOIUr3EfXx_jtG-EzTevrnulrrypRc05wDqyAuKBIoCI0Y-USzhoGwnPUP5NvP900NonEd9qHDUU-vDY9kM0OJhaXafPtV6RLtGcgVbmECCpi81PfYBINYp0Asha6Ggo1PM5-cAw1yrwdUH1Kyz-2q9ZiADdAG0Wxmx-2JQ5R8bX5K8F-S8SCcrehOCJb9GtQTS5n5JEs4u0RcevXCBqOzU3mELxYgGGV_X4ZElvP_HuNA0I4mIjMtkuPwbfy9VSSuATPdQGrhKJIBc7hxdCmQ6ZRKgU2j12rlxLoYtTZSIGG1gRZxhOQKGYAd4yaJ4QGPLX354yxynfjRyhasf2sB2GEtzKQ05Z76GM-eyUhtp1PtXcw1RAUrkyHV0aDAAqJtltzPNzDb6r90leU84OXOXEqID2Jzzs539-Go-XL7FfFkseID6JdRmCb1bTtUVdOP-3mhIA2xOlHzXglMeaTkQ-MaX5hHhDj0Mhu3BvWIiGpr4OfLkquAA1rhOiiHAFYabW38xmev804rYmgxsyLo5ewZ24g49KLd17HE5RK0pXz--_RjtomZ3LxNi5Py316z-djQWG2doG9FnVIClNhkfwG4xm8dlUBRZl1E0Ph47ZiYvp2EsCDxk82qeRl3wVSQfziHNPsw=w1680-h881-ft


The next stage is to start fitting the belly skins, I will be back-drilling and using my secret marking aid tool.
 
The finishing kit shipped in 2000 so I have the overhead rudder pedals (but not yet the revised nose gear leg and fork). The empennage kit shipped in 1992, and the wing+fuselage in 1993. It looks like the firewall top got tipped forward in 1994, so I will need to order or fabricate the revised upper forward ribs. I will also probably need to check that the top skin is the right size. Thanks for those thoughts.

The "tip forward" firewall was before that. I finished my RV-6s in early '93 and had that update.
 
Kit improvements

For interest, here's and example of how much the RV kits have improved over time. The "raw" brake pedals on the left came with the fuselage kit in the mid 90's and the pedals on the right came with the finishing kit in 2000, when I purchased the optional co-pilot brakes.

Vkm1v9YXA0krJHEICp7_bfqY_klLf-rxsDi-xY_O_SubTJkPqIFJXAThFBzs1UMnD6HsGniCV9RZTguW8WPnLNDHFmTX1f76ZT9X-IU2L7-WuF5bBeHaCbp0T06vT3GGaeLFXvf30cNfI_flNw1riWJx0wQ18LWsC6gDEYduz7qyDg0HhoavgjgY8AaL6nXsw-TY_yjIv4vQ531QsjfpDIGyylVpE-TwPv1NZtFGp5iWaq9QgxhkbJ9lW3dKEUHlTIG58vcijo1_FAhBM3MYRcagdXxgECOr4_7_WBYHkd2dK8AXozi28ZOCXhnO0rMpZKRhbNg0_NweJIiN8b8vz8JyN6rsBFhqkNxad5DQCEJN-mKuIrCPMb6l-LzBQuM1mJ1hFcwi-OgPzUkgZjNvERo_JL4uUYjiE_WXnACtDmdkQSDhGSViBnScQ3FM9taGXDRIGpcEJFZuUMge1Ui-fBrlGgiiwTYJGLOWLwRqCAP5BNWbD4FgSuZBSqAWOMjfYEz2dfztuaB9t-0zrOHBBqizxK7MoqOhmEpIxIWIWN5Q7aS8n_pi2Hq2By6gLaTSG20esdGuqs41iUJUw6dVHW3tYEv4vkWdXawAbTMhsmwX-6fHXoEgh0h4m6aio_JWidzN49cDDDgH8qBuYodWHNgsCqRLXSq8JU_aetc8d1kRFxLxH4hf2JT3bxlLUsFuUuz-XA=w1680-h881-ft


I watched the clock and it took 1.5 hours of marking and drilling to convert the earlier pedals to look like the newer pedals.

mzIpmx46N_3UdxXqf_y0m93nhCyBjc_XsPhXreAIqSHyK28nnB-81tk2t2HDwBnm2TRJRMiK6juHytWYwHzp9srd1ILb6qgXoSCHr9Dr2WNNUS43YRh51RdbCe33f3cuUnJBhDIWpVta0r8S1-FCocThaj0G7sTLKcSaTRVtpkWHa7CFfuR72NnrO88SdxEbvz7miBZhsUxpl5ebYHkMM00wWPyETgtZY0oDt3hcjJgdMVQV1XFD-pzes1cQzIiKmQqkeJ3QzFZNmqyr5BYAbIhc7Sns-tP7Y-X6mwweMW7DDMPmWT8h4GweMtMV-DTrxY89TvL49IYy0_rQ37dPAsqG0sp6GxVK9-t52qL0XI-MfNGfFAIm7RRL1_qlY9mL2u4lEw1D9mwatbRvovtwudtnSrG1PCP3dFyfrMUcQgUk7F-ykPmOx38DgThaHwK5uI40ooskJyCTFPrb7sNCDv7ADyX_LnMZDdxE5a0AUpMBvgV6dGkiz6B2gyakJa3yb1iRMOgR51iNCwBDjqAk3QAZeRycAB-v0gm_I44zUJ7Hg3C7B1s81Q45BYdrJL_vVFcmFOtYaH7krF2RjT_TstgM0LKH2Zz6nNyQyFDpbSXcUKEOHJ38mzAqSxM9cKy83rrValAk81aEkLrN6fl86py4rlfoA7RsQwAxtDISPNIlCDgwJTwvMC_0KlqCk___ea8GBA=w1680-h881-ft


And here's another box of parts from the mid 90's that all need marking, cutting and drilling. I'm gradually working out what goes where, as I need it. Some of the labelling has rubbed off and it is taking quite a bit of time to be sure of what's what.

aENwODkdfyGKnxvle00RUDvWMRUwUOdDby9jRQMq6GeUULhdVyHkJFlI8Lv5t6FIcTqRKKRqMb5ZktLBXhMTxH6048A9nOPWhNjIpvfFJ5DRcUnKHXmpEn-QOxhVLxtOtX6m1ZuDYRT2E1p_sEdah6rYWL2PyMWxWjLc57x5_oosmFc5_wWbUT3Wh4w1YtUagqlCZHlC9UlNEN6je7n1xMjrTfvo3THC7Qmk5ydGbFyIdW6dVJLJHlSjk8ylSm10n9UXoktlPr3CYTgSeSlFkqNE4s9CyOjfucISIT_p1BvWVnrIXLg_g2xbn3vOiCYqAPM3UgkH137-2y2k4VtZ4QMZ1lxGCLLGMkNS7C5V_5CoCbgrAd4rLtwoStDqsh_fia8tRuQuj3WLRTHfLL9UhTOsbp9o1X6J1uPmARzwrRU6_Xk2VMeD5oU_wgr7M2UXVTPBlNUJu_CUgymShXR94UO2182U3SF9tkyAq6JdSPw9KI4o7mS9TQekgsFXAe_KwileLDaAFT0BRgePwk63k_30wIe3FntCkZky233DXAm1O0qMMyYCZU0UfQ8BTPTPyxUqNj-qMa5tYlXvf0LoZS56IS02ES_nqjPIy_ZFIJc8SJi2aNwBvbe2Y9gSCtmcxx_nAYOOk_867Loc5stRDadWafY7dTeP-cec7So-dz9hm5InTPVQf6_J7PhcTkQBylqH7A=w1680-h881-ft
 
Very slow build II

Paul,
Thanks for posting the the "old school" method of a build !

I remember my excitement when i ordered my 2001 , 7A kit .. the clincher was
NO rivet holes to locate !!
I feel great respect for you "ole timers " and your perseverance .

I am headed to my shop today for social distancing and to do fiberglass stuff ..
Before the finish kit comes next month .

On-ward .. it will fly !!

Sam
 
Fly it will!

Good on you Sam, keep going! It will be a great achievement to fly, and there is also joy also in the building (even fibreglass for some?)
Cheers
Paul.
 
I fabricated short extensions to the firewall ribs to make the "tip down" extension.

The top skin will still fit...:)
 
Tilted firewall

The "tip forward" firewall was before that. I finished my RV-6s in early '93 and had that update.

Thanks Mel, so therefore mine should be OK.

I fabricated short extensions to the firewall ribs to make the "tip down" extension.

The top skin will still fit...:)


I just went and measured the ribs that go between the firewall and the instrument panel, F-6107 and F-6108 (I have a slider), the dimensions match the latest CD plans, so that appears to confirm that it is indeed kitted for the tip forward firewall.

One of the advantages I like about the older plans is that there are enough dimensions so you can fab your own parts if you need to. I've also had to modify some other ribs by cutting off and repositioning flanges to get things to fit properly, e.g. in the baggage area.
 
Last edited:
Working on

Resurrection of my relic project continues, I am managing to work on it almost every day, some days I make more progress than others, there has been quite a re-learning curve.

This was the view from my shop window this morning, it helps to get me out of bed and I dream of one day flying around the peak.

kuBnzAuDkUGSpQaADoMC6oeWzONczluhHEJJx8QS358wB_eeH_ECBWPiVOGh6WeHt-GYZAVKcUACtHhVGINUP_CMwPl2DTQwhmqMoTB49kNKuXxfHhtzOBor9mBLEWC68Ibm3cqUyQvUXgsCDOvrP_iXmmp0-cQv_6vjJl7fNL2r8YWz-4ZV2TXtbbh3eUWqUYhAOuITsB2VVw04OPGH9L71nY4P8lNRXPXKdM-Khw_i6keCE-lnqwjOLYiuTEQFyL_Ta8nSM62xnfi4w2rzjm4RMs-Yb-ISM5kiOAg46FU5bPoPpamWT4ykwZNFPOmnDiTFlYLBvmkp67d7uD5jT42Z9n35mam_aybBS15D-y-rRG4xeLQI8KSm7yA1HOBgfBedBND0IkcLDMCm9rU2OG5Ek_ebwJCqgislm24GScBaLW4rTgQjajGi9rd3asq9jEGt1KUkFIigkGGfBpC18wIzP91gesNcLBJl9J1_1SMaqXmGag6tuvm4Xx2Zh3UQNNPNWHJbLyUkqA8HDd3xt3YP1urJ8C6WRc2r5TtV7JOy8bAO4hqlqDyj5GH0wPQPgtL2Lfs7E-t0f8nwWNkvBFOIjLvl9E4LQLRwEfnIFvcjxH-KIv1wy_86gs0IkJW8tbGUWg1oa-H0keiFLarGuPeqMBXRyURAA5rctONjq7ei-GNBq9YvDJb7qOj-IGy3D3IsDQ=w1680-h881-ft


After preparing the brake pedal parts I riveted everything together and found that the earlier two pedals were too wide to fit the rudder bars. The newer pair were fine, so I only had to re-do one set. I prefer to fix problems as I go, while things are still fresh. The rudder pedal uhmw mounting blocks from the original kit were drilled out of alignment, so I also needed to fabricate some new blocks.

Here is the set up that gives maximum forward tilt for the brake pedals. The metal strap is simulating the brake cylinder mounting holes that are 7.5" apart.

xonVGaKJPiZ1B7UxUyRY9MPNZQZF9UBPuVdk4GTrIJTIyUvMPnZwon-tQkZ_qcgCyj-KVNNgB8bIiFBKEw3n0izQ0W9z95ahJ0TVqHFrMWbAQkgx4-GRHZ0vFzEgmOnrc4gyzL8Tv3S-RGUPcsu-Vu-xwYrbEpf1skeFTxW_WFJlJp2OHEqw-nAFsW7mx_szG8O_lwVUl5JsIiZb_glqAIB8RMLoUwt-bM3_3frRW8wRq0hg1mRUrfD3AI-9nJDMBVg6BZUnqSNB3tlIUyUQubwWb8G1SCxqDfF8bG3I2F8xUVhbnmgEwI4RCvRwxd2bErQVe1SUSQPTM5sjlosU2s_L6yP0CjZSLaPEFFGfBy77vBJnhfAGS0-AGbdbAYJ2x0NO7g65hSt-OH25pTO3ZUGPh3JiX0fLpqmZDkH9kS_gJUWHazZ9xGsmAg8fk04a6acLxO4XFwffBqa_567REcag1X-mH7pezx6FypqGNep89sO9sPoJOIS5RTWJNwkokj5eK4uU6mlSnaTYrGjHKpOsWpJTTZ6h4WbHnK1_A9XoHSgKeJ8qHwtfXHvJyaBaXXuCMpHriHghyhZWLa563Bj2BZXBm5NiDQzk_Ze54zZJkqw3LjoIYuJ3ghq9hDNPn34RwSN8B4QYNaEbj3xJ6gTpo7n4bXs7ygEa9iVhtP0Oh5TTS8H8lq5hmMkiDQaRTEa6sg=w1680-h881-ft


NEXT PHASE

The fuselage frame is completely riveted now and I am working on installing the skins.

This is what I use to lay out the holes, I have plastic strips made up with various hole spacing: 1", 1 1/4" etc. and they are flexible enough to follow curves.

GR0Ew98E2Dfp6ByT1ayxCP-NMC0bF72NhmTvdVuFImfo0v19QgzcTQEmmSOF2s883EtGqEzP-7X4FH00ALQguOVQ0mZ0FCN5jmWEJT3YIHItQwrWPh5JeR2prEttQWj8mZ2vR9KOPw5NmDkS3ld3Zbm78xEk7Yh6CVVg4bp8YjBOqZYY6PgCzi_SF6H_RyTKDUSRqOr8_jhdteAcUhxG3pz5Bpl-899gX4E1zHQA981mZdpvV4zNowFZ70r07A8aqhmawZC8BnBBu69Ja6vqBHBa4cbuSD0pnnN8zfqgt_Tj6Ad9uVRgkLwCC21EMOZfc2MJFunfrXW9erFT4DUIFClkPn9E5TOvrSMKZ7yEBya6XMQGA65UBN6tA2TEpe_XXwr1xiZ7MnrS-kpbg9oHmeCL-PkOQJPRnL3vhwj7G6JXyqjkWOLmKLFdOvxWY6g5nKiu2fNwxEUBH2fpJOUYSFyMFBivpA6UPKEYZafURn0aTHgunOTjWE0BRWNQKvvYRukGTE2MDtJr3q8qbG-IcfTQTFmF06DGL7-TSTlN721aWf-YNsNRj6PWiGkp50-yF5FEZYiNPQOAetCUAW6RN6lhKZYZUDSqXLEhcP90dkw2U4ba33qZ9v-9nzrA6ZSHI46q3N6puO-RtyHl_dpttYQEqXNqBlIi-zoasDa8sr12xPg_MSipkbl2Jwpq_biVYx-o7g=w1680-h881-ft


Strip being used here to mark the bottom skin before drilling to the skeleton:

1Lu0rba9NUHa_T533U5fR_aOwF0y0J1kCPYp3A0RhQWVKvKHdAmcRxx2xOhLjyeqOaC_tMjR9yLHrmOGSgHBDjlszPI3XpxsYsoC8iMEkf5KFPsnzCrXzfJz32D3YDDEt6tTx6LJb2boRuuKBSJy13OxckFRdaWcIbTKf07fSV-sJ3eg-6jyQoySYVpcNxrYy3aCc9Xn1iRsYpH5bX1Az3aU4qZFzRIMtmJnReEIONcROJmbasarj1uuP4mvZ-yAeWwrJh6Cx-3Wh-7eYH_YuvjnQO-vhdHRUmIeAN9aAGPHpIjha5h8TObHdf_xkgch_odbcvONtMVNhCse97NfwX4u1eD9Yx64C-lHgD6cHVPZ-qa4emzlOVTSlZHeAfJ0cnqylOQnhBJJiO9oMGB2eGGLFwt8cbt3firS7I14RR7Xvp5U1C_GcfNTE45350TG-kRMeeLlxKaNmeREuMrZxhuWzu6rNcAGiVDMTeakCq2KjEVJSGsPlZJ71FWM-puY6Aw0RDzUJKXFcCVh_HfLULjuvT-qGfARzEA7owtE2TFflSOG1DOI7ij_tzIiep-F89dV800lrJf_gA66t9Cd0pGbKe_pxSx_A09rae4-ATRjl-NnQmnUkxw9ELBUBMUSIug3eL15i1M4r3zldDLK1ju-r_T0M_1YVrCHlqzT2nxGxohtn7ahz5EGmIyi0oLR7by9Hg=w1680-h881-ft


I'm going very carefully and slowly with the skins to get the best possible fit.
 
Hi Paul,
I'm in Temora NSW and have recently acquired an RV-6 kit, partly built. It is about 1996 with pre punched wing skins, so not quite like yours.
It is our third build.
Interested in comparing notes.
Cheers
Mike
 
Sure a very nice (and big) country you guys down under have! How lucky you are...
Thanks for sharing that beautiful mountain shot, as well as the rest of your build.
 
Contact

Hi Paul,
I'm in Temora NSW and have recently acquired an RV-6 kit, partly built. It is about 1996 with pre punched wing skins, so not quite like yours.
It is our third build.
Interested in comparing notes.
Cheers
Mike

Hi Mike, happy to compare notes with a fellow partner in crime, PM if you want and I will send you my contact details. Cheers, Paul.
 
Cheers

Sure a very nice (and big) country you guys down under have! How lucky you are...
Thanks for sharing that beautiful mountain shot, as well as the rest of your build.

Thanks Dan, the mountains here are nothing like your Alps. ;)
Much of our land is flat and dry and any peaks stand out - this helps with local navigation!
 
Started on fuse skins

It was quite a battle to get the aft side skins fitted onto the fuselage. Initially, the curved over section of the long side skins was not rolled enough to properly fit over the belly skin. So I clamped the edge of the skin between some boards and gradually curled it over to get it to fit better before starting to drill it on.

Once the sides were drilled, the next challenge was to eliminate ripples in the belly edge of the skin due to some bulging bulkhead and alignment problems. Thanks to VAF and some helpful folk I found a solution, this took about a week to work out.

http://www.vansairforce.com/community/showthread.php?t=182112

After fixing the bulkhead that was too narrow, I have been able to continue on with drilling the remainder of the aft fuselage onto the skeleton and now it looks like this, and there is NO MORE RIPPLE IN THE SKIN!!:

_rEFbde3l_7uthE5C-J_KHowWiYqSxWrlkn6upTBZl0zDS0rE_azyudB7mwJU9Po1PqLJZXPboPsQC2wZTcw83YkWzwUxGTcDs45DilnNeh3FfX3QK7XY0k5deSd954xmAEId3m-qsOMocjXZvotFfO2tmQnfHg6F579iKj1ffuQn-BOVVv27dTei0Yjh-t9e7qo0UfyLLyN8kLmuJxSB6zoybdtuCdtbnCGu86Nq3uWBs87sV6kRwCUbwDPApuunQ3lajogftY_V0Pj4QFLQLB_1u-A99FWrKVYj9N_fbK3FKD2AIjHWRImBI9SGpgIrIIPcBqwzrT2hjQa3REkaQzmkpRUGD4xJkGAeB_oI5WqON13aN7VzhD9b0F9Ka2Ku4Ubb_k6SPIFdpLpsH-iOfy7oHpNafKi_eoqz51oPV9Imxz5S57oUAWu96fwv3--j79Yba18io4T2p1XfcViKTxDD-3QJb4vPu2KAt3O1pbIdDngx43pqp5R51H1VofGqFrqL3RMTZRCszB_C21ypKT7UvQniVGOBLOiY0t6ZbiPvpu6ILCMjditH0CgDuEDt3dP0HEHJbJ1jDpwJ5-JuTbiMHJwmRSVuZVFjYhD2gQVmkom0wtm97dswI1DeIT7SjOayAC3t0ZJMNMbAHGQxzWgS9Agww9NmE0HgtgRCf5B4F5ZuhgEyNARbtjNN0KcXAZNSQ=w1680-h881-ft


The next stage is to tidy up some remaining holes that need to be drilled around the tail cone and bulkhead corners.

And thanks to John, Andrew, Russell, Brian and Peter I should have enough clecoes to hold everything together! (Not so sure about holding onto my sanity though after this last episode!:eek: )
 
Looking good

You and I are just about in the same exact spot in our builds. I'm glad to see that pile of random parts shrinking! Looks like you're making the most of your free time too.
 
Building along

You and I are just about in the same exact spot in our builds. I'm glad to see that pile of random parts shrinking! Looks like you're making the most of your free time too.

Hi Matt, yes indeed we are just about at the same stage. I've got more done in the last 2 months, thanks to isolation, than in the preceding 20 years. Apart from also moving house twice in those 20 years.

The lower rear fuselage skins are fully clecoed on now. Next step is skins F-677 and F-676 beneath the seats and the baggage compartment. I'm wondering what surprises are in store. These skins are just rectangular flat .025 however they need to make a compound curve over the ribs, so I'm guessing that some "pillowing" is inevitable, since the skin hasn't been shrunk or stretched to match the form of the ribs.

There's also some trimming and rolling involved to marry up with the aft section and trying to get that looking as neat as possible.

I plan on back drilling these skins, so as to miss the flutes in all of the floor ribs. That means more crawling around on the floor under the jig, so the yoga mats will come in handy.:rolleyes:
 
Last edited:
Build date 9925

I have been drilling on the belly skins beneath the baggage compartment and the seats, there are a lot of ribs and pretty well every cleco in the district has been used. My wife came into the shed today and commented that it looks like an ystervark, which I suppose it does:

jN2nD2JpdCgNIeOrHk6TVMyClKQGtqQ8wtqnfa_0ro8wJ-WJTUH6mEEZual4UiB4f0wXUmhymPfxuj1bLZbnA_ZV_Y1MW-VvROcBG-kDGhm0At2EBwyWqHR3hPfjmEU7xikNQ3CFHASVOE6op660uwJuPQMNCe7FiQR3u-Rk_PR8klKtbdHbwEKsSmDFglVhLuK6sREDDrGMxMkZGfPV98JFEU_xdS6UJ_lf9tewG6m9fjXLVoNsPSu5o1_eHxFaopNe-LJPO7pwJOLre8XVYahmKQRzLUtrcdJ9lnQIfzI3iwzOY5xLuHf35xRYMr4HKikbX3eGTBLwsQiDwOoq7mTPsfaFFFeiwH5z51E0uD9EbLtUPU459Ru8QY9sAcpDJ7guvOrWPRH1gSgW8rFckUaA3a-tfwfHV2CTidW2bWPTmQZukWaFVxMGQStThsj2nWz4Ir33VWT4pUHen5eKAsVN6Xl90r2zmx-qST69MrKezvbQZDKLOgq6r8CM1KAcZhhtIHf6nlg19rf30v9MWP1MCCtIwTNfR6WNmd4ADd4QFwE_Spjjc7jZge6ARJTqp98Fg_QVJA7fPUTbf2Z3iUTWsnw6Y_xt5eGjKQFdvExHmCUhOzOXE8Hg81ChbJ25Jd29xYTsWat4OowLS57jX_sfC4wweYHpE4Tx85fPVMAWYScVyS2LkZJ31f95SnyD3WUrfA=w1680-h881-ft


This work has been really tedious and slow going because I have been back drilling from under the jig with a long drill bit 1/16", so for each hole I have to come back out from under the jig to drill up to #40 from above and insert a cleco. This sequence is repeated for each hole in the seats and at the ends of the baggage ribs. The method works well though because the skins shift as they are tightened down and pre-drilling the skins would risk drilling into a flute or too close to an edge.

Today I had enough courage to look at exactly when I first started work on the kit. I have started a new log book for recent work, because the original log book is yellowed with age.

wpZ9gT0qKUfpkl2auYLdw7Pcvbhlb9gJ3wmXncbti6XexkPsCa62ZwTUn3hOMO_8pindxLQNgdTSCVb1IXO7ApElJgi3nu4oZaKFf4zGEFAJ2i5bKi26EYfrTN8VeouEPlzBG-USCSbFzAv1AEtv-AXr1uJsazB1L9D5Hg_diV92fDnjw38BeWet32EAHOQ2hFccCdYrg0wQwz_P44reZLjK_uHsjl3ISHeeRKDAnNOMc1G5enBSf5iSQimiYJw2RQX1hBs5whurpr3WjM_9kHsNFBHn2DKdcxlDdg1dlk6rva446IXZuZtTpnFeCU8jB-fZiWAtjv6QtZ7K_MPx6VL0xCYh54tF3AFDDI1xi3lAq4lD-8U2Uosr97kZ8YXCd6C40Ws5ABxx0vH2QkTGLYMUt83WWde0szGzO_8nBbde55zWxymuv6c578KWoVu1GxCL6GWgHY9HyylolPVTCFGkA9IMQFcKYVG_lT4gWX-gKseS9MTrZcSs8CpMEiCSTjXyMZcqYcKraIGiTUfemvQtFeDlvcoQDluGrYZmxKYwlzd3MNuxnKkMG4Gxew14bb_yZE6qSMp3R0WRskIsV6WpBZ5nkaoGKXeef2WHm2eqDhBg2RdjYXyJ6l_zioyEY5Tjd2V_OTLuTCFa2fdYGEipOQyXBoBbhfm3WDqq5XksOb9idRkBG8y99LS8uZcFX_wemg=w1680-h881-ft


That makes today's build date 9925 days since starting the horizontal stab on 17 March 1993...or 27.25 years.

There are still some funny shaped ribs to fit to the baggage compartment but I need to remove the belly skins to trim to where the ribs go, so I have continued on with preparing the forward floor skin for installation. It seems to fit OK at a first pass but I can see that there will be interference at the front of the jig for when I need to put on the lower hinge which attaches the cowl. Here is the floor skin for trial fit, the ends are resting on the first two bulkhead flanges only. It will be drilled to the floor stiffener angles, these are fixed at one end to the firewall however they will only be attached to the wing spar later on once that has been installed, so there are some temporary blocks on the spar attach bulkhead to hold them in place while drilling the floor.

GdIBy9PdKATJSUksdKERaRxAug47mD5KMVfs1Y54T0vXdl37t0rak2Nrs9D5j1Dsdo8X8OTv2P0Azt2jGKIseo-vUrARwmrGX3uSzG9ixHEiNW1bGyiLAfd8rU1hd43UW6BGUA4RqWl8V5KKb6TOpfWCOyPw1PsQt8ppiUJFT1E8U9txmZvA1phw2MSIEsLR7TMiSwy4LnlsSAUGII0yXi5Kg-hN8DHQFn_sVMNFv-ghdalk7jJ4W_keDDYrsvC-gPg_t__l5tmP1tPksVbjcpBQ1Gyep2mHs-RTnqsTPisOQKi_boIHQVrJfNtTXMsRwxuZzm3OzcyJpN-tt67V0-ogLMX3PJiw_vHFs3gXyMmW9MnzunxEZI3gX86MilUPxJcDKyRw_TQu2mUpF7vDABIFzDnCx-8dSFuVCjaabMsULnKine15UhhL9NKbCLcpwYH8UwFahqKrtKg-qFRODSqn_FwcxkOUhFAgQUnc1G3VdeEsUTDJsxrBW7bpIRSGRWmRYbBUVa65VVbzf903zEIp_RxCfaetHQ-wCkdSaCUGxEegnbmuiH27QrxePXFW9Wwbr-mc6iCLW3RPA4G6dLy6Zg_dIdTrD5h-Oj5VE1zxlrRP4S1zNEogH2_4CvJLgI55GwrfGOiCSmDl99g8yhVc2J8ZN-2ZK-FkcZu1B5neLIEBbpYjGmRi9I5ecDaPPUFWFg=w1680-h881-ft


My building companion is very interested in all of this, I think he is planning to build an RV-15!

Jl4VzWwffi7f0AvdR3BEznHU1ZqCKQMVLW23XK21nVUyXcy-CUb78GUKxCFZZRQ5V2GcBKxyUy3JnrGh8xGCa_T3LvxlF3cIbnsEQJRi_3z9v3_LvUtWVaDTleezzl0ogxMQUecWlSx5ES0U5HhBnVtKsuoqU49B8O71_p6-wFWR1P36WF-qWduYaTbBQbD8XbW1AhtKJj_NaBDvp8Y1yIY_Baq01ZcM7tAYrFUi0iCZmJn0WXYk79FiFb7YCkySvg3_UH1ewK8WPHI5mSbBeN2j1BwXhlCarNyldMdNsQm2lqqgPMJCkOJ9PDvhia0DUvTlD2Qy0gTtjy7vthb5EDFd9_C3ltNT-ceaRyPNw4pnNJL2brRmdEwj3mdTUMK7ufbpDa9SBsfkHmzu3IwfpoX3cleuuqaAha6VDudyuvePlI-TbjNhW6GGufLzsRcWQNlFgZVImnICQ7jWTRWNZncJmdXlX--S6Knh0lyJQ1EcNYaZlJbyIZnIoBHSSv1XFaurraZJzZ3XT3sTcB8x5tolNmXobABigh555NRG9MCpPP4G91FGqF79ypxrqIN2SRP5GMEjdTtZ65Y3U_bEuP2cS_qp5nQBSJkfjFj3LLnZGc3s6rqVFkxdWRjmQyPLHzldbqY38hs6yEoxWExedxMAtn1JdXSF8NmAL9rZbKeNZZwKsZrJI9VR16HSB3_QhrMcnw=w1680-h881-ft
 
Resuming work

It has been a while since I posted an update and I have been making progress on some other projects, but not so much on the poor old RV.

In June, that was 6 months ago, I completed most of the drilling and fitting of the belly skins, and started on fitting the two forward side skins. I had pre-drilled the skeleton and then planned to back drill through the skins. This worked out well for maintaining edge distances, but some of the floor and baggage ribs had obstructions and this got a bit fiddly. There were some other things on the farm that needed attention (as always) so I had a break from the RV for a while.

I've now picked up again where I Ieft off and completed drilling on the left side skin. It took most of a day to "make holes for rivets" as my wife describes this task. It was convenient to fit some of the clecos from the inside and they seem to hold just as well.

Next step will be the other side skin, and then trimming and forming the compound curve where the fuselage narrows behind the baggage compartment. I am leaving the trimming as late as possible to try and get the best fit.
 

Attachments

  • 20201206_170854.jpg
    20201206_170854.jpg
    324 KB · Views: 401
Fuselage construction

Paul,
I remember well when I was at this stage with my 6A - was fun, lots of visible progress.
A few thoughts for your consideration:
1. build the fuselage from the inside out. The goal is that the fitting/placement of the bulkheads leaves no gap between bulkhead and skin, a zero gap results in a smooth riveted skin. I found that the F-608 bulkhead, properly positioned, was too narrow at the bottom corners, I cut the bulkhead at the bottom corners and added a splice plate on each corner to widen the bulkhead to make a perfect fit. Bulkheads can shift or bend as the skin is strapped down, so wooden reinforcements on the webs, and wooden sticks between the bulkheads hold everything in place;
2. It is difficult to avoid a slight gap where skin, upper longeron and bulkheads meet, especially on the F-606 and F-607; tapered shims can take up the gaps. I also squeezed a mixture of flox/epoxy into the remaining gap in a couple of spots, and also used that on the F-6111 reinforcement ribs. Look up "liquid shim" on the Matronics RV-List;
3. You are probably aware, but Van's has the RV-6/6A plans set on DVD, up to date and includes all the "OP" drawings, very helpful downloaded to the laptop.
Bill Brooks,
Ottawa, Canada,
RV-6A finishing
 
Thanks Bill.

F-608 was the correct width in my kit but I know that other builders needed to widen it. I did however have trouble with F-606 being too narrow at the bottom and needed to widen it by 1/4" to get the rear side skins to fit.

The seat rib joggles extended too far back from the bulkhead at the main spar and I used epoxy filler to correct the gap and fit the belly skins properly. I still need to do something around F-611 as the fit around there is not very good!

I've got a copy of the latest plans on DVD and took them to be printed out so I have all the amendments in the shop. I will probably also buy the RV-7 plans on USB as a useful reference.

I'd be interested to know how you shimmed the firewall sides for fitting the piano hinges that attach the cowl. The problem I have in that area is that the firewall side flanges are fluted for straigtening, so the piano hinge won't fit flush against the inside of the flange. The plans call for .032 shim under the hinge to allow for the thickness of the cowl. The options appear to be to cut individual shims between the flutes, or use liquid shim?

Thanks,
Paul.
 
Last edited:
Paul,
I have found the RV-7/7A plan set a useful addition, and am incorporating some of the RV-7A changes and parts; the PC-680 firewall mounted battery, the centre floor cover/heater cover and fuel pump housing which allows wiring and plumbing runs to extend from the spar to the firewall under the cover, eliminating the vertical channel from the panel to the floor, running the vent tubes forward of the F-602, modifying the panel sides to use the RV-7 separate air vent mounting plates, copying the RV-7 panel to forward top skin mounting angles (easier and lighter weight).
Don't know what age your baffle kit is, if you have it, the one Van's uses now for the RV-7 will fit (the cowls are the same) and I understand is an easier build than the earlier one.
I did not have to flute any part of the firewall stainless flange, and am using Skybolt camlock fasteners along the firewall which use a separate mounting strip riveted to the firewall flange. I would think that mounting a hinge to a fluted surface would be similar to mounting a skin to a fluted rib - avoid the flutes in placement of the rivets, if necessary refluting the underlying surface in a pattern that works, if it has to be fluted at all.
Bill Brooks
Ottawa, Canada
 
Conical bend

Working on the dreaded conical bend where the side skins roll around under the belly in a conical shape. It took most of the day to get one side skin trimmed and partially rolled.

The Vans instructions say to clamp the skin between wooden blocks to make the bend but there is interference between the blocks so I have been using various flat steel bars instead. The main area to watch is the small end of the curve where the radius is about 1/8 inch only, to avoid potentially tearing.

I've looked at a few other completed RVs to see how other people have finished this curve and each one has been slightly different, some look better than others. The best finished one had been stretched with a roller tool along the trailing edge of the curve so I may also try that after I get some roller bearings to fabricate a tool.
 

Attachments

  • 20201228_101551.jpg
    20201228_101551.jpg
    282.2 KB · Views: 415
  • 20201228_101628.jpg
    20201228_101628.jpg
    588.5 KB · Views: 408
Meeting the skins

The fuselage side skins need to meet up with the rear rear skin lower curved corners, but the skins come together at different angles at the point where they overlap and get riveted together. Therefore, there is a (bad) tapered gap.

The plans/manual do not provide any advice on how to deal with this! So... a combination of VAF research for some options, and consulting with a local RV-9 builder lead me to slot and bend some tabs within the overlap area of the rear skins.

Other builders have made tapered shims to solve this problem, but I am happy with how this has turned out, despite thinking and worrying about it quite a bit. And in the new kits, all of the slots and holes are already done for you, how easy is that?!
 

Attachments

  • 20201231_172911.jpg
    20201231_172911.jpg
    279.3 KB · Views: 390
  • 20201231_173006.jpg
    20201231_173006.jpg
    258.8 KB · Views: 440
  • 20201231_173059.jpg
    20201231_173059.jpg
    261.7 KB · Views: 402
looks like you're making steady progress, and it's looking good.

I did not build my -6.9, but looking at your pictures brings back memories... building the -4 sure was of course very similar. The 1st thing I learned was not to trim any piece before it had been matched to the next one... and use the plan given measurement solely as vague reference ;)

I remember opening those huge shipping crates... the longest one contained the Phlogiston spar, $$$ well spent. Inside the other crates, only the rims looked like aircraft stuff... the rest was sheetmetal, some of it vaguely pre-bent, angle bar, and those paper bags containing zillions of rivets :D

Thanks for your reports, educational and interesting! Also happy for you to have found that renewed motivation, well done.
 
Paul, I just read through this entire thread. Congratulations on persevering. You're making steady progress... you'll get there. And I now know what a "ystervark" is!
 
notching the rear skin

Paul, for this joint I followed a suggestion in the December 1992 RVator (reproduced in "24 years of the RVator") to notch the aft skin and bend it slightly at this joint with good result.
 

Attachments

  • fuselage skin joint 1.jpg
    fuselage skin joint 1.jpg
    44.9 KB · Views: 408
  • fuselage skin joint 2.jpg
    fuselage skin joint 2.jpg
    34.7 KB · Views: 367
looks like you're making steady progress, and it's looking good.

I did not build my -6.9, but looking at your pictures brings back memories... building the -4 sure was of course very similar. The 1st thing I learned was not to trim any piece before it had been matched to the next one... and use the plan given measurement solely as vague reference ;)

I remember opening those huge shipping crates... the longest one contained the Phlogiston spar, $$$ well spent. Inside the other crates, only the rims looked like aircraft stuff... the rest was sheetmetal, some of it vaguely pre-bent, angle bar, and those paper bags containing zillions of rivets :D

Thanks for your reports, educational and interesting! Also happy for you to have found that renewed motivation, well done.

Thanks Dan...the jig that the -6 is on was previously used by another builder for a -4, so indeed the building process is similar and careful measuring is important! I did the spar rivets the hard way with a hammer, like other builders around me at the time. Actually it wasn't too bad, I think it only took a morning to set the AD6 rivets (but I was much younger then).

Still got zillions of bits and pieces to use up and some of the part numbers have faded away...:confused:
 
Paul, I just read through this entire thread. Congratulations on persevering. You're making steady progress... you'll get there. And I now know what a "ystervark" is!

Thanks Ben! You probably also know to not get too close to an ystervark.
 
Paul, for this joint I followed a suggestion in the December 1992 RVator (reproduced in "24 years of the RVator") to notch the aft skin and bend it slightly at this joint with good result.

Thanks Bill, that looks good. I've done the notching and drilling now, but not yet riveted, I'm hoping for a pass. I may have that original RVator somewhere, I haven't actually looked through them recently. Cheers, Paul.
 
It's a New Year, It's a New Day!

Day 1 of Year 2021: (10,152 days from start)

Well, I admit that we maybe did do a bit too much celebrating last night because we're kind of glad to see the end of 2020, like many I guess. We hope that 2021 will be better and that we will overcome this dastardly pandemic. That's my excuse for getting off to a slow start today.

All of the fuselage skins are now in place and (mostly, like 99%) attached. The next stage is to work over the whole airframe and drill any remaining (tricky) holes, prior to disassembly (again) for deburring, dimpling, priming and then re-assembly in readiness for riveting!

eKoCy5xsalojKAlgyrHgx4JPJrOfjvqyT8f6AOusw3zj2wH7MZvzoDOGuYTUB9KNGEQKIuhaFjGJkTS6Ur8daMX30pcC5f391_hYUe9n-hC7cRm5tinUClq3oV5OfY37HFR_GyKgnMTHE7YL4dpuJDtX2tZRbOJWfcVIzT0e0I6H4co6XWoGCz_qettBHWz8ar4Qs08rI7DpO6f3Q5lQS6QLSpzWDRYfy1FlB4rXHe9CIjkClETo6L_WgMihgirj8gKFOXI_NkSz4_SNKkEaqzQQXCowhkLuKLsfJJpJx2a9N7c-DhG9ajhF_AZK2vC7QQ-tTq8R2GBCFywqq_B1qEp9uzEweWrrhbKkr5UeQ1LaG2_qfeuuWlHrnL_9ey6rzqoJK3hPFNAY_wpv64L-dF437sjUtKsxSFc10lS2jIm8bvwN-sts5AA9WBY7zPl-07LurISTJ30zh1y6K1wS01t51sYvvgB8U5xbikCuWZifrZqhmHr-D88OJTgctU2yPxrlWtUhXVbqTcV3YEHOdnKHnVVnBEycMFn5hJ6L_ybNnA3y2n3h3P_3kaBBw6kdn4zDk23PN2us5aOMBcefyN-eqMuKhT5HytncR-nw7bFdM-ee04N1dUWBf7G8T5xtgBHAJOzeEmQSbyUnlstwJiCzFLx97Kx6wFh44kZm9rg5EwV-K3rav_FElf59vg=s939-no-tmp.jpg
 
Last edited:
Prep for riveting

Today the temperature got to 39 degrees (102 F) so it was kinda warm in the work shed, the wind has been blowing all week and everything is drying out, anyway I managed to prime the rear fuselage skins and started dimpling today.

Some of these rivet holes have been drilled over a 20 year period and they are not as uniform as the new punched kits, but all the edge distance and clearances have worked out OK.

I am spraying a line of zinc chromate primer under the rivet heads to help prevent corrosion. Most of the spray will be removed during prep for final painting, when I get to that stage.

I'm planning to start riveting in the next few days and hope that I can still remember what to do!
 

Attachments

  • 20210108_173942.jpg
    20210108_173942.jpg
    453.1 KB · Views: 396
  • 20210108_164051.jpg
    20210108_164051.jpg
    253.2 KB · Views: 487
  • 20210108_164145.jpg
    20210108_164145.jpg
    250.5 KB · Views: 468
unexpected break from building

I haven't posted any updates for a while because after riveting on the rear fuselage skins I was diagnosed with cancer and advised to have surgery within 3 months. Following surgery there is a six week recovery period with NO LIFTING, which is almost impossible on a farm, so the RV project had to go on hold to allow some other heavy jobs to get done while still able. I covered over the fuselage and put away the tools... frustrating.

Now in the later stages of recovery I've found some light jobs that don't require any lifting, though somebody needs to open the shop door for me!

A few of the steel parts, including the roll bar and canopy frame, came from the factory with powder coating. Altough the parts were stored inside the workshop, there was corrosion coming through and spreading under the coating, particularly where any dust had settled. I've been removing the powder coating with paint stripper and sanding off the corrosion. I intend to thorougly clean the metal and apply an appropriate primer and topcoat to protect it properly.
 

Attachments

  • 20210515_131329.jpg
    20210515_131329.jpg
    334 KB · Views: 321
  • 20210515_131410.jpg
    20210515_131410.jpg
    439.7 KB · Views: 332
  • 20210515_133936.jpg
    20210515_133936.jpg
    429.8 KB · Views: 383
Refinished roll bar

Here is the refinished roll bar after stripping back to bare metal and then priming and topcoating with Rustoleum. I'm happy enough with how it turned out and will use the same process on the canopy frame. I checked the outside dimensions of the roll bar versus the fuselage side longerons and the bar is about 1/8" too wide, so it will need to be tweaked with a hydraulic press before fitting. I can easily touch up the finish if needed.
 

Attachments

  • 20210517_102305.jpg
    20210517_102305.jpg
    198.7 KB · Views: 317
Back
Top