
Van's Air Force
You are using an out of date browser. It may not display this or other websites correctly.
You should upgrade or use an alternative browser.
You should upgrade or use an alternative browser.
RV-12 N417E Build Milestones
- Thread starter f1rocket
- Start date

Very nice work and informative photos Randy. I've done my fairing using more or less the same method and have been wondering about the best way to glue it to the canopy. It looks like you painted the outside of the canopy, which means the proseal would be sticking to the paint rather than the plastic. Or is the paint on the inside?
f1rocket
Well Known Member
11-12-13 Finish Kit Completed
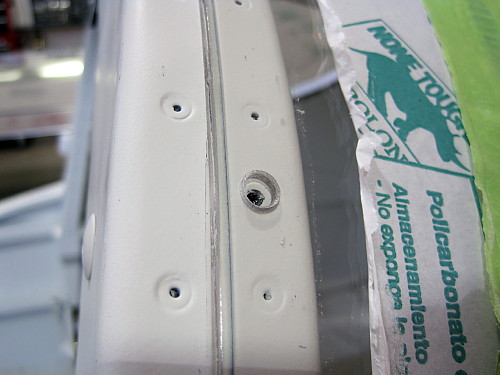
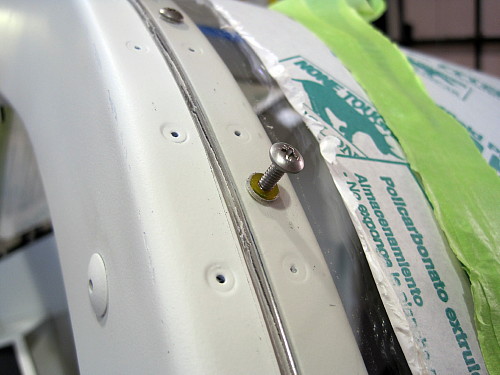
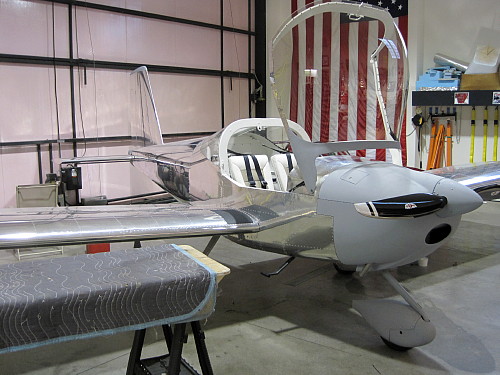
Final step for me was sealing up the rear window. I over-drilled each attach hole and used a rubber bushing to protect the window from cracking. This technique is discussed in another thread regarding the installation of the rear window.
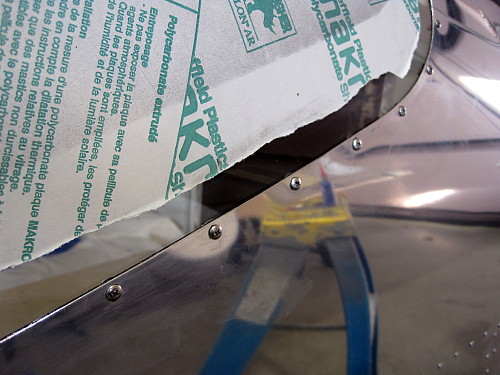
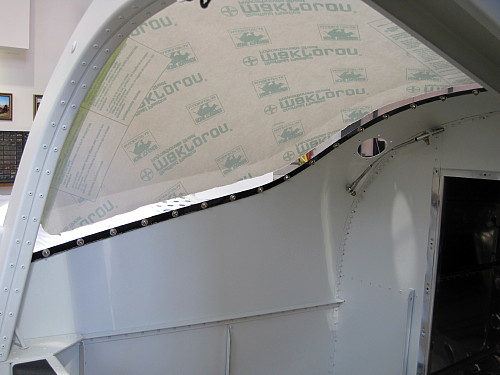
I loosened up every screws and used shims to hold the window off the aluminum. I then used a syringe to inject fuel tank sealant progressively around the window. I slightly tightened the screws and wiped off the excess.
Additional pictures can be found here.
Now, I am waiting for the avionics kit to arrive.
Final step for me was sealing up the rear window. I over-drilled each attach hole and used a rubber bushing to protect the window from cracking. This technique is discussed in another thread regarding the installation of the rear window.
I loosened up every screws and used shims to hold the window off the aluminum. I then used a syringe to inject fuel tank sealant progressively around the window. I slightly tightened the screws and wiped off the excess.
Additional pictures can be found here.
Now, I am waiting for the avionics kit to arrive.
f1rocket
Well Known Member
The head is bigger, but that's not really what holds the window in place. The bushing expands as the screw is inserted. On the sides, I used some slightly oversized washers on the inside of the window that expands the contact area. With the fuel tank sealant all the way around the perimeter of the window, I can probably remove all the screws and the window wouldn't budge an inch.
f1rocket
Well Known Member
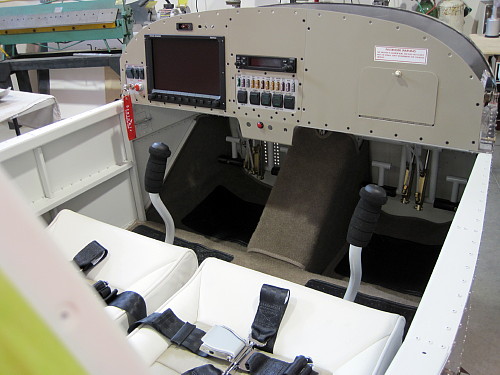
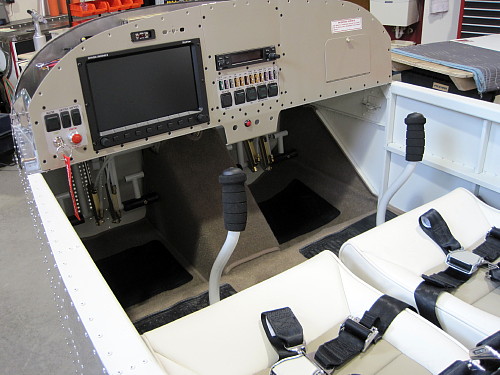
11-27-13 Instrument Kit Installed

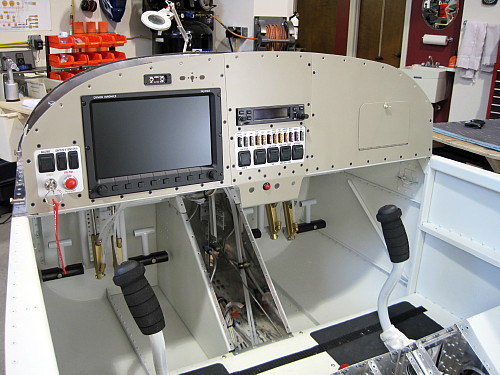
Finished up the installation of the instrument kit in 9 days beginning to end. This kit included the new Garmin GTR200, ADS/B, and autopilot servos.
Next step is the engine. Shooting for a March 2014 first flight.
Pictures of instrument install can be found here.
Finished up the installation of the instrument kit in 9 days beginning to end. This kit included the new Garmin GTR200, ADS/B, and autopilot servos.
Next step is the engine. Shooting for a March 2014 first flight.
Pictures of instrument install can be found here.

f1rocket
Well Known Member
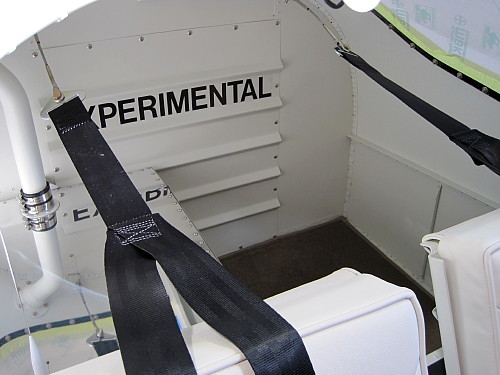
12-25-13 Side Panels
I finished making some custom side panels for the interior.
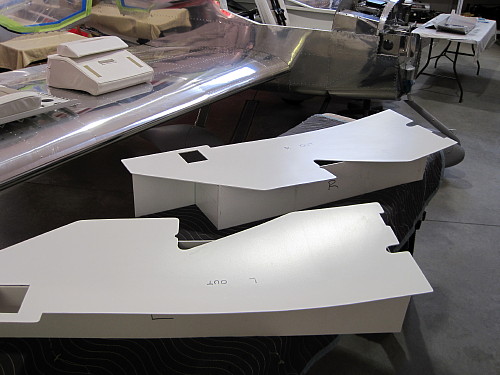
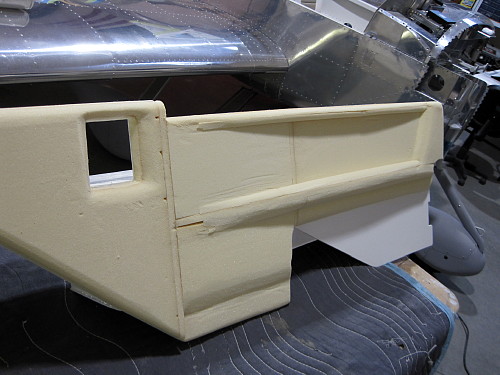
First, I made two molds of the inside of the cockpit.
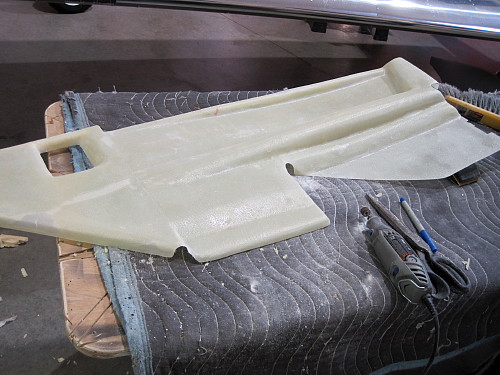
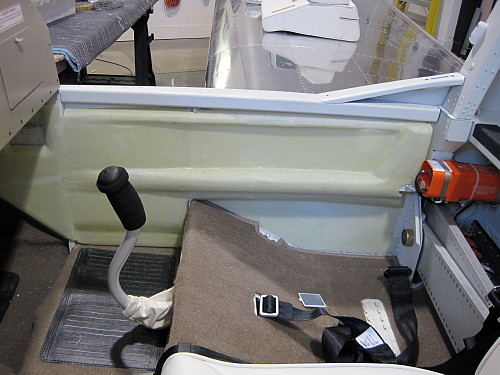
I laid up two plys of 9 oz. cloth and fit them to the interior. These will be covered in two colors of leather. I'm waiting for the painter to finalize my logo so I can finish the embroidery, then I can apply the leather and permanently attach these panels to the side of the cockpit.
Details can be found here.
I finished making some custom side panels for the interior.
First, I made two molds of the inside of the cockpit.
I laid up two plys of 9 oz. cloth and fit them to the interior. These will be covered in two colors of leather. I'm waiting for the painter to finalize my logo so I can finish the embroidery, then I can apply the leather and permanently attach these panels to the side of the cockpit.
Details can be found here.
Bill_H
Well Known Member
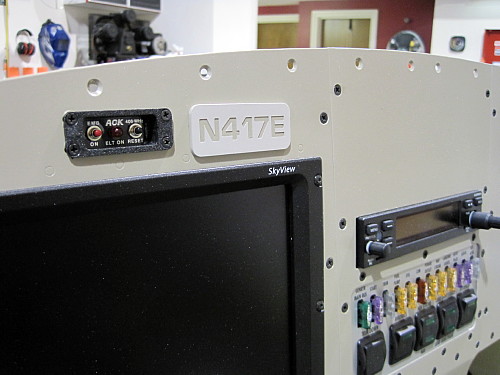
Is this with the new radio that is incorporating the intercom function? If so I would have thought that Vans would have sent you a revised left side panel that did not have the intercom holes. You could cover that with a plaque with the N Number, had mine made at a trophy shop but put it above the ignition switches.
f1rocket
Well Known Member
01-23-14 Fuel Tank SB Completed
While waiting for my engine kit to arrive, I completed the recent fuel tank service bulletin. For me it's an extra pain because my tank is both painted and polished. That meant re-doing both once the SB was done.

While I had the tank out, I calibrated it and marked the side of the tank. I'm not sure what others have done in this regard, but this is how I did it.
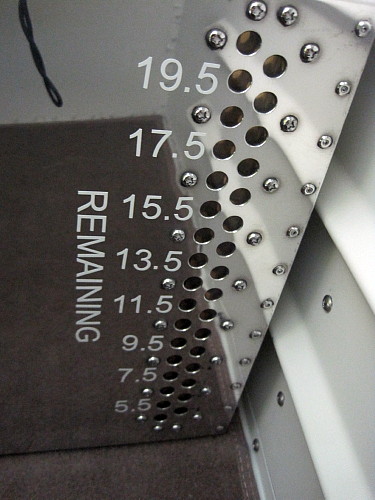
UPDATE: These markings are not accurate. I had a new placard made up and installed. I'll update this picture soon.
While waiting for my engine kit to arrive, I completed the recent fuel tank service bulletin. For me it's an extra pain because my tank is both painted and polished. That meant re-doing both once the SB was done.
While I had the tank out, I calibrated it and marked the side of the tank. I'm not sure what others have done in this regard, but this is how I did it.
UPDATE: These markings are not accurate. I had a new placard made up and installed. I'll update this picture soon.
Last edited:
f1rocket
Well Known Member
02-22-2014
I was able to get the engine mounted before going back to the hospital for the fifth time in less than 2 years as my battle with cancer continues. First, I had to wait two months for the kit to arrive so that blows my schedule to complete the airplane in 12 months. Oh well, next objective is AirVenture this year. That should be doable.
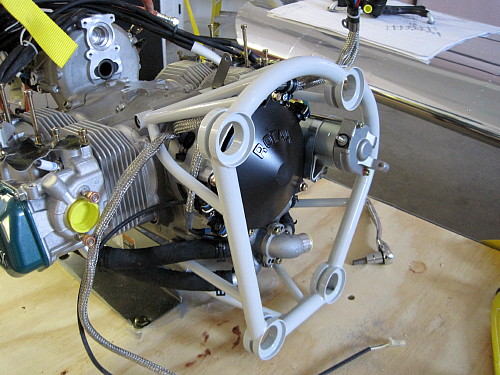
I was able to get the engine mounted before going back to the hospital for the fifth time in less than 2 years as my battle with cancer continues. First, I had to wait two months for the kit to arrive so that blows my schedule to complete the airplane in 12 months. Oh well, next objective is AirVenture this year. That should be doable.
Last edited:
GhostRider32
Active Member
Super nice job.
f1rocket
Well Known Member
(pssst! Turn the flag around)
Yep, I've received numerous "suggestions" on that. I promise I'll take care of that this summer.
f1rocket
Well Known Member
04-01-14 Engine Start and Taxi Tests
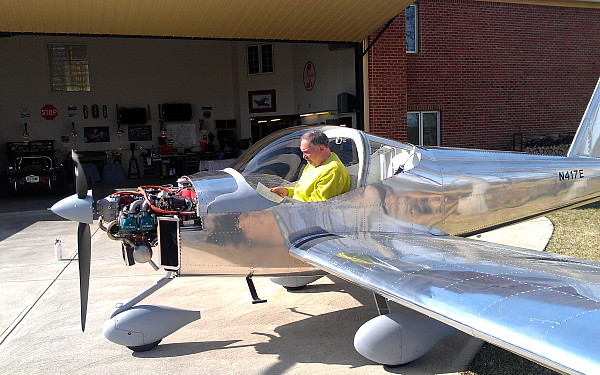
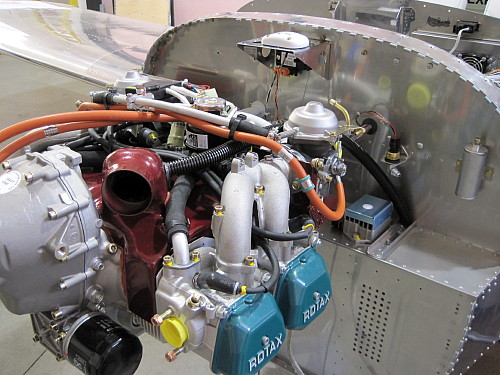
Completed the initial start of the engine. Complied with all the ROTAX SB's and SI's for purging the system, fuel, etc. No major problems found. Run up was normal.
Went out late this afternoon to complete some taxi tests, break in the brake pads, configure the magnetometer, etc. I can't believe the visibility in this thing.
Right now, I'm waiting for the FAA to come by for the airworthiness inspection.
txaviator
Well Known Member
Looks like a show winner! Wait until you are airborne in the plane.....my first impression flying in a -12 was really wild. It gives you the a sensation that there is no canopy or wing (unreal visibility). You can see, unobstructed, for miles and miles and miles. Looks very nice, Randy!
f1rocket
Well Known Member
Randy, given your impressive history of completed aircraft I'm curious how long it took you to bang...correction...squeeze out this 12?")
Twelve elapsed months with four months in there of waiting and "other" stuff. Eight actual months of building. (I'm retired and the wife is still working so that makes a big difference.) Nothing goes together as easily as this kit. It is amazing.
Last edited:
f1rocket
Well Known Member
Randy
Superb, meticulous build, and such helpful documentation of the build process.
You are an imspiration.
One slightly personal question, how tall are you? I notice your head seems close to the canopy.
John
Thank you for the nice comments.
I'm 5'10" but I have the extra cushion installed under the seat bottom. That's an extra 3 or 4 inches. I like to sit as high as I can without hitting the canopy. I also use HALO headsets.
f1rocket
Well Known Member
Okay, my question is what are you going to build next. I know you need to have a project going so you don't get bored.
Not sure. I'd like to enjoy the -12 before health issues start to dominate my life. This is likely my last aviation project though. I'm thinking of doing a resto-mod on a late 40's or 50's pickup truck.
f1rocket
Well Known Member
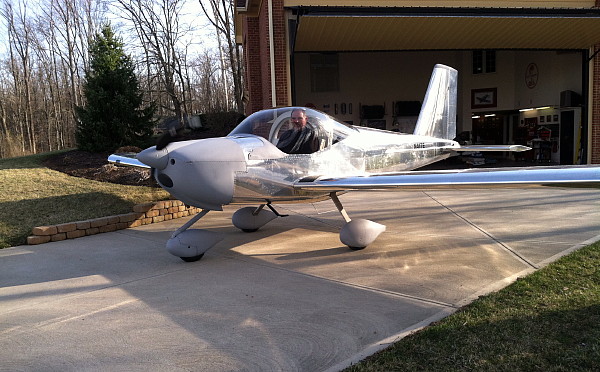
04-14-14 Airworthiness Certificate Issued
Today, my airplane parts officially became an airplane. The inspection was this morning and was performed by the Indy FSDO. Great guys there. No issues noted and it took about an hour to check all the papers. Very thorough job of verifying all the documentation.
First flight to be made by local legend Jim Winings "Sodbuster" as soon as we get a break in the weather. It's looking like Thursday may work. Stay tuned.
Last edited:
f1rocket
Well Known Member
04-17-14 - First Flight
N417E became airborne this morning. Jim Winings did the honors. This was his 14th first flight and he has now completed a first flight in all of Van's designs except the -14.
The wind kind of kicked up so I will wait until tomorrow morning to make my jaunt. I've waited 6 years, one more day won't hurt.
Everything worked great. Heavy left wing and right rudder tab needed. Otherwise, she flew great.
Last edited:
f1rocket
Well Known Member
Made my first flight this morning. What a great, great airplane. Easy to fly and land, great visibility, comfortable, and fun. It is everything I hoped it would be. Could not be happier. Thank you Vans.
I do have a significantly heavy left wing. I've squeezed the right flaperon, but I think I'm going to have to blunt the left one some. Let go of the stick and it immediately enters a steep turn. I need to work on that one.
Wow is all I can say right now.
I do have a significantly heavy left wing. I've squeezed the right flaperon, but I think I'm going to have to blunt the left one some. Let go of the stick and it immediately enters a steep turn. I need to work on that one.
Wow is all I can say right now.
propsync
Well Known Member
Congratulations, Randy!
I'm sure this latest RV from your hands reflects your amazing "handiwork."
You are an inspiration to us. I hope to meet you someday.
We do need some pictures.
whoohoo congrats.
I do have a significantly heavy left wing. I've squeezed the right flaperon, but I think I'm going to have to blunt the left one some. Let go of the stick and it immediately enters a steep turn. I need to work on that one.
It might pay to check the position of the flaperon bearings. They might need some adjustment if the out of balance is that significant and you've already squeezed the trailing edge.
Last edited:

