What's new
Van's Air Force

Don't miss anything! Register now for full access to the definitive RV support community.

HS Attach holes drilled incorectly??

AJ85WA

Well Known Member
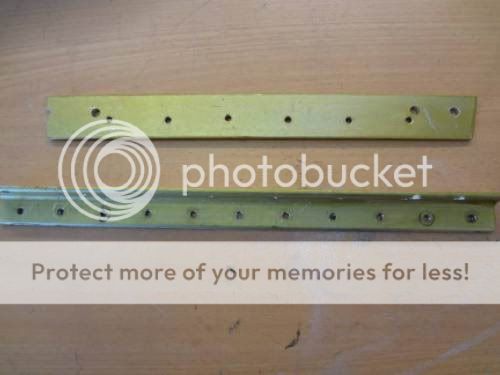
I was in the process of getting ready to attach my HS stabilizer today and noticed the previous builder already had a attempt at this. But as you can see the holes are not even close to the correct positions.
DSC00454.jpg

DSC00456.jpg

DSC00457.jpg


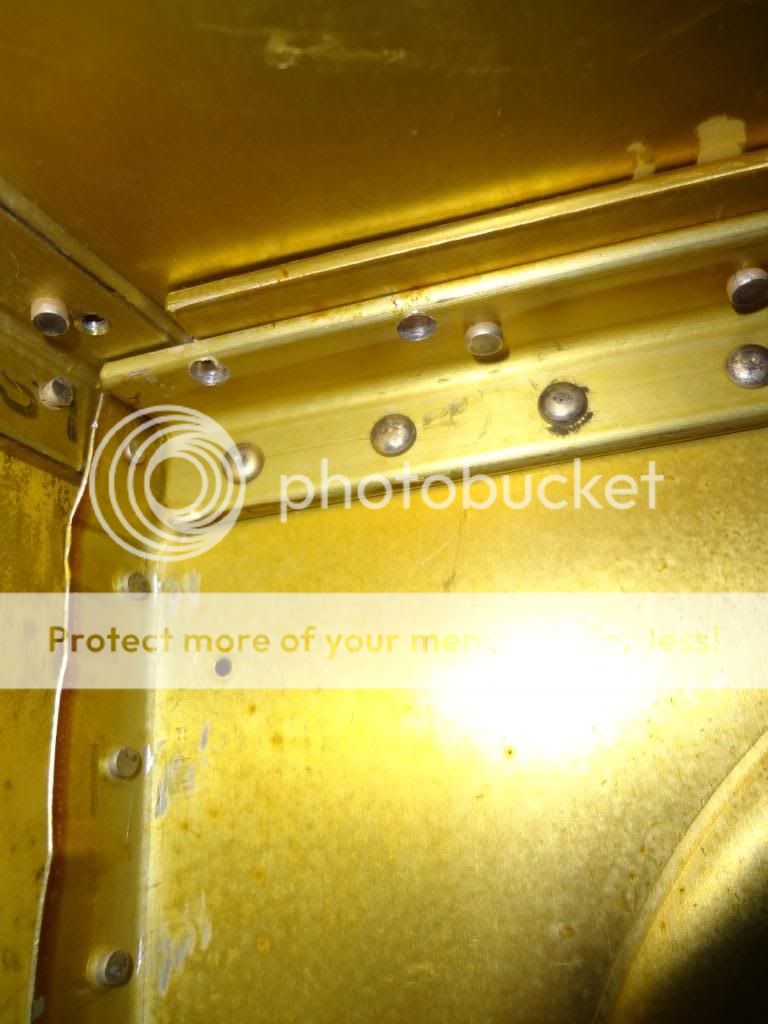
Now as you can see the holes are not actually touching the two side longerons a they are suppose to. (At least it is not compromising the longerons strength)


As far as i can see there is no structural weakness from these holes, maybe fill them up with some rivets? Any advise would be greatly appreciated.

AJ
 
Last edited:
Of course speak to Van's.
If I were faced with this, I would see if I could replace the misdrilled heavy angle under the F-611. I think with an angle drill you could get at the rivets to drill them out and replace the angle. Awkward, but I think it could be done.
The misdrilled holes in the horizontal stab angle you may wish to consider dealing with by adding reinforcement - as well as replacing the two short spacers that sit on the rear deck, rivet a single long (full length of the angle) reinforcing piece of 1/8 plate on the opposite (top) side of the horizontal stab angle to provide a doubler/sandwich the misdrilled angle. The spacers raise the horizontal stab angle enough to provide clearance to the shop heads of the rivets that would hold the plate provided that you plan their location to miss the rivets in the angle on the top deck.
Obviously these attachments are flight critical, so clear whatever you decide to do with Van's.
In the end, anything can be replaced if it has to be to make it right, just takes time.
Bill Brooks
Ottawa,Canada
RV-6 finishing
 
I'm seeing quite a few unaccaeptable rivets there also. I'm afraid you need some new tail pieces. Sorry, but its just a few hours of rework. Plus a little money. Might as well get used to it now.
 
If this were my plane, i would replace the angle, spacers, and top sheet, and call Van about the extra hole in the longeron. I would also carefully inspect the rest of the partially completed kit for other issues, and replace all the non-conforming rivets. You may be able to get away with less, but why not set the bar high now, especially in such a critical location on the airframe.

Aaron
 
HS attach holes

Glad you checked and found this before putting it all together.
I would replace the rear deck, angle, spacer that's on top of the angle looks to be drilled wrong too and in the wrong spot for an RV7 (look at your RV6 plans carefully), easy to fab a new one and replace that too.

If you don't have one, I would suggest buying a rivet removal tool. PM me for my rivet removal technique if you need it, works well without damaging holes.

On mine (RV7) I removed the rear deck to check other pieces, replaced all substandard parts with new even replacing the rear bulkhead and tie down anchor that prev. builder messed up. All in all took me about 35 hours of work but I replaced extra parts that were factory QB unacceptable parts.
The triangles you see in my picture show 4 clecos where I had to put some some flush 4- rivets in as the HS sits flush on there.

I crawled into the back part of the fuselage on a sheet of wood to protect it to drill out the forward rear deck rivets.

From looking at your pictures, luckily it looks like they missed the longeron all together except forthe extra hole they put in it. Check with Van's on that one as others have said.
While you have the rear deck off, I would replace those nasty looking rivets in the bulkhead as aerhed mentioned.

If you're replacing the piece(s) anyway you don't have to spend too much time drilling out rivets being careful you don't damage the hole as you're replacing the parts anyway. Just be sure all the parts are being replaced!

By the time you have all the new parts fab'd you'll only have the extra hole in the longeron to contend with from what I see but inspect it all. You'll be able to see a lot better when you have the rear deck off.

Other bad news...You will probably have to replace the bottom reinforcement angle on your HS as it will have holes that are at the wrong place too. Check your plans on this. (they would be wrong for a 7 for sure).
Disclaimer...This fix is only what I did to fix the problem on mine (RV7A), don't try this at home! Seek professional help on this fix as I did. Talk to an engineer that specializes in airframe repair. I had 2 come by and verify my fix (Thanks Raplh and Randy). Carefully review your plans.
 
Last edited:
Wrong angle to start with

AJ

Looking at the pictures it looks as if the angle underneath is the wrong dimension. It looks like a 3/4 angle when if you check the plans it should be larger. So you'll need to remove enough of the rear deck to drill this angle out and replace it. Then replace the spacer as well and only the holes in the actual top deck will be wrong but that should be fine. You could always make the top spacers lager as in the previous post but that was because the longerons were drilled wrong which isn't a factor in your case. Hope this makes sense.

Peter
 
Last edited:
Thanks Guys

Hey guys

Thanks allot for the responses. I really do appreciate this VAF forum,so helpful.

I have already purchased a new RV7 Empennage so the older one with the holes through the spar is not an issue.

I will inspect my plans tonnight and see if that angle is the correct size or not. Either way I found some holes in the very far bulkhead holding the tailwheel attachment to be unacceptable so I might get the old partslist out and start ordering some new parts from vans.

Would i have to order a new skin for the bottom rear of fuselage?
 
I'm seeing quite a few unaccaeptable rivets there also. I'm afraid you need some new tail pieces. Sorry, but its just a few hours of rework. Plus a little money. Might as well get used to it now.

I'll have to second this. Some of those rivets are not even set half-way. I would make an effort to check everyone and address them as needed. I would definitely refer to Vans opinion on this as this is a part that absolutely needs to be installed correctly. I would at least replace all parts that were drilled through.
 
Thank you

Hi guys thanks for the responses. I was able to drill the rivets out on top and then crawl into the fuse and drill out the angle rivets. The angle is deffinately the wrong size and spacer will be replaced.And I'll address all those rivets and check them with the go no go gauge.
f2d18841.jpg
 
Good catch AJ. Everybody is good at something, but it is pretty obvious that whomever built that empenage needs to keep their day job. Wow.
 
Hi guys thanks for the responses. I was able to drill the rivets out on top and then crawl into the fuse and drill out the angle rivets. The angle is deffinately the wrong size and spacer will be replaced.And I'll address all those rivets and check them with the go no go gauge.

AJ, the photos that you have submitted to date are clear evidence of two things:

1. That the previous builder of your project did not have a clue as to how to fabricate an aircraft.

2. That the person you commissioned to do the pre-buy inspection of this project in the US on your behalf was not up to the task. That they described the workmanship on this project as "excellent" is a clear indication that they did not inspect the empennage at all. Or if they did, they had no idea of what they were looking at.

In a previous thread you suggested that the fuselage was QB but that the empennage and wings were fabricated by the previous builder. If that is the case I would highly recommend a VERY thorough inspection of the wings. If they were built by the same person that did the empennage you can almost certainly expect more horrors.
 
Last edited:
Longeron

AJ

Just looking again at your first photo, it looks like the is an extra hole in the right Longeron that is open without that much edge distance to the next rivet but this hole doesn't show up on the top deck photo. This might require further investigation.

Peter
 
Last edited:
AJ

I think I'd make up the spacers and rivet them on like CPSONE did to reinforce the whole area.

Peter

No offense, but if you don't have an "engineered" solution, you are just guessing. The transfer of forces in an aircraft structure are not always obvious. Repairs to load bearing structures are to be done to provide the proper transfer of forces through or around a damaged part and back into the structure. You would think that making the structure stronger than originally designed would be better, but you may unknowingly transfer forces to another part of the airframe. I am not judging CPSONE's solution. However, if you can replace the parts, you keep the original design and nothing needs to be engineered or guessed at.
 
early 6's

I agree with JonJay.
I'm not suggesting that anyone use the fix I did, it was right for my project and my problem only. I had it checked out by 2 qualified people so I am comfortable with it. It is not an engineered fix. This is also why you must refer to AC43.13 for the proper repair for your damaged area.

...I was told that the early 6's had "triangle" plates in these spots when the HS reinforcement angles were different in early 6 plans.
Anyone have a copy of these plans that can post a pic? or Pics of an early 6 with these plates?


No offense, but if you don't have an "engineered" solution, you are just guessing. The transfer of forces in an aircraft structure are not always obvious. Repairs to load bearing structures are to be done to provide the proper transfer of forces through or around a damaged part and back into the structure. You would think that making the structure stronger than originally designed would be better, but you may unknowingly transfer forces to another part of the airframe. I am not judging CPSONE's solution. However, if you can replace the parts, you keep the original design and nothing needs to be engineered or guessed at.
 
no offense taken. I was just trying to highlight the fact that the longeron may have been weakened and may need investigating. I think with all these sorts of repairs its best to consult Vans, use standard aircraft repair techinques or consult a aircraft design engineer to draw up a safe repair.

Peter
 
Back
Top