

rightrudder
Well Known Member
It's been a great year with the RV-9A. I've put 112.9 on the Hobbs so far, and have flown from my home airport of Cable in Upland, CA to Arizona a couple of times (Chandler and Sedona) and a quick gambling trip to Jean, NV as well. Most of my flying is 30-45 minute breakfast hops to French Valley and Camarillo, and I've been to Hemet, Fallbrook, Fullerton, Hesperia, and Gillespie Field a couple of times. Did the SFRA route over LAX and loitered a bit over Malibu. Fun!
No major issues on the first annual, just some small fiddly stuff.
Airbox/filter: As other have experienced, the filter element has shrunk a little, so viewed head-on, it's a bit conical now. There's some pitting in the aluminum floor of the airbox where the filter element has vibrated against it...maybe a function of intake pulses/pressure waves acting on it. No big deal, but I'll keep an eye on it. FAB plate is holding up great...I made it out of 0.125" stock (twice as thick as the stock piece).
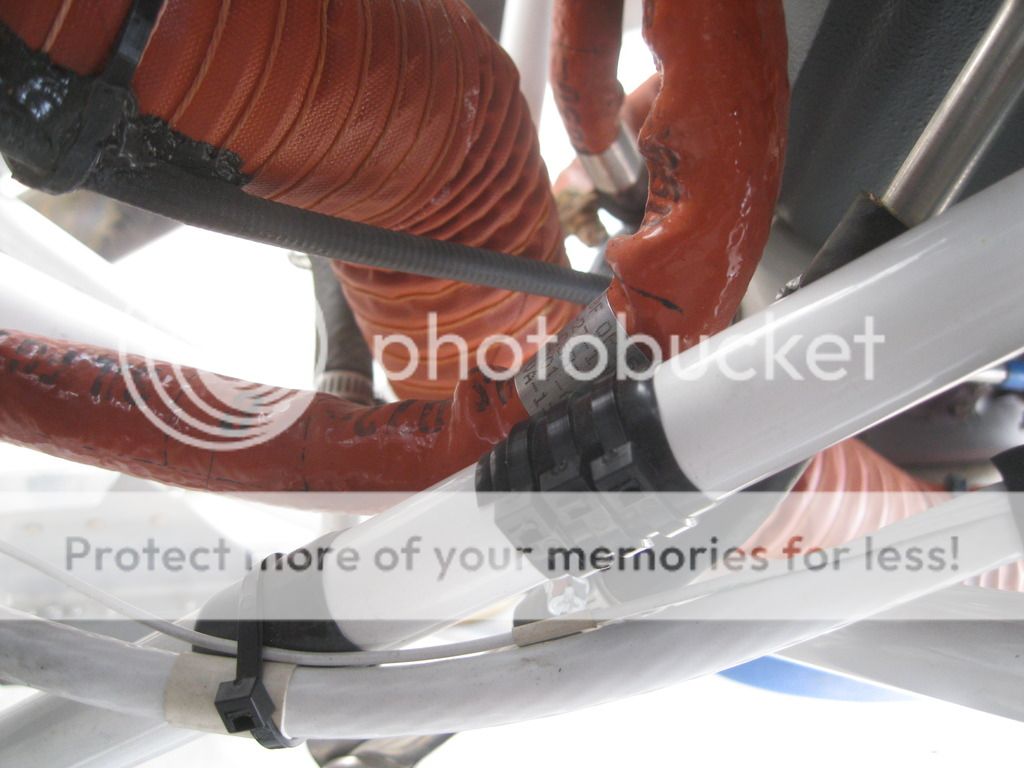
Engine, in general: Good numbers on differential pressure testing, as would be expected from a new engine. 80/79, 80/79, 80/80, 80/80. (Thanks, Keith, for fearlessly holding the prop during the testing!) Plugs look decent (photo shows them before cleaning and gapping) with the center electrodes just starting to show some oval-ness. No baffle cracks in stock baffling, though I did make a small brace to reduce flex near the oil cooler. Tightened hose clamps on all the intake coupler hoses. The metal ferrule on one of the fire-sleeved fuel hoses was just grazing the engine mount, so I made a scuff guard out of silicone rescue tape and tie-wraps to protect it.
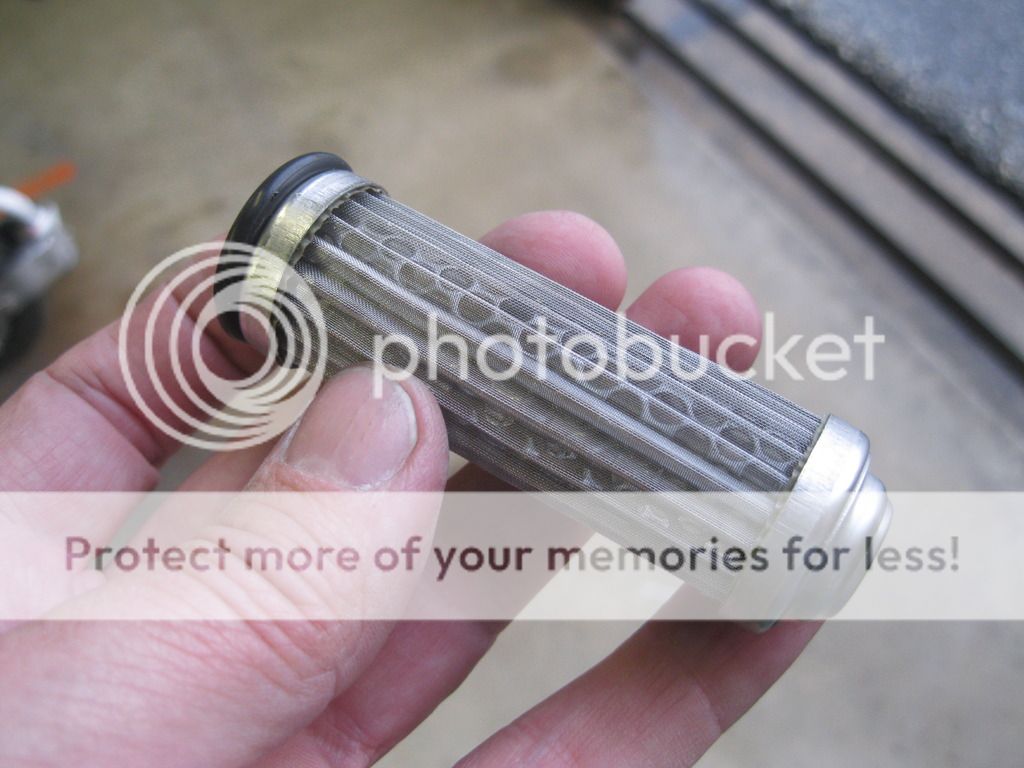
Fuel filter/fuel servo screen: Both clean as a whistle!
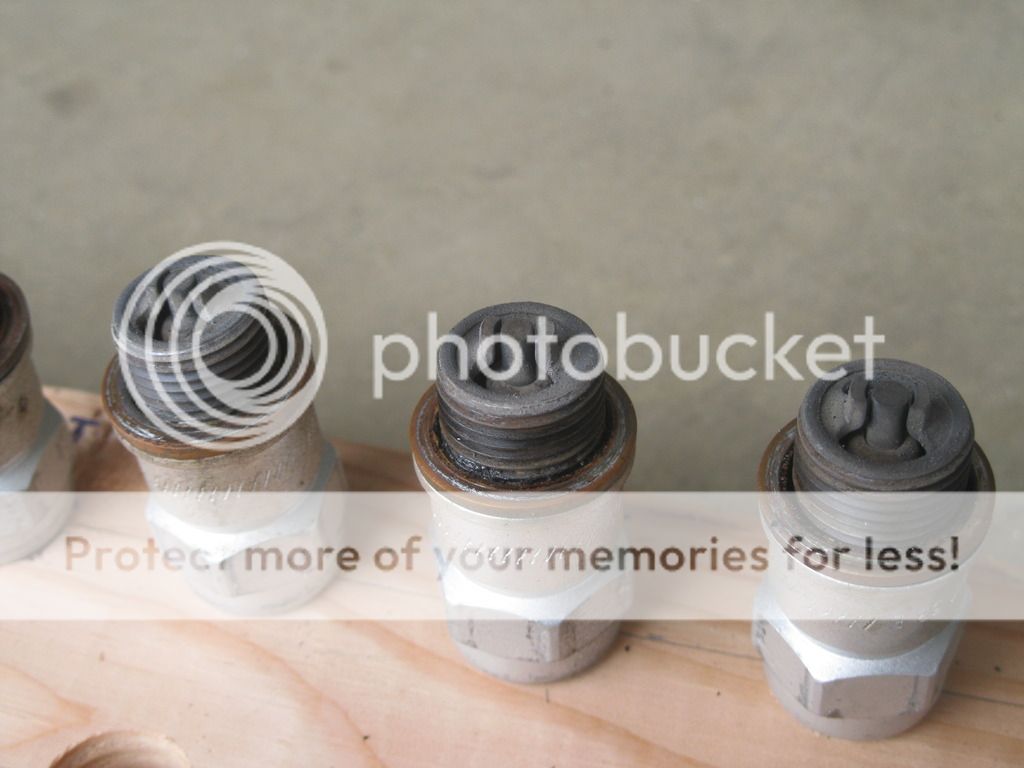
Engine bolts: All have held their torque, both the engine-to-mount bolts and mount-to-airframe bolts.
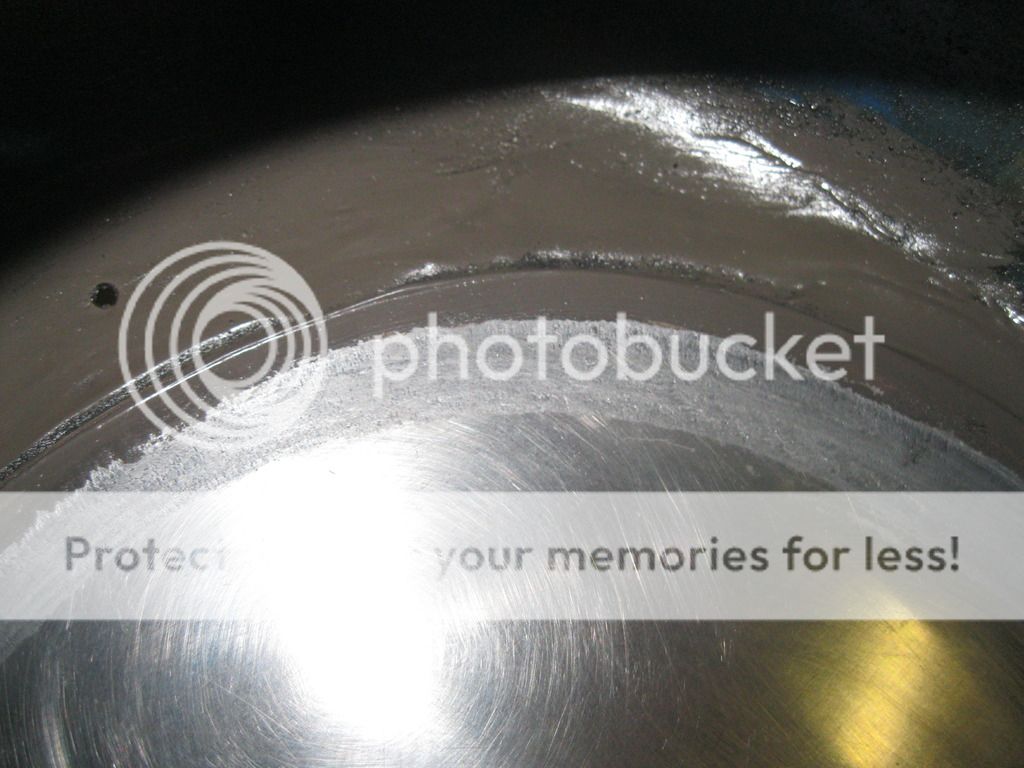
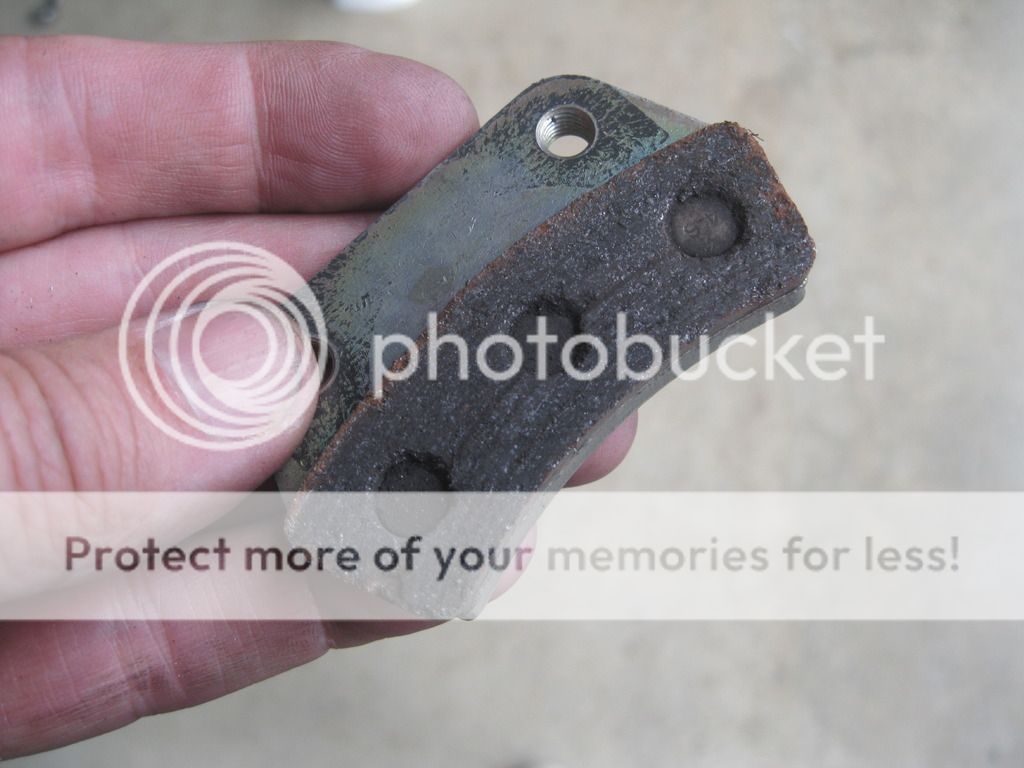
Brakes: Pads are getting pretty worn...the worst one is pictured. I've reassembled everything for now, but will change out the linings at the next oil change. I think for future inspections, I'll change out the linings as a matter of course. They're only $35, which is cheap peace of mind, and I've already purchased the Avery tool for setting the special rivets. At the brake pedals there were a couple of very minor leaks, one on the 90-degree fitting (high-pressure side) on the master cylinder, the other where the high pressure flex lines meet the hard lines at the firewall. Both were flared joints, so snugging them down seemed to fix the problem.
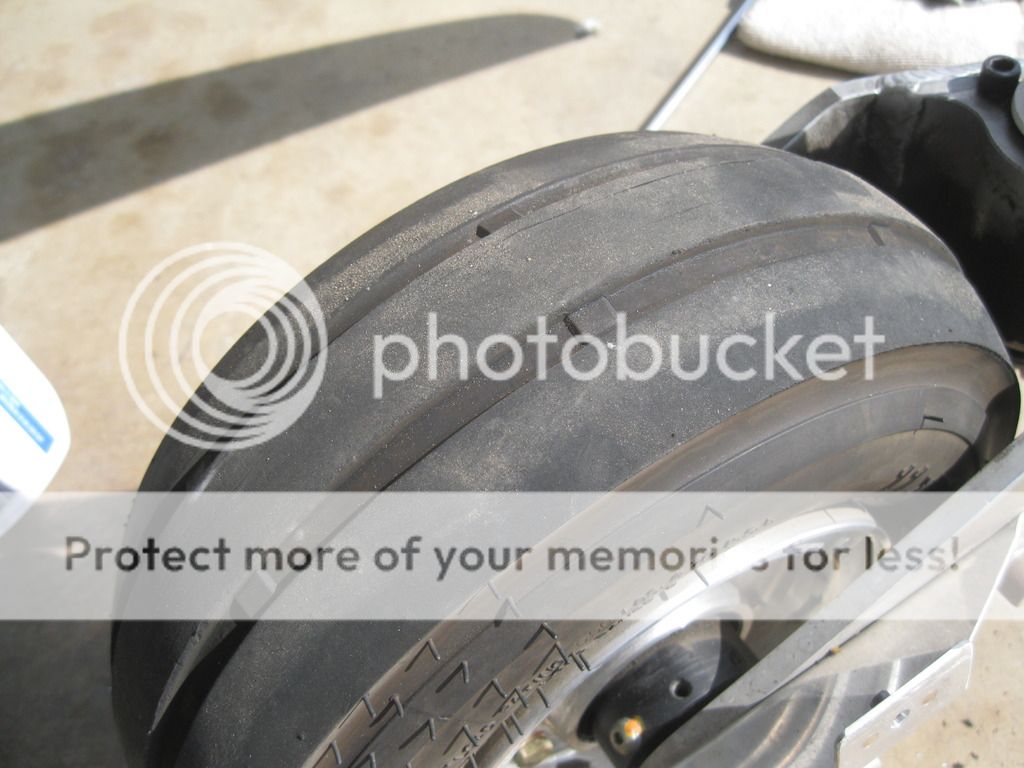
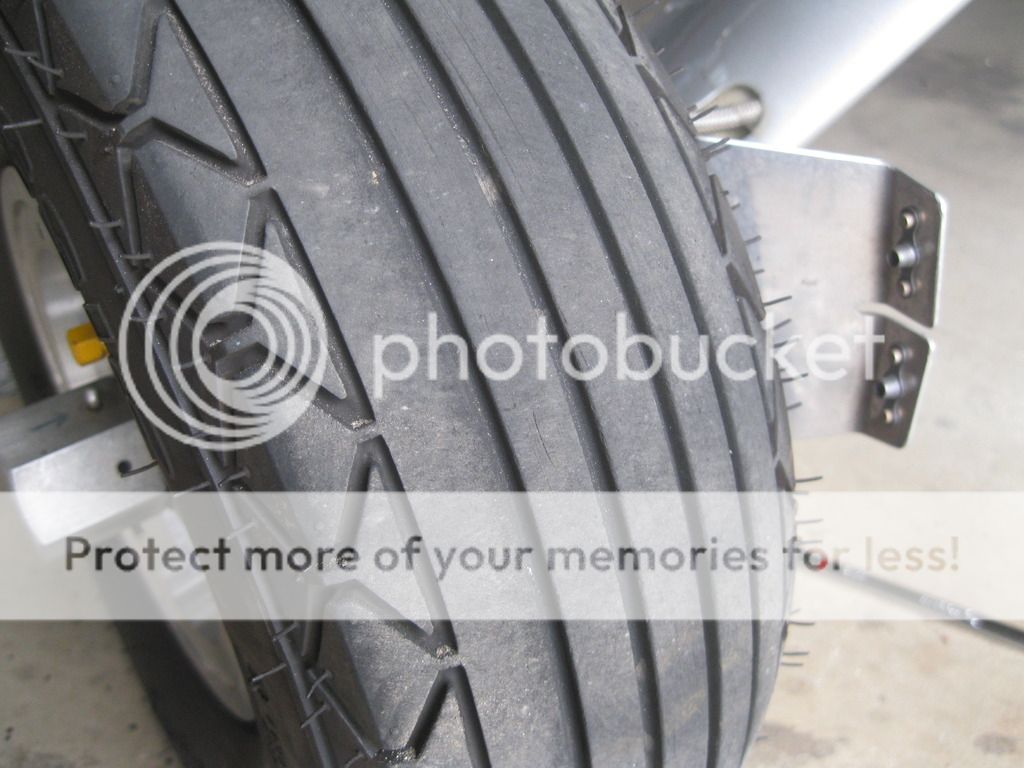
Tires: Plenty of tread. Good for another year at least.
Empennage attachment bolts: I put a wrench on all of these to check torque. Some had relaxed just a little, but only required 1/16 turn or so to reach the torque spec.
Under the forward seat pans: Geez, removing/reinstalling these is definitely the most tedious part of the annual. Fixed a slight amount of fore/aft slop in the control stick by tightening the longitudinal pivot bolt. Secured a bit of wiring that had come loose, and really cranked down the friction block for the aileron trim.
Prop: I removed it to check torque of the prop extension bolts...everything within spec. Prop itself is holding up great (Catto 70x70 with nickel leading edges).
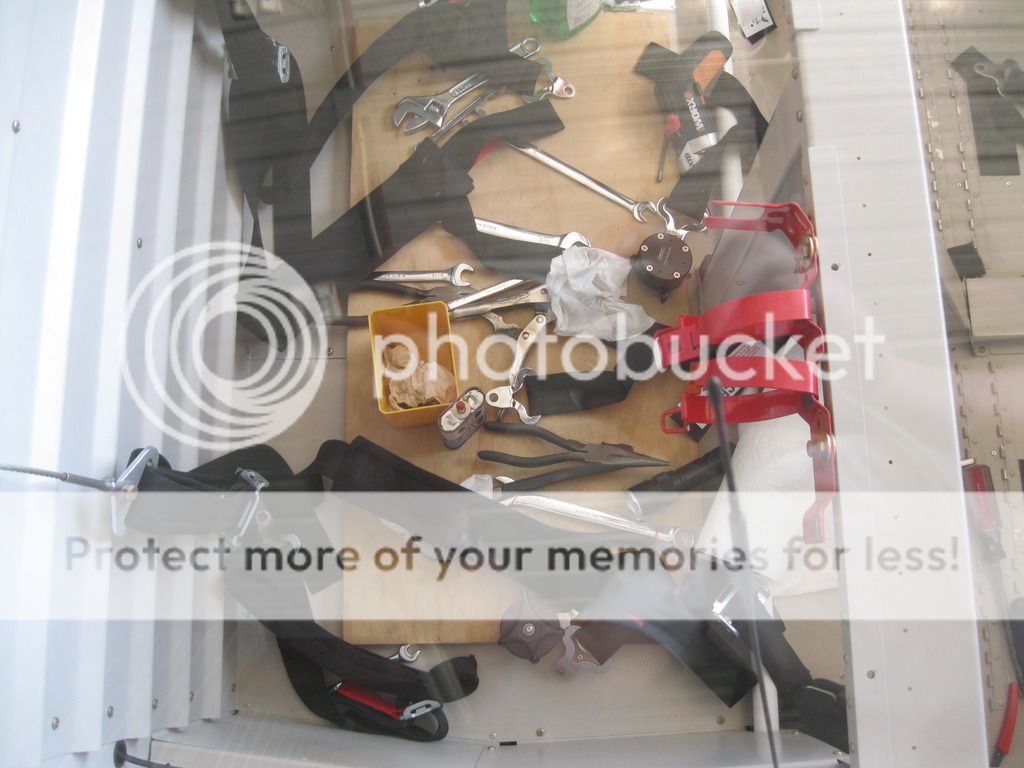
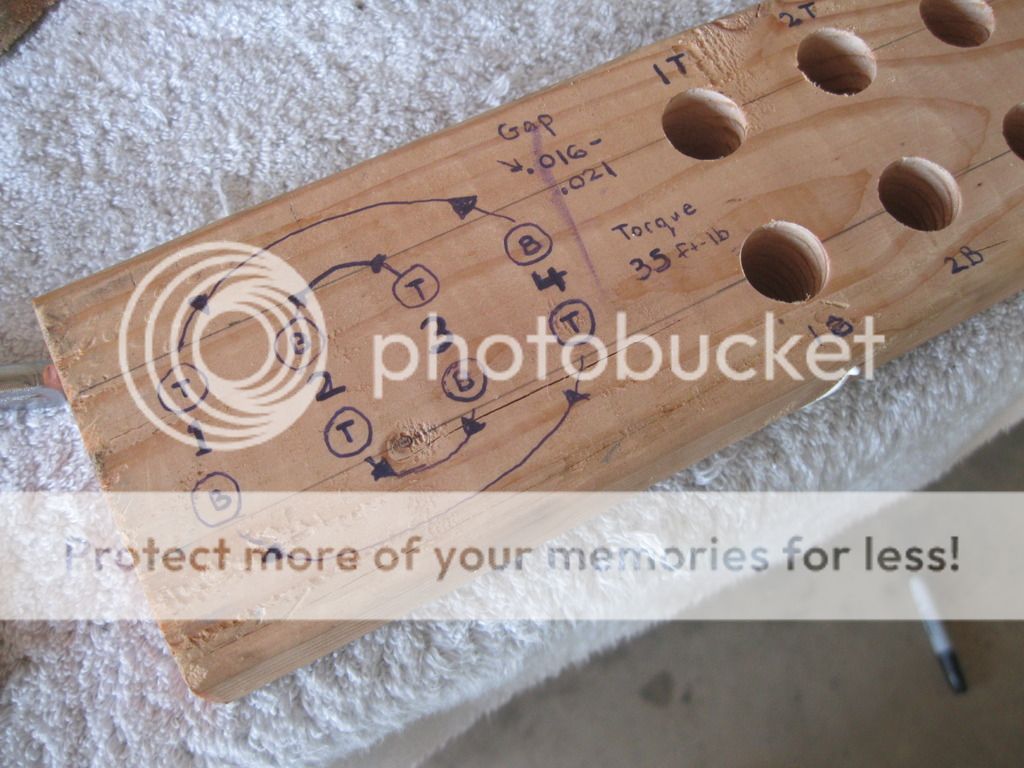
Some general observations: When working on the aircraft's interior, empty your entire toolbox onto the cargo floor! Anything to reduce the number of trips in and out is a good thing. Advil is your friend, both as a preemptive strike and afterward. Swap those seat cushions side to side to equalize wear. And where appropriate, mark torque specs for key components on or near the components themselves, so you don't having to go fishing through all the manuals to find them.
It's also a great time to clean everything up, remove smudges from the panel, etc.
No major issues on the first annual, just some small fiddly stuff.
Airbox/filter: As other have experienced, the filter element has shrunk a little, so viewed head-on, it's a bit conical now. There's some pitting in the aluminum floor of the airbox where the filter element has vibrated against it...maybe a function of intake pulses/pressure waves acting on it. No big deal, but I'll keep an eye on it. FAB plate is holding up great...I made it out of 0.125" stock (twice as thick as the stock piece).

Engine, in general: Good numbers on differential pressure testing, as would be expected from a new engine. 80/79, 80/79, 80/80, 80/80. (Thanks, Keith, for fearlessly holding the prop during the testing!) Plugs look decent (photo shows them before cleaning and gapping) with the center electrodes just starting to show some oval-ness. No baffle cracks in stock baffling, though I did make a small brace to reduce flex near the oil cooler. Tightened hose clamps on all the intake coupler hoses. The metal ferrule on one of the fire-sleeved fuel hoses was just grazing the engine mount, so I made a scuff guard out of silicone rescue tape and tie-wraps to protect it.


Fuel filter/fuel servo screen: Both clean as a whistle!

Engine bolts: All have held their torque, both the engine-to-mount bolts and mount-to-airframe bolts.
Brakes: Pads are getting pretty worn...the worst one is pictured. I've reassembled everything for now, but will change out the linings at the next oil change. I think for future inspections, I'll change out the linings as a matter of course. They're only $35, which is cheap peace of mind, and I've already purchased the Avery tool for setting the special rivets. At the brake pedals there were a couple of very minor leaks, one on the 90-degree fitting (high-pressure side) on the master cylinder, the other where the high pressure flex lines meet the hard lines at the firewall. Both were flared joints, so snugging them down seemed to fix the problem.

Tires: Plenty of tread. Good for another year at least.


Empennage attachment bolts: I put a wrench on all of these to check torque. Some had relaxed just a little, but only required 1/16 turn or so to reach the torque spec.
Under the forward seat pans: Geez, removing/reinstalling these is definitely the most tedious part of the annual. Fixed a slight amount of fore/aft slop in the control stick by tightening the longitudinal pivot bolt. Secured a bit of wiring that had come loose, and really cranked down the friction block for the aileron trim.
Prop: I removed it to check torque of the prop extension bolts...everything within spec. Prop itself is holding up great (Catto 70x70 with nickel leading edges).

Some general observations: When working on the aircraft's interior, empty your entire toolbox onto the cargo floor! Anything to reduce the number of trips in and out is a good thing. Advil is your friend, both as a preemptive strike and afterward. Swap those seat cushions side to side to equalize wear. And where appropriate, mark torque specs for key components on or near the components themselves, so you don't having to go fishing through all the manuals to find them.
It's also a great time to clean everything up, remove smudges from the panel, etc.


Last edited:


