What's new
Van's Air Force

Don't miss anything! Register now for full access to the definitive RV support community.

Running wing conduit

FlyGuy65

Well Known Member
Studying Vans PDF and other builders pictures - the wiring conduit is run on the bottom of the ribs, closest to the ground when wings level. Vans says to use some sealant to keep the conduit from chafing. Watching the GBO video, it's suggested to run the conduit after riveting each individual rib/bottom skin so as not to interfere with the bucking bar for that rib. It would seem very difficult to add sealant 'as you go', vs before riveting the bottom skin on. Thoughts? Does anyone run the conduit closer to the top skin? Just install the conduit and work around it to buck? Not use the RTV at all?

Thanks,

John

RV-7 Slowwww build
 
Last edited:
conduit

Here's how I did it, and it really worked well. Easy to get all the cables in that I needed. I had to create a cutout to exit for the wing servo, and that also just required a couple of holes.

http://www.rv8.ch/wing-wiring-conduit/

20041026231058140_5_original-1024x768.jpg
 
Conduit

I installed the black stuff Vans sells in the designated location before riveting bottom skins. No problem bucking rivets. Adding a dollop of proseal at each intersection was easy. Just reach in with a glob on a popsicle stick. All it does is prevent the conduit from vibrating.
 
It?s not a big deal to rivet around the conduit if located where Vans suggests. I would highly recommend installing while the skins are off.

Studying Vans PDF and other builders pictures - the wiring conduit is run on the bottom of the ribs, closest to the ground when wings level. Vans says to use some sealant to keep the conduit from chafing. Watching the GBO video, it's suggested to run the conduit after riveting each individual rib/bottom skin so as not to interfere with the bucking bar for that rib. It would seem very difficult to add sealant 'as you go', vs before riveting the bottom skin on. Thoughts? Does anyone run the conduit closer to the top skin? Just install the conduit and work around it to buck? Not use the RTV at all?

Thanks,

John

RV-7 Slowwww build
 
Just me

I ran the corregated Vans conduit in the designated holes. I ran the conduit before the bottom skin was on with no trouble riveting the bottom-skin. I also stretch the conduit so it wouldnt rub on the bottom skin in light turbulence. It was easy of added the proseal with the skin off.
 
Larry/John,

Did you find it a tight fit running the conduit? Seems like it will take a while to get these installed using the called out hole diameter.
 
Vans plan

I used the details on Vans optional plan and drilled the holes accordingly. The corrugated conduit fit in tight and i had to pull it thru with it snapping thru each corrugation.. but it worked as advertised.
 
wing conduit in a mounted wing of a flying aircraft

Running wing conduit in a mounted wing of a flying aircraft?
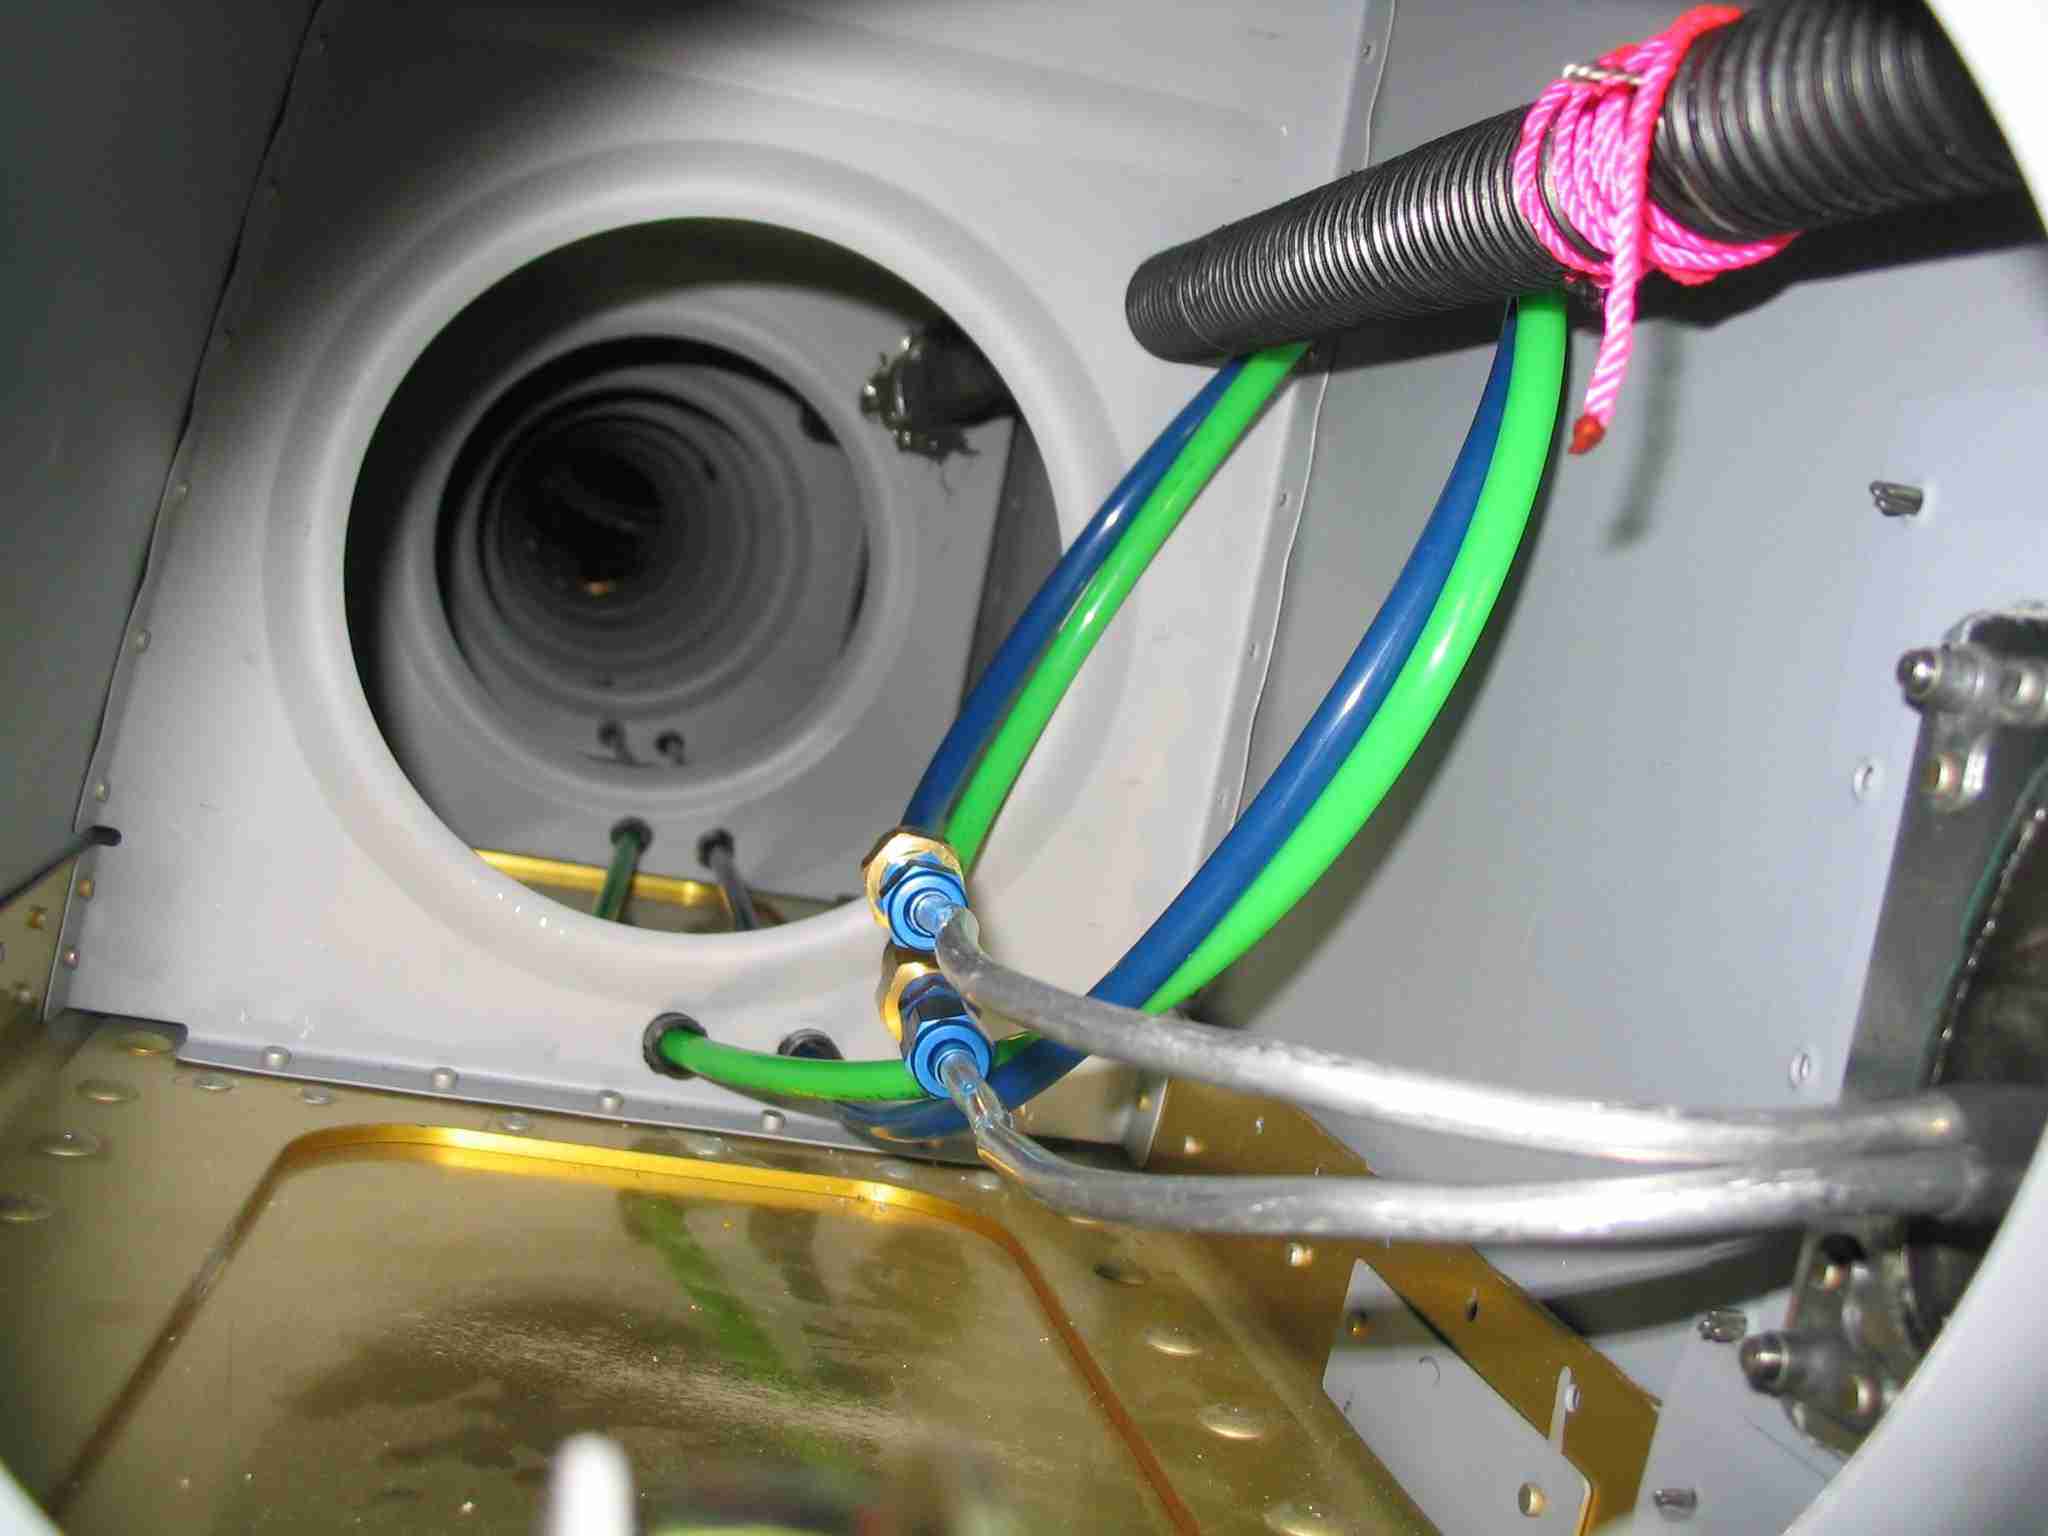
The second avionics update for my store bought -6 had me install an OAT probe close to the aileron bellcrank access on the right wing.

There are several ways to do this, the one used here was "cheap" and required awkward gymnastics... why are my arm and fist joints where they are and not where required for the task I ask ;)

In a nutshell:
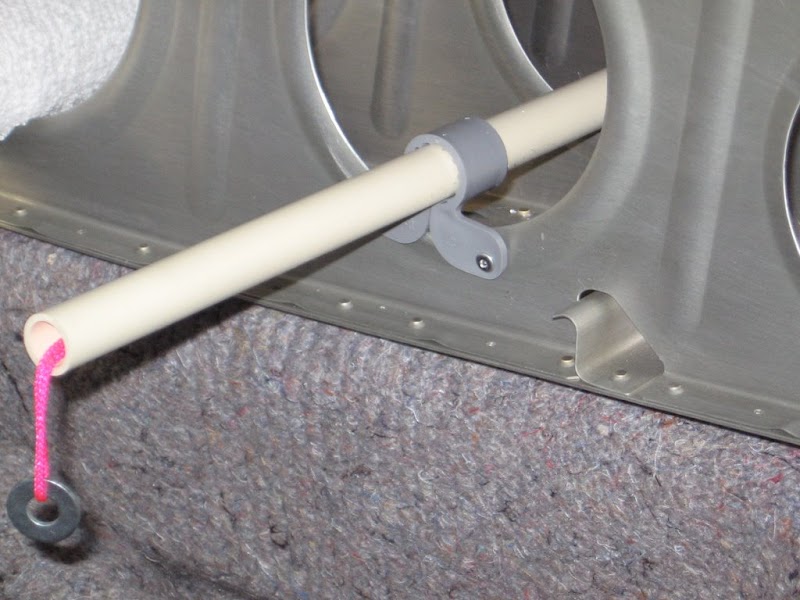
- had some leftover conduit as used when I built the -4 (just about 30 years ago...), only 4mm i.d. but plenty for the wire used
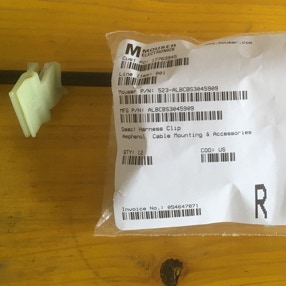
- the search engine is your friend and Mouser has exactly what I was looking for: Harness Clip, Mouser P/N 523-ALBCBS3045909. Right size and enough clamping pressure
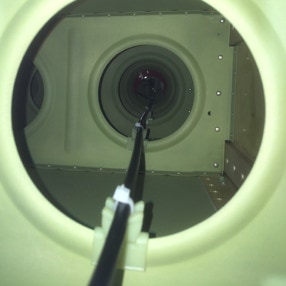
- gain access to the ribs, e.g. remove the right seat and panels below, remove the aileron boots, remove the 2 bolts holding the right aileron pushrod and push it to the other side, and open the right aileron bellcrank access panel
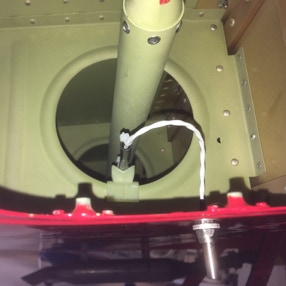
- clip the clips on the ribs: for the hard to reach middle ribs, precisely measure the between ribs distance, then drill/dremel the cavities for the clips on a 2x1". Attach the conduit held to the clips by plastic ties onto that piece of wood, secure with some thin masking tape. Insert that contraption from the access panel side, adjust and slightly hammer the 2x1" down and remove it. For the rest of the clips, try retracting all muscles and bending the bones of your arm to reach the clips on the ribs from inside the fuse and the access panel...
- reinstall everything and check the clearance between the aileron pushrod and the clips

img_8438-286.jpg

img_8448-286.jpg

img_8458-286.jpg
 
I installed the black stuff Vans sells in the designated location before riveting bottom skins. No problem bucking rivets. Adding a dollop of proseal at each intersection was easy. Just reach in with a glob on a popsicle stick. All it does is prevent the conduit from vibrating.

I did the exact same thing. It is a challenge getting it started and it takes a good tug to get it to pull through. It also makes a horrible noise but didn't damage anything.

Here is a picture. (The pitot and AoA lines were just being test run and the service loop was later pulled out.)

(Click to enlarge)

From my website:
To make sure all wing rib conduit holes line up I made the simple template on the left. Take one rib, measure and mark the position of the conduit hole as per Van's instructions. Drill the hole with #40 (or #30) drill. (The big hole on the left was just a test hole to make sure the conduit would fit, so ignore it.) Mark the template with arrows, one pointing up, and one pointing to one corner. Hold the template in place with the marked corner touching the big lightening hole and the bottom against the bottom of the rib. Mark the hole on the template with a pen or center punch. Drill the #40 hole in the template and you are ready to start marking all of ribs.

(Click to enlarge)
 
QB conduit

What do people do with the QB wings? I don't suppose it comes with conduit.

I thought QB wings had no bottom skins. Or maybe it's just the outboard bottom skins. Anyway, just drill the hole with a long bit and start yanking. Put on some ear protection, cuz it make a horrible noise.
 
I thought QB wings had no bottom skins. Or maybe it's just the outboard bottom skins. Anyway, just drill the hole with a long bit and start yanking. Put on some ear protection, cuz it make a horrible noise.

Exactly. I know of one guy who installed the conduit on a completed and flying -9A that he bought without removing the wings.

I believe he pulled the conduit from the wing root out to the tip, which is removable on his plane.

It was a "challenge" but he was able to do it.
 
Multiple Conduits?

When running conduit in the wings, some wires need to go all the way to the wingtip and others terminate earlier (a/p servo, pitot-heat, ...). Do you run a single conduit and cut exit holes midway, or do you run different conduits for the different distances?

Thanks,
-Ted
 
When running conduit in the wings, some wires need to go all the way to the wingtip and others terminate earlier (a/p servo, pitot-heat, ...). Do you run a single conduit and cut exit holes midway, or do you run different conduits for the different distances?

Thanks,
-Ted

I cut an exit hole in mine. I used the recommended material that Van's Aircraft calls out in the location that they recommend.
 
Larry/John,

Did you find it a tight fit running the conduit? Seems like it will take a while to get these installed using the called out hole diameter.

Yes. Just keep pulling. It will go.

Ditto for me and it sounds horrible when you pull it. Not only that, but you really have to tank on it but it will pull through without damaging any thing.

One suggestion, after you pull it through and before you run any wires, cut openings in it by where your roll servo and pitot heat wires will have to come out.
 
Soldering iron

When running conduit in the wings, some wires need to go all the way to the wingtip and others terminate earlier (a/p servo, pitot-heat, ...). Do you run a single conduit and cut exit holes midway, or do you run different conduits for the different distances?

Thanks,
-Ted

Use a pencil type soldering iron to drill a hole in the conduit.
 
Van's Tech wasn't excited about me drilling another hole in my ribs. They didn't say I couldn't, just didn't like the idea. So, I used SpringFast flexible grommets and Van's conduit. I contacted SpringFast and they stated that I could use as little as 1/3 diameter of a circle and the grommet wouldn't move. I used about 1/2 diameter (look hard on second rib) on the internal ribs and a full grommet on each end rib. Clears bellcrank, servo, pushrods, etc. with ease. Conduit is yet to be trimmed.

 
I ran separate conduits for my a/p servo and lights. I wanted to make sure I had separation for possible strobe interference.
 
I'm seeing two options for running the conduit. Option 1 is to drill holes in the ribs and run it through the holes. Option 2 is to fabricate small brackets from aluminum angle for adel clamps or use a joist hanger (similar concept). Is one method preferred over the other? I can see pros and cons to both methods. Thoughts?
 
I'm seeing two options for running the conduit. Option 1 is to drill holes in the ribs and run it through the holes. Option 2 is to fabricate small brackets from aluminum angle for adel clamps or use a joist hanger (similar concept). Is one method preferred over the other? I can see pros and cons to both methods. Thoughts?

Small brackets don't seem to weigh much but as you'll find out once you're done, every little bit adds up in the end. You'd wish you used as little additional weight as possible because all it does is eat up your useful load later.
 
Holes

Drill the holes and pull the conduit if you want it. Lots of builders drill holes, install snap bushings and pull a string. I wanted the conduit but I do weigh stuff every time I "weigh" a decision.:D
 
Back
Top