Mike S
Senior Curmudgeon
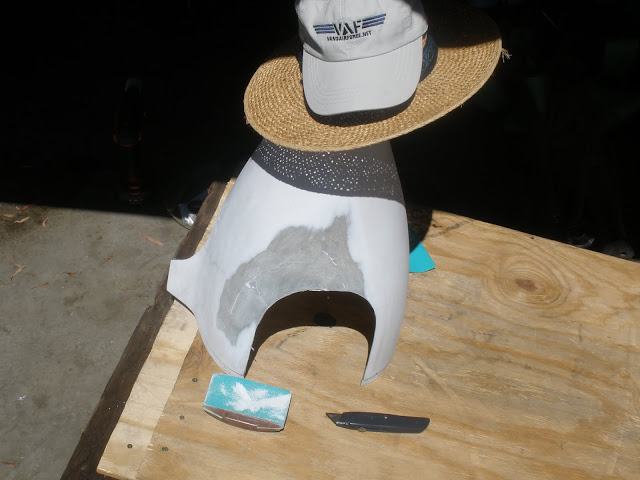
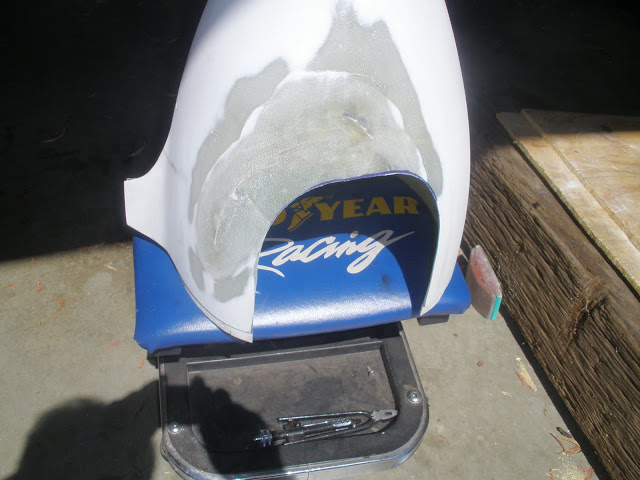
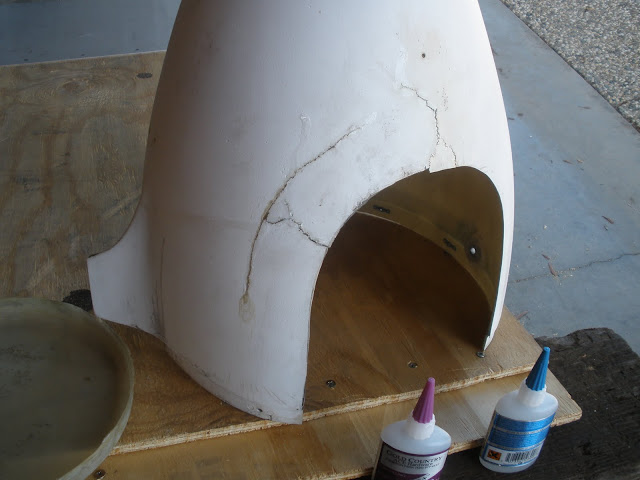
I did a bit of a carrier landing a while back, and cracked one of the wheelpants when the tire bulged a bit too much and caught the edge of the pant.
Knowing that many of the folks here at VAF are a bit put off by the thought of working fiberglass, I thought I would document the repair process, and maybe help someone out in the future.
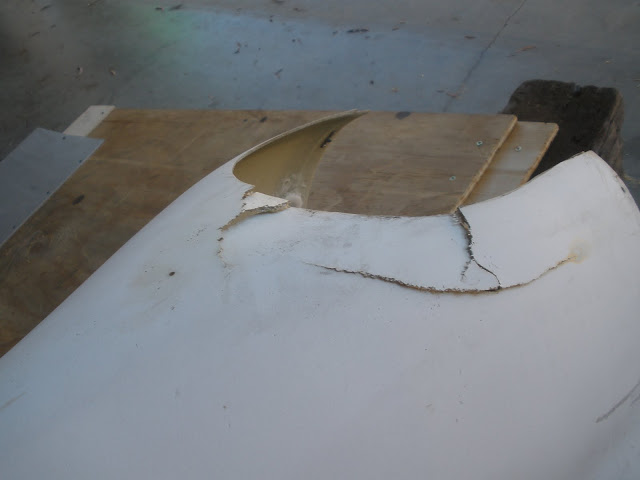
As can be seen here, the damage went aft of the internal bulkhead. (and luckily the bulkhead was loosened up pretty good, so I removed it for the repair)
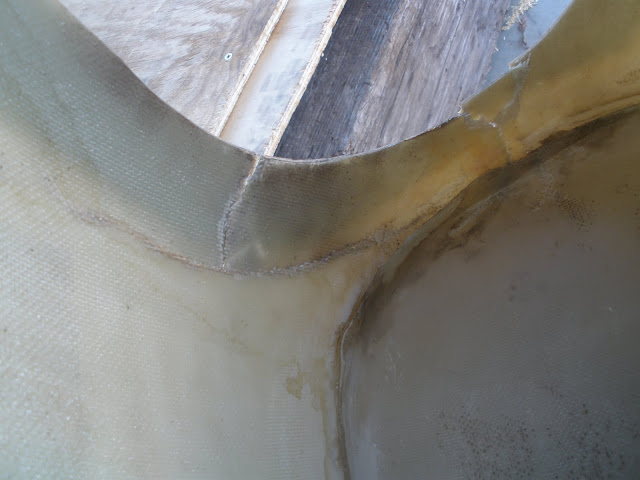
I used some CA glue from the local hobby store to put the pieces back in place as best as I could-----not perfect by any means, but all I am trying to accomplish is making the part steady enough to do the needed fiberglass work inside the pant.
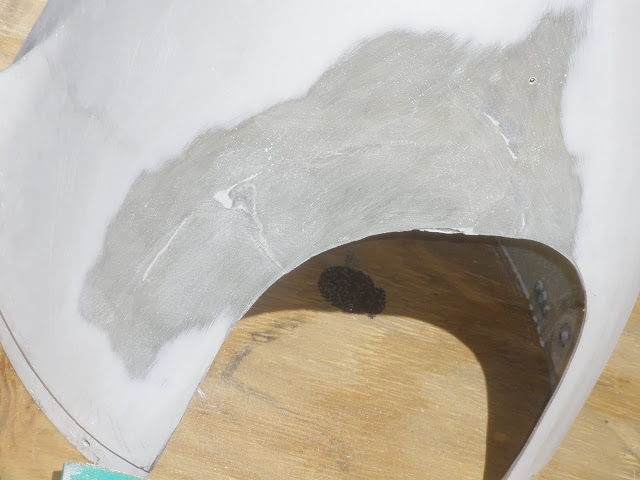
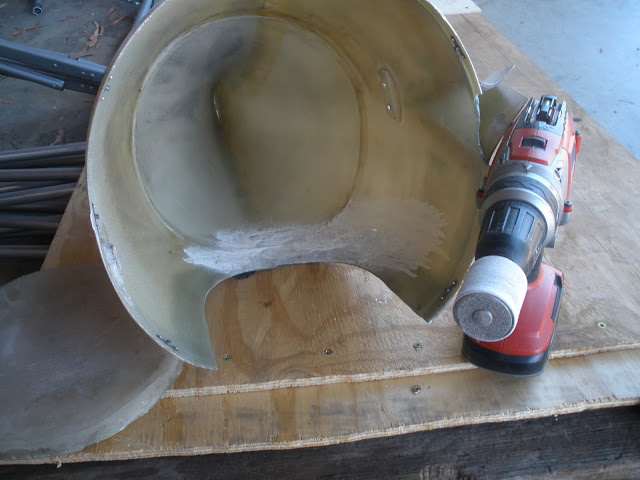
Next I used a cordless drill and a sanding drum to smooth up the area of the repair, and to break the surface of the fiberglass to give it some "tooth" for the repair to stick.
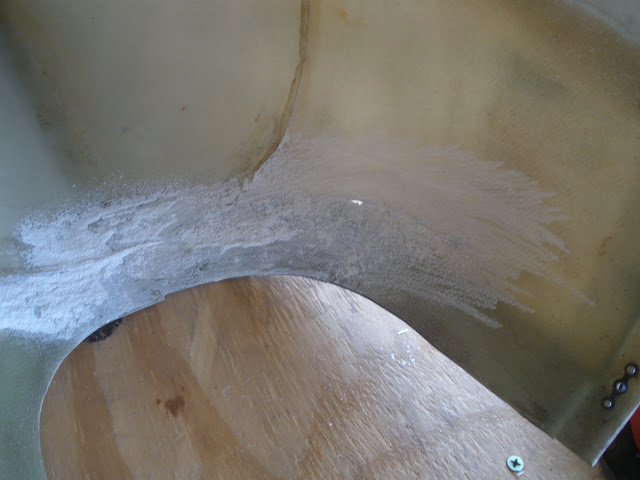
I used an air gun to blow out the sanding dust, and wipped things down with MEK, then I mixed up a bit of epoxy resin. I also made up a small amount of resin and flox to use for leveling out any remaining roughness, and to fill any holes or cracks.
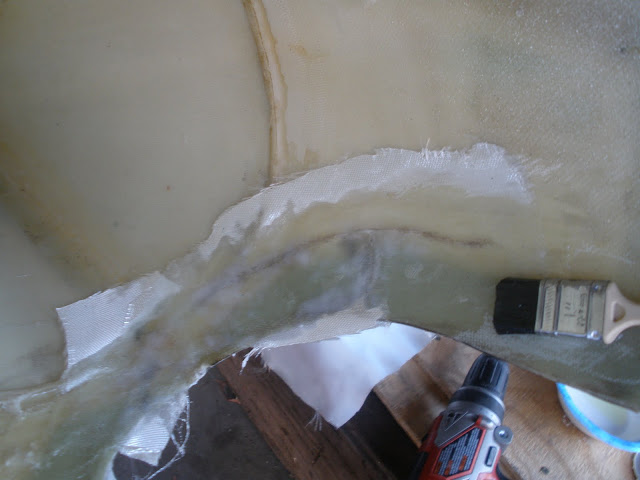
Here you can see the flox in place, it doesnt have to be smoothed out perfectly, as the next step will take care of that.
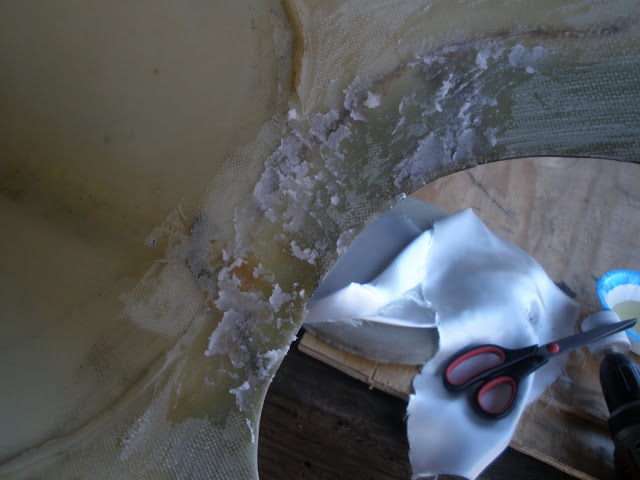
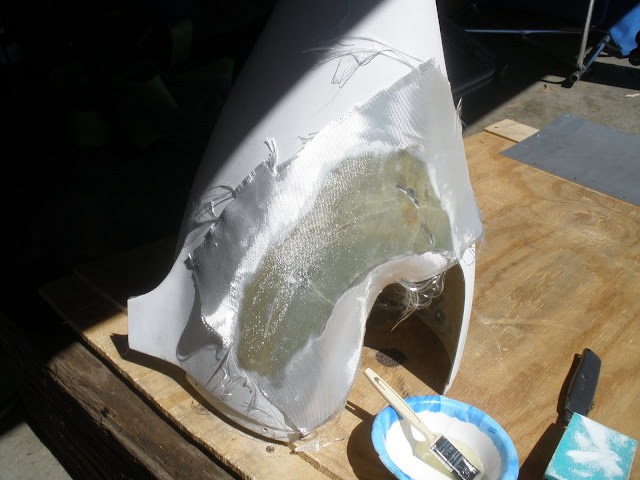
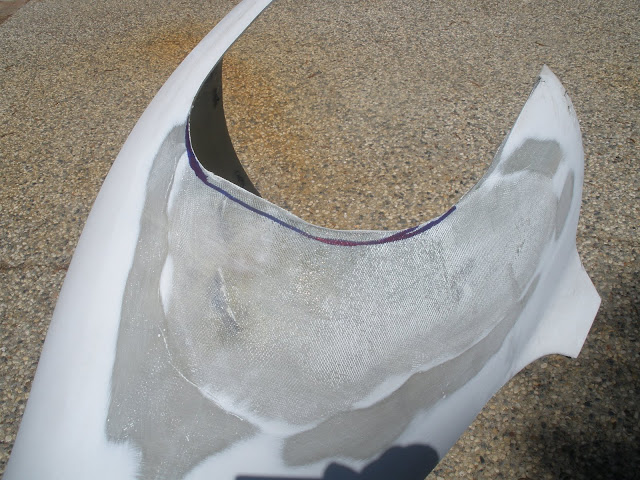
First layer of cloth laid directly over the flox---you can see there is enough resin there to start wetting out the glass already.
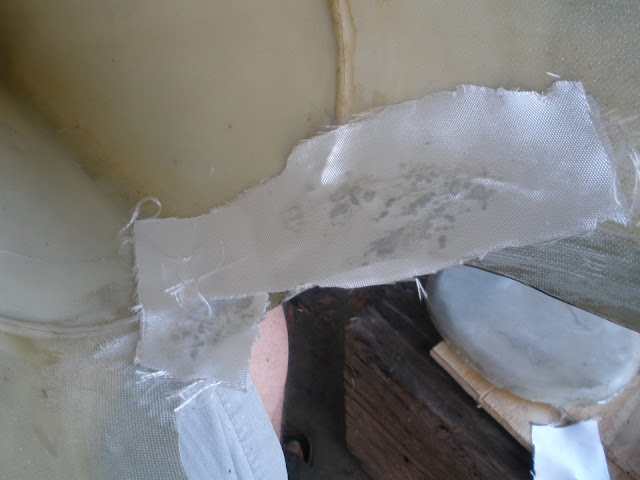
Here I have added a bit of resin, and gotten the cloth wetted out well in the repair area. The excess cloth is just left alone for now, will take care of it later. Note the paint brush with half of the bristle length cut off, this is to stiffen up the brush when "stippling"-----jabbing the brush straight on to the cloth to drive out any air bubbles, and get a good adheasion to the layer below.
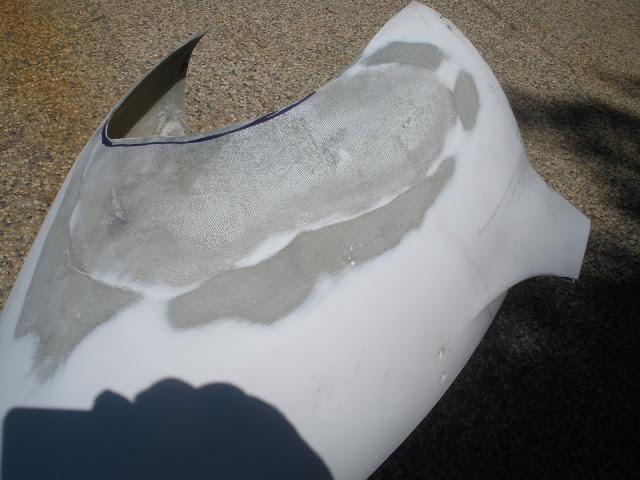
Second layer of cloth. Again, dont be concerned about looks, extra will be trimmed later.
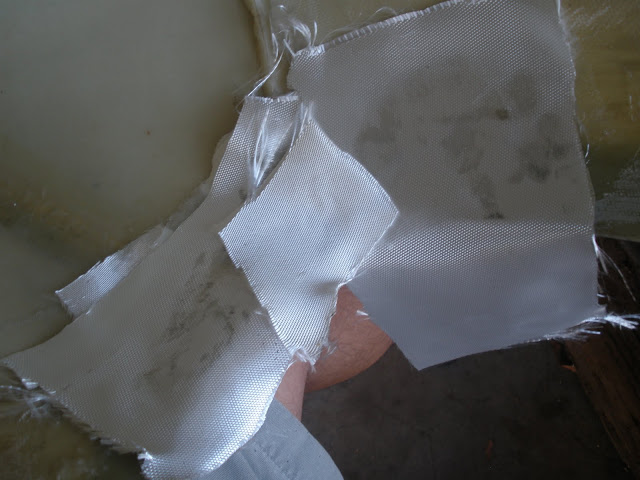
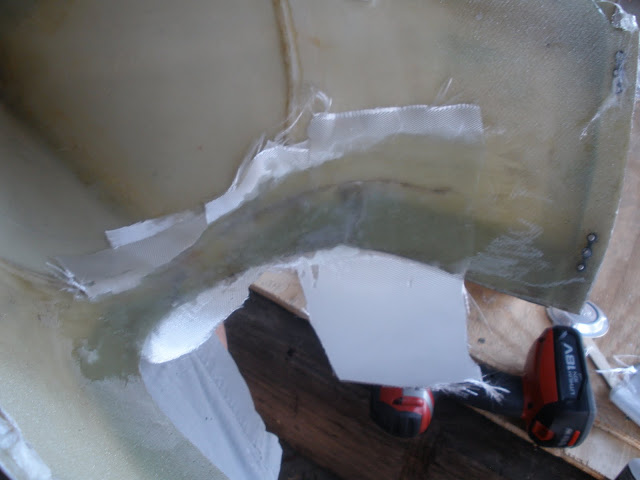
And finally the third ply of cloth is down, and wetted out. I will let it set over night to harden.
Knowing that many of the folks here at VAF are a bit put off by the thought of working fiberglass, I thought I would document the repair process, and maybe help someone out in the future.
As can be seen here, the damage went aft of the internal bulkhead. (and luckily the bulkhead was loosened up pretty good, so I removed it for the repair)
I used some CA glue from the local hobby store to put the pieces back in place as best as I could-----not perfect by any means, but all I am trying to accomplish is making the part steady enough to do the needed fiberglass work inside the pant.
Next I used a cordless drill and a sanding drum to smooth up the area of the repair, and to break the surface of the fiberglass to give it some "tooth" for the repair to stick.
I used an air gun to blow out the sanding dust, and wipped things down with MEK, then I mixed up a bit of epoxy resin. I also made up a small amount of resin and flox to use for leveling out any remaining roughness, and to fill any holes or cracks.
Here you can see the flox in place, it doesnt have to be smoothed out perfectly, as the next step will take care of that.
First layer of cloth laid directly over the flox---you can see there is enough resin there to start wetting out the glass already.
Here I have added a bit of resin, and gotten the cloth wetted out well in the repair area. The excess cloth is just left alone for now, will take care of it later. Note the paint brush with half of the bristle length cut off, this is to stiffen up the brush when "stippling"-----jabbing the brush straight on to the cloth to drive out any air bubbles, and get a good adheasion to the layer below.
Second layer of cloth. Again, dont be concerned about looks, extra will be trimmed later.
And finally the third ply of cloth is down, and wetted out. I will let it set over night to harden.
Last edited: