
Van's Air Force
You are using an out of date browser. It may not display this or other websites correctly.
You should upgrade or use an alternative browser.
You should upgrade or use an alternative browser.
Fiberglass Suggestions for Slider Windscreen
- Thread starter larrynew
- Start date

Toobuilder
Well Known Member
JMHO, but if you want an exact fit at this critical joint, lay it up directly on the surface. I went with just 3 plies of carbon so I could keep the buildup razor thin, but still stiff.
Frank Smidler
Well Known Member
Why?
I layed it up in place, and it came out great. I think you are overthinking it. You will just be adding work and get a poorer fit if you make it off the airplane.
I layed it up in place, and it came out great. I think you are overthinking it. You will just be adding work and get a poorer fit if you make it off the airplane.
hgerhardt
Well Known Member
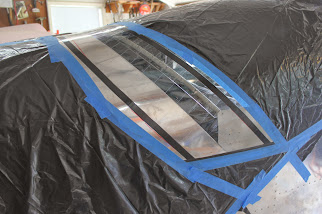
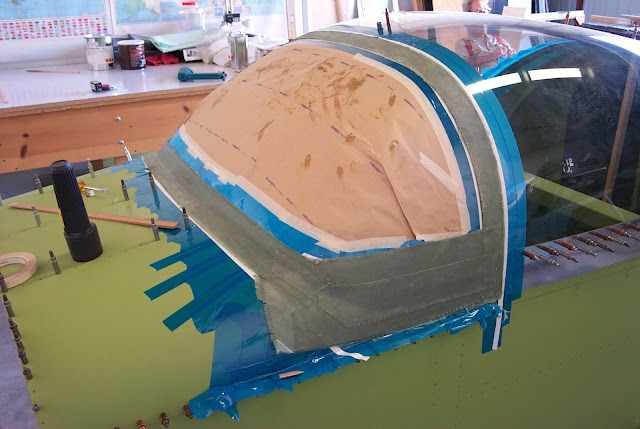
I made both the rear skirt and front windshield fairings that way. Makes it easier to get a nice symmetric and sharp edge on the plexi. Just rivet/glue with Proseal the thing on. I used clecos to hold the fairing to the plexi while the Proseal cured and then filled the #40 holes with more Proseal afterwards.
Unfortunately I didn't get a pic of the tape underlayment before I laid up the glass, so this is after I pulled the fairing off. The white tape is for the end-of-part witness mark to cut to.
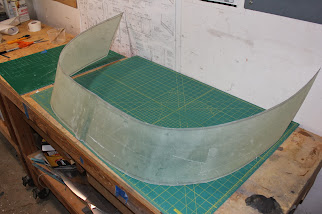
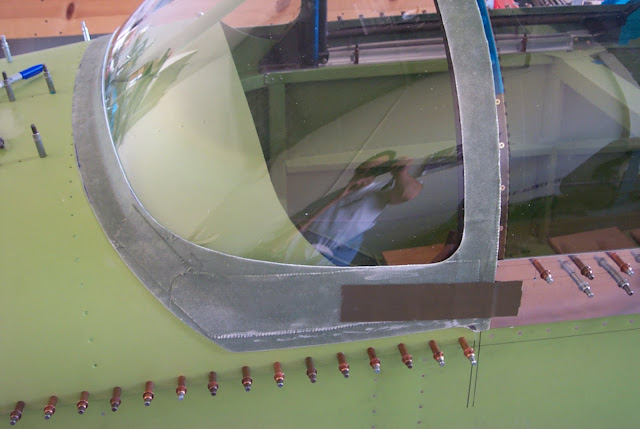
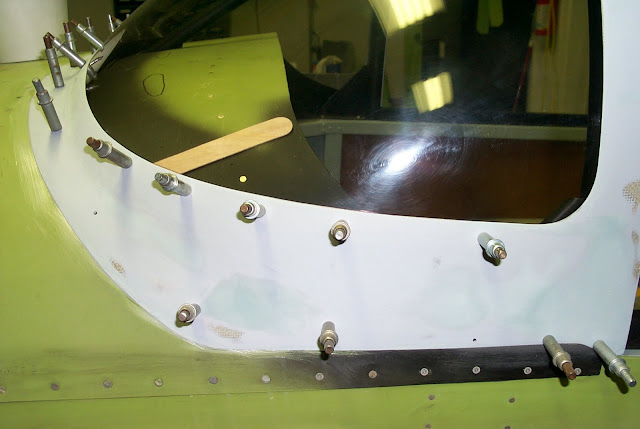
After perimeter trim:

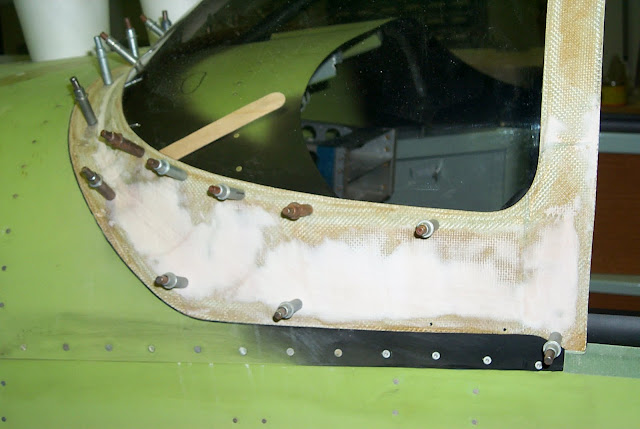

Unfortunately I didn't get a pic of the tape underlayment before I laid up the glass, so this is after I pulled the fairing off. The white tape is for the end-of-part witness mark to cut to.
After perimeter trim:
larrynew
Well Known Member
I made both the rear skirt and front windshield fairings that way.
That's exactly what I was thinking, thanks for the pictures. I layed up the rear skirt the same way including the tape witness. I just wasn't sure if there was something I wasn't seeing about the front that would make it a bad idea.
BSwayze
Well Known Member
Either way will certainly work, Larry. But my vote also goes to just laying it up directly on the windscreen. There's a reason Vans recommends doing it that way. I would guess most of the vast number of RV's that are finished and flying were done Vans' way.
Advantages, as I see it:
Structural strength. If you do the layups directly on the windscreen, in place, you'll avoid drilling all those unnecessary holes in the plexi. Even though you'll fill them later, I still see a risk of cracking, either now or later. And what about the final structural strength of a windscreen shot full of holes? Even though they're filled, is that as strong as an undrilled one?
You're going to use proseal? Really? Is that as strong as bonded layups? I would at least be considering the question. Along with the effects of temperature changes. Expansion, contraction. The pressure of the windblast on the windscreen. I'd want mine firmly bonded in place, and I wouldn't want holes in it either. JMHO
Speaking of holes, you may not like the appearance of your fairing from inside your cabin when you're finished. Remember, you'll see through the plexi from the inside. Every time you climb in and sit down, you're looking at the back side of your fairing. And even though you fill those holes, you'll see every one of them from inside. You may not have thought of this because it's not an issue with the rear fairing.
Less work. Again, JMHO, I've only built one. I do think you're overthinking this.
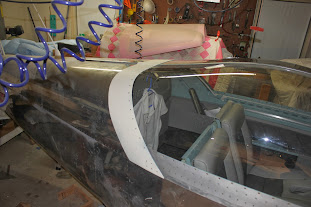
A fairing finished in place can be finely finished to fit so well, the smooth transition is unmatched. When it's painted you won't even see it. Just my opinion, I've only done one. It's not that hard. If you mask off the plexi with a piece of electrical tape and sand down to the tape, when you pull it off you'll have an edge so thin it will hardly catch your fingernail. And on the forward edge, you feather it out so you can't even see it when it's painted. There's no way to match a fit like that building it on the bench. You can see how mine turned out. I'll put in a picture here. Mine's a tip-up, but the ideas are the same. It's not that hard. I had never done this before.
Either way you go, good luck with it. I looked at your website and I'm very impressed with your work!")

Advantages, as I see it:
Structural strength. If you do the layups directly on the windscreen, in place, you'll avoid drilling all those unnecessary holes in the plexi. Even though you'll fill them later, I still see a risk of cracking, either now or later. And what about the final structural strength of a windscreen shot full of holes? Even though they're filled, is that as strong as an undrilled one?
You're going to use proseal? Really? Is that as strong as bonded layups? I would at least be considering the question. Along with the effects of temperature changes. Expansion, contraction. The pressure of the windblast on the windscreen. I'd want mine firmly bonded in place, and I wouldn't want holes in it either. JMHO
Speaking of holes, you may not like the appearance of your fairing from inside your cabin when you're finished. Remember, you'll see through the plexi from the inside. Every time you climb in and sit down, you're looking at the back side of your fairing. And even though you fill those holes, you'll see every one of them from inside. You may not have thought of this because it's not an issue with the rear fairing.
Less work. Again, JMHO, I've only built one. I do think you're overthinking this.
A fairing finished in place can be finely finished to fit so well, the smooth transition is unmatched. When it's painted you won't even see it. Just my opinion, I've only done one. It's not that hard. If you mask off the plexi with a piece of electrical tape and sand down to the tape, when you pull it off you'll have an edge so thin it will hardly catch your fingernail. And on the forward edge, you feather it out so you can't even see it when it's painted. There's no way to match a fit like that building it on the bench. You can see how mine turned out. I'll put in a picture here. Mine's a tip-up, but the ideas are the same. It's not that hard. I had never done this before.
Either way you go, good luck with it. I looked at your website and I'm very impressed with your work!
There are ups and downs either way, but I suspect (1) layup on the airframe followed by (2) finishing off the airframe, then (3) adhesive attachment is easier for the novice.
Regarding adhesion...epoxy has poor peel strength, in particular when the bond surface is something slick like plexiglass. I think you'll find quite a few adhesives are stronger in this regard. Note that the canopies themselves are often bonded to a fiberglass canopy frame with a structural adhesive, even if later the outside gets a glass layup for cover and trim.
You will see the adhesive from the inside unless you mask and spray a coverup trim, or build a trim cover. Or you can build a flox flange around the inside of the windshield as is done with a Showplanes canopy, in which case all the bonding is to the outside of the flange.
Rear skirt layup
Larry,
How did you do the layup for the rear skirt? I've spent hours fussing with the metal skirts and give up. Particularly, how did you bridge the gap from the canopy to the fuselage? Also, did you add the washer spacers under the delrin blocks when you did it? Any more pictures? Thanks for the advice!
larrynew
Well Known Member
Larry,
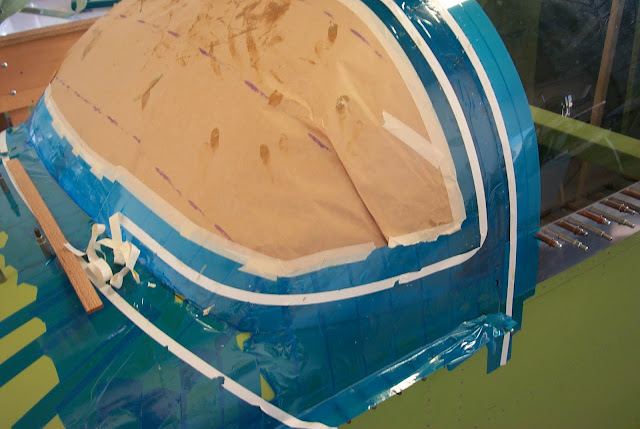
Particularly, how did you bridge the gap from the canopy to the fuselage?
Bruce,
With the canopy in-place, I used heavy clear packing tape to bridge the gap. Electrical tape outlined my planned cut lines. Paste wax was my mold release. More sanding but much easier than the metal skirts. The photos in the first post are the only ones I have of the process. Keep looking on VAF for the real talented fiberglass folks.

