What's new
Van's Air Force

Don't miss anything! Register now for full access to the definitive RV support community.

RV-3: Junior Tries on His Wings!

Ironflight

VAF Moderator / Line Boy
Mentor
Ah, they grow up so fast! It seems like only a few months ago that our RV-3 project (affectionately known around here as ?Junior?) tried on his gear legs for the first time. And now, all of a sudden ? he sprouted wings!

IMG_6089.JPG


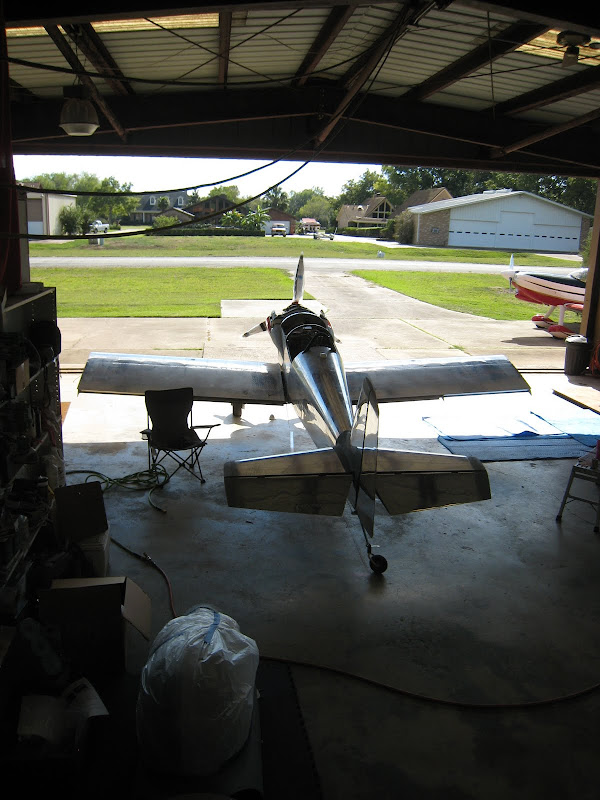
Even though we are building in our backyard hangar, we have been working towards getting everything possible complete on the fuselage before mounting the wings because ti meant finding temporary hangar space for one of the flying airplanes in order to make room for a new RV. Fortunately, we have generous neighbors, and Mikey and the Val have assured space just a few doors down, so this morning it was time enlist a little help and address one of my greatest fears on this project?.would the Quick build wing fit the slow-build fuselage?! With a number of things that need to be built ?to fit? in the area of the fuselage/wing intersection, we know that we?ll be pulling the spars out a few times yet, but we wanted to get the ?big fit? out of the way and make a few measurements.

It really only took about two hours from the time our crew showed up until we broke for pizza with the wings fitting nicely. The left wing went on first, and fit the center section and the rear spar stub perfectly.

IMG_6052.JPG


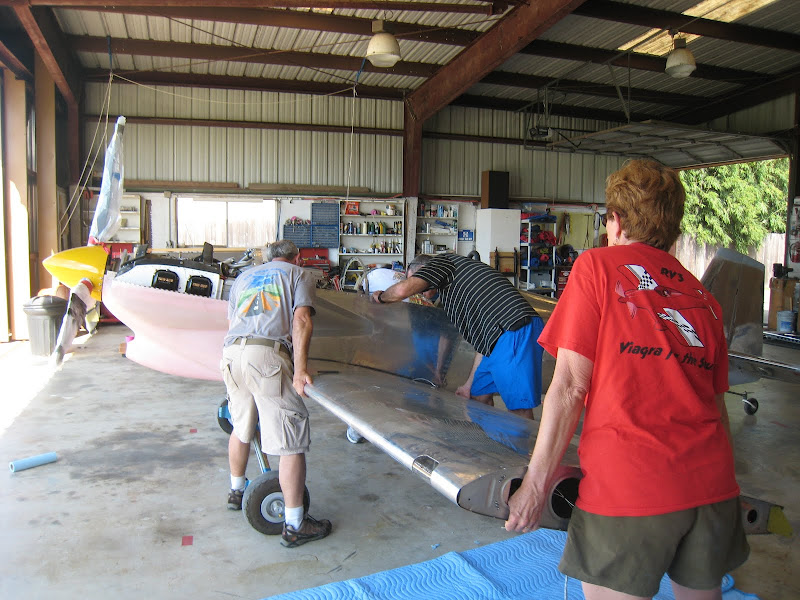
How many hands does it take to fit a few temporary spar pins? Just enough to whack someone?s finger with a hammer!

IMG_6073.JPG


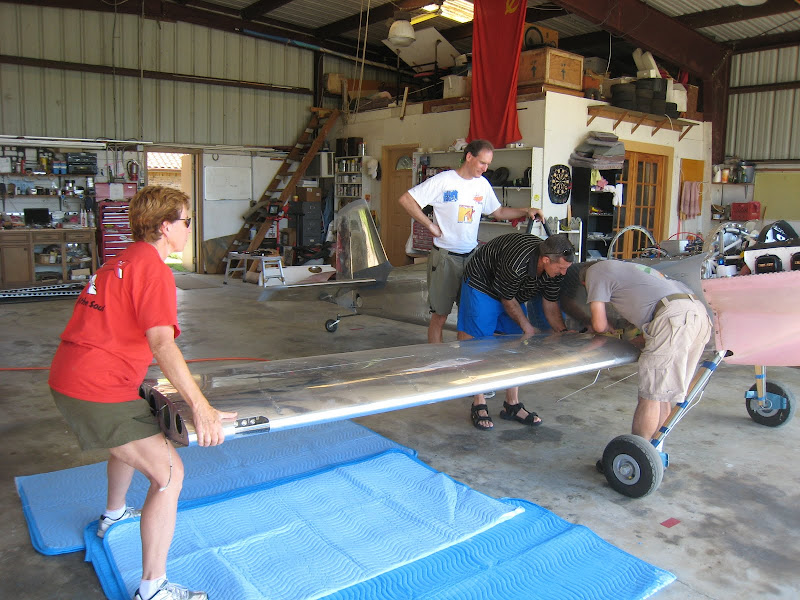
The right wing went on next with similar results. Later measurements of sweep indicated that we needed to cut about 1/8? off the rear center spar, but I expected this, as I left it longer than the plans had shown. I wanted to maintain maximum edge distance for the critical rear spar bolt, and achieved that goal.
IMG_6062.JPG


We had the wings off two more times as the afternoon wore on, measuring sweep and incidence each time, making minor adjustments. Junior gets the hangar alone tonight, as he is sitting on alignment lines and e didn?t want to disturb anything for a few follow-up measurements.

IMG_6071.JPG


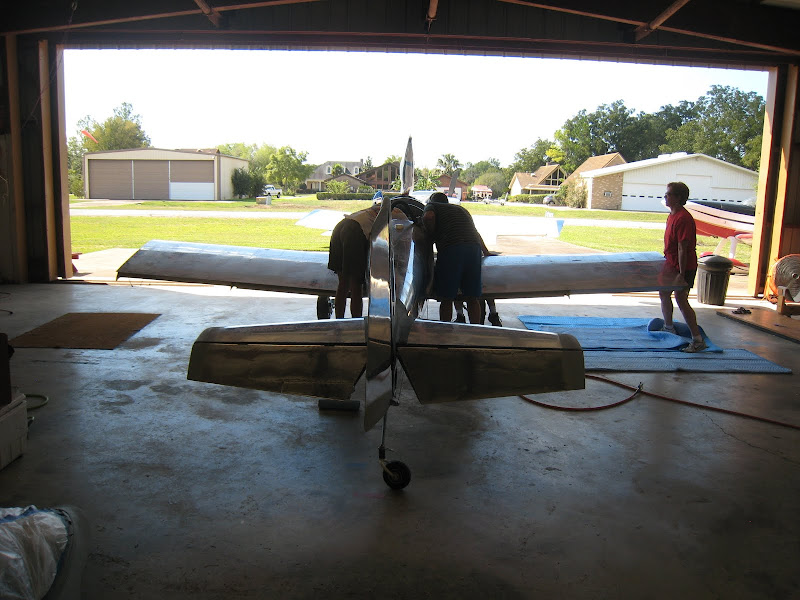
Next up is fitting the fuel lines to the tanks, hooking up wing wiring, and fitting the flaps. Then it?s on to intersection and flap fairings. Oh?and we?ve got to get that registration paperwork in to the FAA!

Paul
 
Good job!

Congratulations, Paul and Louise. I'm looking forward to the next major status report!
 
Does that tee shirt say Viagra, GOOD FOR THE SOUL, with an RV above that? I gotta have one of those,,,,,,and in red. Dave
 
Notes for Posterity....

A few detailed notes on hanging the wings on the RV-3:

1) The wings are pretty light ? one person can easily hang on to the tip while another guides it in at the fuselage. The wing-tip holder can rock the tip up and down to facilitate the spar sliding in to the center section.

2) I am really glad that when I built the center section, I took it over to the wings in the rack and slid it on to each spar stub. Knowing that the slot was the right width was about the only thing that kept me from going nuts with worry about it fitting over the past two years. And I still worried.

3) We have slid the wings in and out about five times to work on fitting fuel lines, drill the holes for the bottom skin overlap and fit/fabricate the inboard fuel tank support bracket. A little grease on the spars before the first insertion has made this really pretty easy. The only thing that takes any real care at all is making sure that the belly skin overlap gets under the wing root when it slides in.

4) The airplane shows no tendency at all to tip over with only one wing in place.

5) We made up eight 3/8? ?pins? from three-inch hardware-store bolts by grinding the threads off and making them into bullet points. I had a bunch of similar ?? pins I?d made for the same job on my RV-8. We used four of the ?? pins in the two spacer bock holes near the fuselage skin, and four of the 3/8? pins for the upper and lower inboard holes on each wing. These 8 pins are more than adequate to hold the wings for fitting. All of the matched-holes in the center section have lined up perfectly.

6) We haven?t installed a single ?final? bolt yet ? no reason to scar those up until we are sure the wings are staying on ? probably in a couple of days. We?ll probably do the dry ice trick when we install them ? although I don?t know how much good it really does. Doesn?t cost much though!

7) To make access to the center section easy, we removed the forward top skin, instrument panel, fuel valve, fuel lines, stick, floor panels?anything that gets in the way of access to the spar. I designed the center console to allow access to all the spar bolts with this in mind ? if you?re doing custom things like this, don?t build yourself in to a corner!

8) The fuel lines form the tank to the fuel selectors are really, really, really short from the tank to the fuselage. I removed the previously-installed grommets, threaded them on to the removed fuel line, the put on the B-nut and collar before flaring the tube. The width of the clamp blocks on the flaring tool was the limiting factor in how short you can make the straight section coming out of the tank, and that is about the right length. I?ll reinstall the lines AFTER putting in all the spar bolts, and do it from inside, then pop the grommet in to place. The space between the fuel tank and the fuselage is much skinnier than the other RV?s. If we ever have to work on the sending unit, the tank (or wing) will have to come off.

9) The forward in board tank support brackets are free-form art projects, and the instructions hardly address them at all. I was glad to have the RV-8 manual and drawings for reference.

10) We adjusted wing sweep and incidence using plumb bobs and marks on the floor. Because I had left the rear stub spar slightly long, we had some forward sweep, and had to pull the wings out a couple of times, trimming an eighth inch at a time to get the sweep to zero. This left us with maximum edge distance.

11) Oh yeah ? rear spar bolt edge distance is hardly even touched on in the RV-3 instructions/drawings (considering how much it is emphasized in the more modern models). We drew a box with half-inch edge distance (it?s a ?? bolt) all the way around to make sure we were golden before drilling.

Paul
 
What he said...

Lookin reaaaal good.

Let me know how the dry ice works on the final bolts, I will be fitting mine next weekend. Also, I caved to your peer pressure and pulled my raven tank and fitted the christen. Im still trying to get the height finalized, but I'm optimistic!
 
Let me know how the dry ice works on the final bolts, I will be fitting mine next weekend. Also, I caved to your peer pressure and pulled my raven tank and fitted the christen. I'm still trying to get the height finalized, but I'm optimistic!

We installed the final bolt set today - took a couple of hours from start to having them all torqued. No real issues - in fact, it was probably easier than on the RV-8 (although there were more bolts!). We put the bolts in a box with a few pounds of dry ice, and put the box in the freezer for about 12 hours - they were nice and cold this morning. Louise took them out one at a time, and gave them a shot of lube - they all went in the holes pretty easily. We tapped most of them home with a small ball-peen hammer - nothing needed more than a little tapping. The more that were in, the easier the rest were to do. Since I haven't done it WITHOUT ice, I can't give you a comparison, but it worked fine with the dry ice.

We had to put two of the lower big bolts in from back-to-front because of the triangular ribs up front (they were in the way of the holes - only room for the nuts) Otherwise, everything went in front to back.

Paul
 
Did the dry ice last 'till the bolts were installed?

I'd have expected that the lube would freeze on the bolts upon application. Or were the bolts warming up so quickly at that point that it didn't?

Congratulations on growing wings, Junior!

Dave
 
Did the dry ice last 'till the bolts were installed?

I'd have expected that the lube would freeze on the bolts upon application. Or were the bolts warming up so quickly at that point that it didn't?

Congratulations on growing wings, Junior!

Dave

The block of dry ice lasted until the next morning - kept in the freezer of course. The lube didn't freeze on the bolts, and they were cold enough to freeze your flesh without gloves. We used a little LPS-1....I suppose other lubes might be too cold to work.

Paul
 
Back
Top