We’re in that stage of building on the RV-3 where everything is details. As fast as a can build a To Do list and post it on the shop door, I find myself penciling in other little things that I didn’t think about, and only came up with as I was staring at the project. Cross some off, add one or two – the other day the list went from three pages down to two, so we must be winning! Everything is headed towards finishing as much as possible before hanging the wings – it’s just easier to work on the fuselage when the wings are off, and we have some more fiberglass finishing to do.
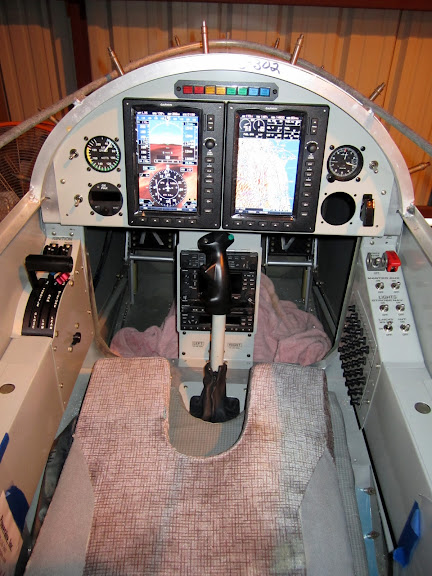
So here are a few completed cockpit finishing details. Te first is heat – we finally finished the Half-raven inverted oil installation, and that left room for both a heat muff and a heater box – so they’re now installed. Of course, that meant that I had to find a way to control the heat, and that was accomplished with a clever little gear-thingy I picked up used at Air Salvage of Dallas a couple of years ago. Turning the knob results in a push or pull on a Bowden cable, and voila – the heat comes on and off! Next to the heater knob is the switch for the heated seats – a little luxury that weighs less than a pound, and Oregon Aero incorporated when they built the cushions.
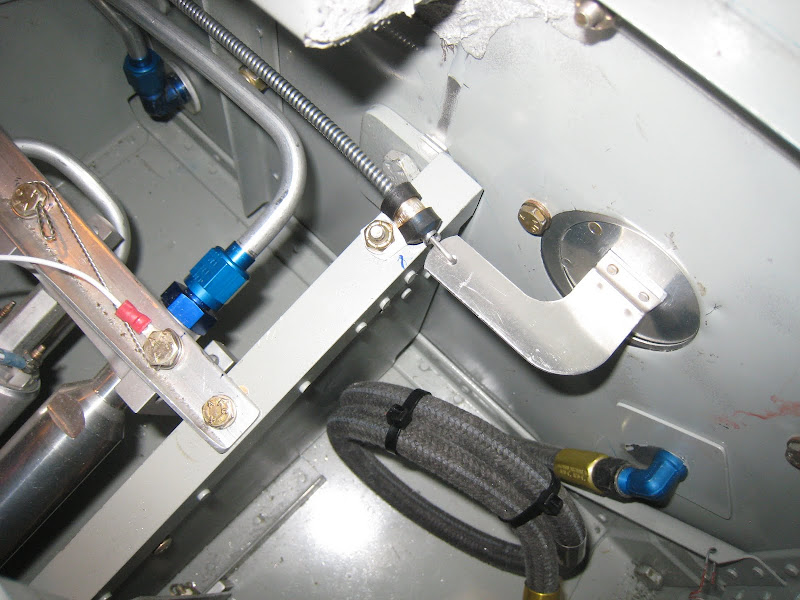
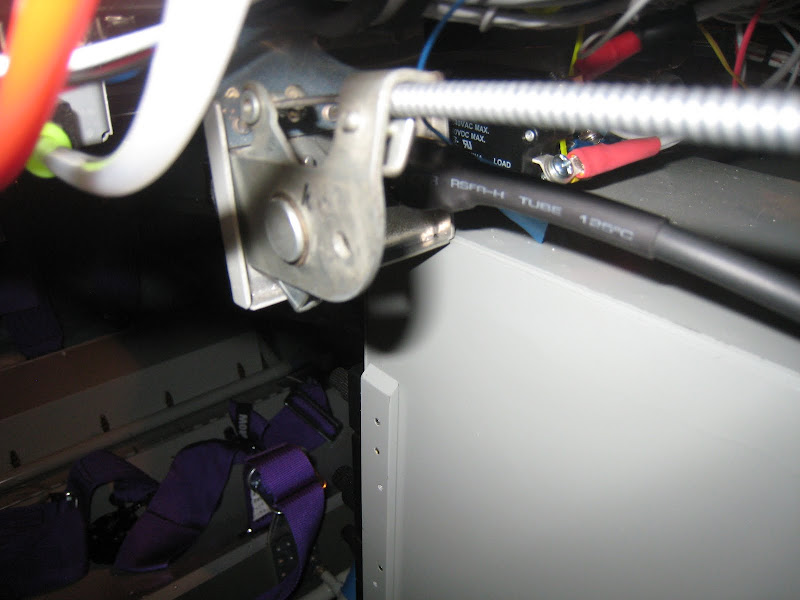
The Bowden cable is anchored to the firewall bracing rib – very convenient:
I’m not sure what certified airplane this little gear drive came ff of – but it was a steal at Air Salvage for $5.00:
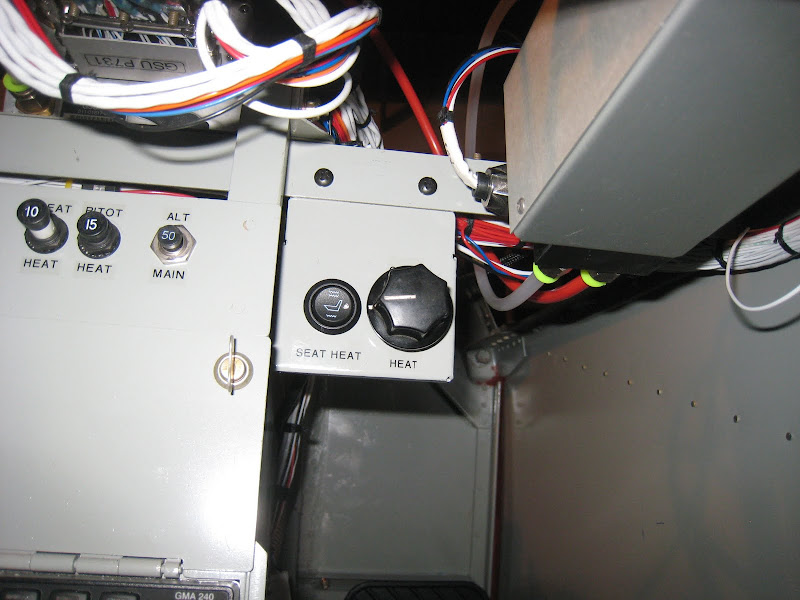
The “Environmental Control Panel” hides up above the pilot’s right leg, out of site, but easy to operate:
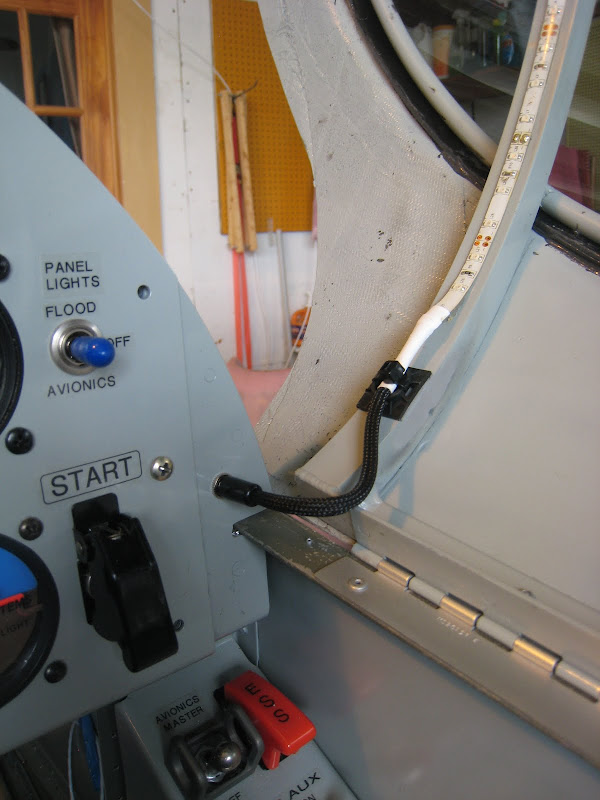
The next little project was a way to connect the LED strip that is glued on under the canopy bow (for instrument panel lighting) to power. Since I wanted the canopy to be removable for maintenance, I wanted a way to make a finished-looking disconnect that didn’t require reaching behind the panel. The answer was a little power disconnect plug and some small snake-skin to dress the wires.
Connected:
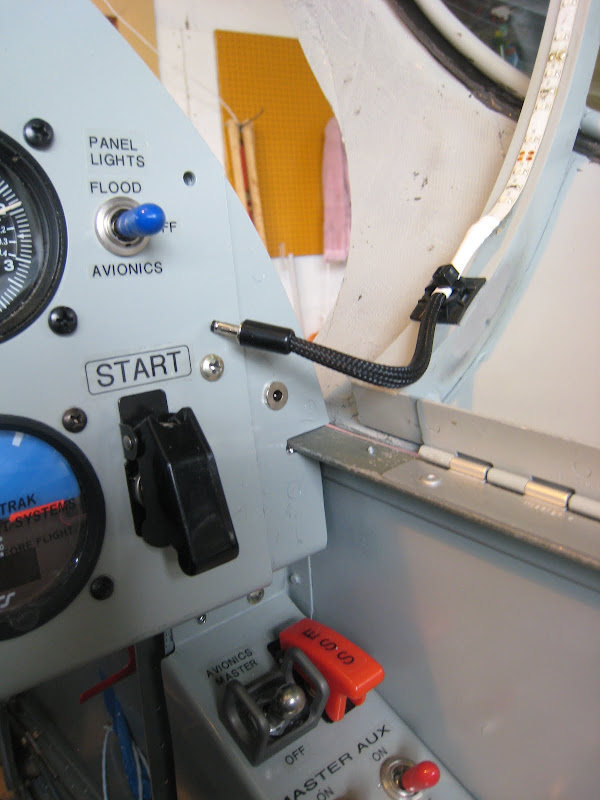
Disconnected:
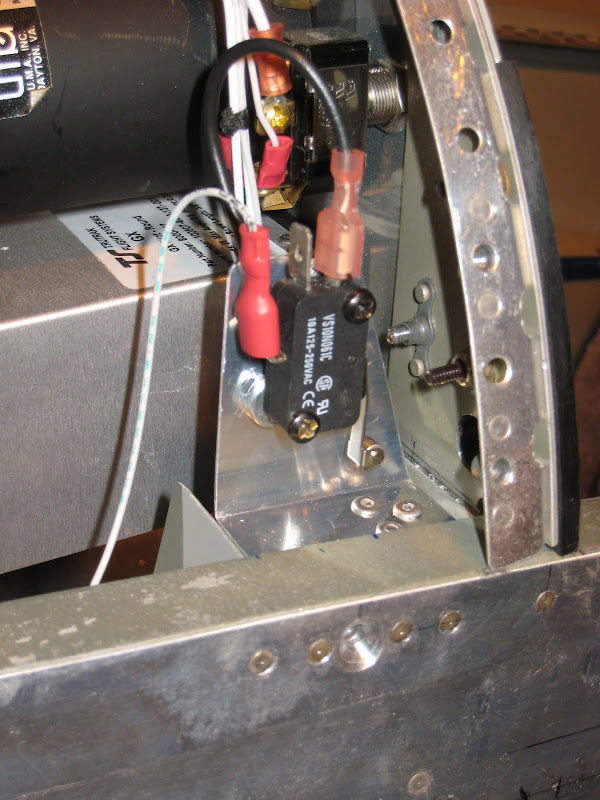
Next up was a canopy latch micro-switch – We have a panel-mounted annunciator to tell us if the canopy is unlatched. Hopefully, that should make it less likely that we try a canopy-unlatched flight! The plunger is depressed by the forward canopy latch pushrod.
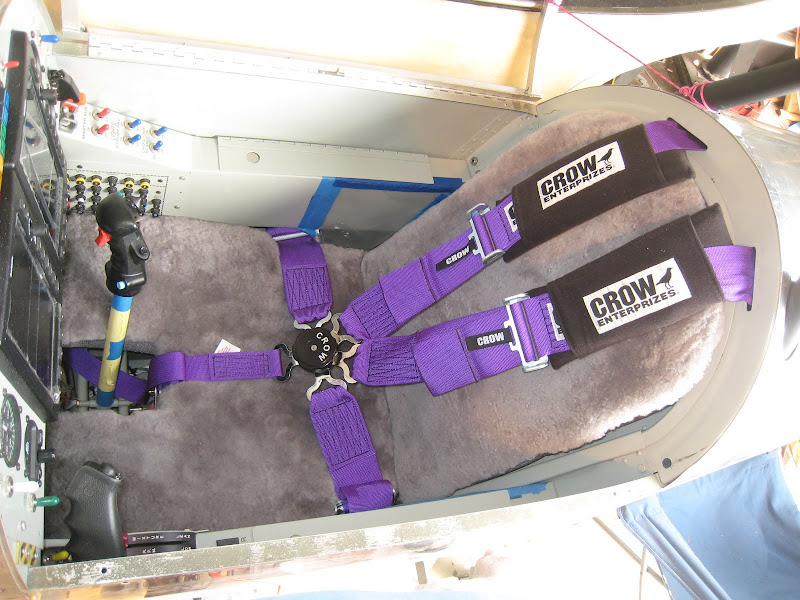
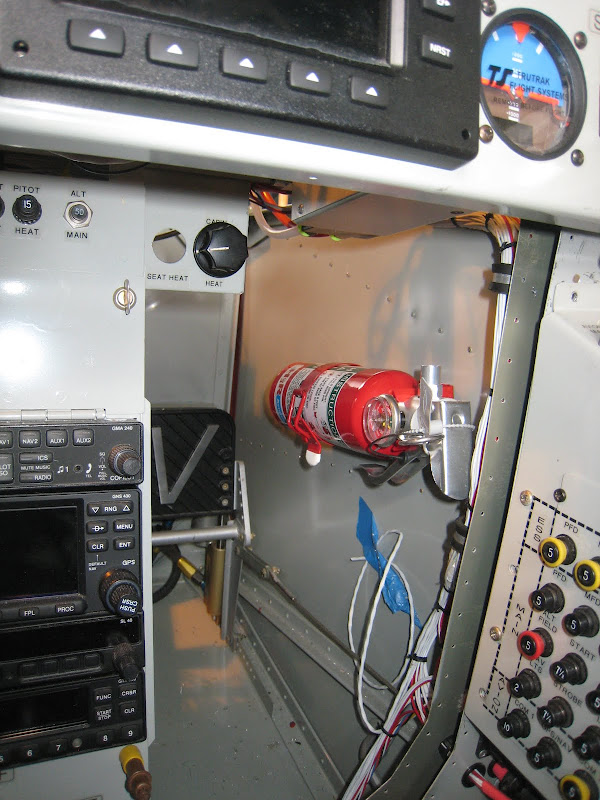
And lastly, we have been struggling to find a place to mount a fire extinguisher in the cockpit. Louise was sitting in the seat, trying out the view from the recently-unwrapped canopy, and the forward top skin was off, so I took advantage of the opportunity to try out a few ideas. Interestingly enough, mounting it to the side wall, with a reinforcing doubler inside the cheek cowl extension, doesn’t interfere with our leg or knee at all. A side benefit is that if you think you have a cabin electrical fire, you don’t have to do anything put pull the pin and squeeze the handle – the entire avionics area will be flooded with Halon. It’s also easy to reach if you need to evacuate on the ground to fight an exterior fire.
We’ll keep knocking things off the pre-wing-mate list, and sooner or later, we’re going to have to kick one of the children out to a neighbor’s hangar to make room for junior to spread his wings. Might be sooner rather than later….but who knows?
Paul
So here are a few completed cockpit finishing details. Te first is heat – we finally finished the Half-raven inverted oil installation, and that left room for both a heat muff and a heater box – so they’re now installed. Of course, that meant that I had to find a way to control the heat, and that was accomplished with a clever little gear-thingy I picked up used at Air Salvage of Dallas a couple of years ago. Turning the knob results in a push or pull on a Bowden cable, and voila – the heat comes on and off! Next to the heater knob is the switch for the heated seats – a little luxury that weighs less than a pound, and Oregon Aero incorporated when they built the cushions.
The Bowden cable is anchored to the firewall bracing rib – very convenient:
I’m not sure what certified airplane this little gear drive came ff of – but it was a steal at Air Salvage for $5.00:
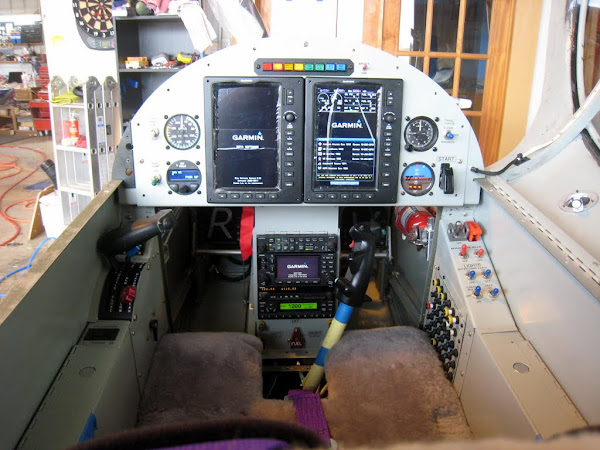
The “Environmental Control Panel” hides up above the pilot’s right leg, out of site, but easy to operate:
The next little project was a way to connect the LED strip that is glued on under the canopy bow (for instrument panel lighting) to power. Since I wanted the canopy to be removable for maintenance, I wanted a way to make a finished-looking disconnect that didn’t require reaching behind the panel. The answer was a little power disconnect plug and some small snake-skin to dress the wires.
Connected:
Disconnected:
Next up was a canopy latch micro-switch – We have a panel-mounted annunciator to tell us if the canopy is unlatched. Hopefully, that should make it less likely that we try a canopy-unlatched flight! The plunger is depressed by the forward canopy latch pushrod.
And lastly, we have been struggling to find a place to mount a fire extinguisher in the cockpit. Louise was sitting in the seat, trying out the view from the recently-unwrapped canopy, and the forward top skin was off, so I took advantage of the opportunity to try out a few ideas. Interestingly enough, mounting it to the side wall, with a reinforcing doubler inside the cheek cowl extension, doesn’t interfere with our leg or knee at all. A side benefit is that if you think you have a cabin electrical fire, you don’t have to do anything put pull the pin and squeeze the handle – the entire avionics area will be flooded with Halon. It’s also easy to reach if you need to evacuate on the ground to fight an exterior fire.
We’ll keep knocking things off the pre-wing-mate list, and sooner or later, we’re going to have to kick one of the children out to a neighbor’s hangar to make room for junior to spread his wings. Might be sooner rather than later….but who knows?
Paul
Last edited: