What's new
Van's Air Force

Don't miss anything! Register now for full access to the definitive RV support community.

Forming aluminum for a cooling outlet fairing

Regardless those speeds are outstanding

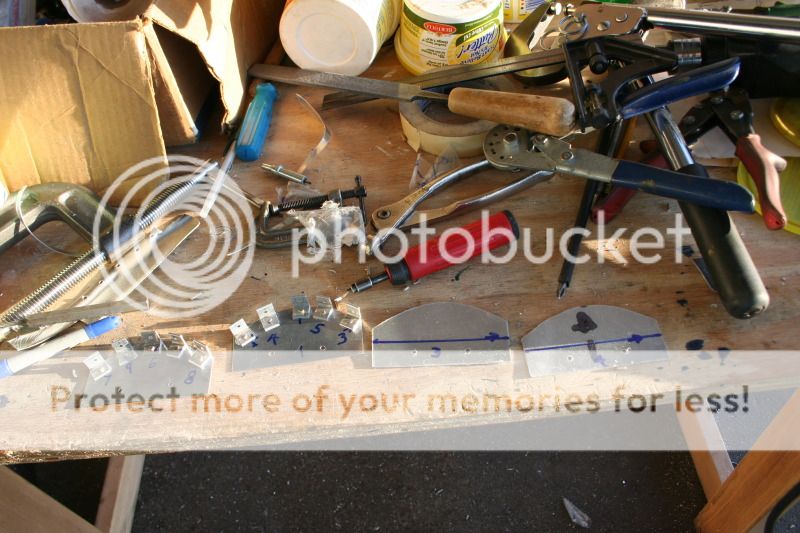
It was extremely windy today at Taylor and the ceilings were overcast at about 3k msl over the airport, lower in some other places. Mike Thompson and I were battling to avoid being last in the RV Blue Class. This time I beat him. He commented that he played the winds wrong but he didn't explain. Weather here is forecast to be severe tomorrow so when I found that the current conditions were modest IMC. I filed and departed without food or the award ceremony. I had a Sausage Biscuit, hash browns in a paper sleeve and black coffee from our local McDonald's on the way to the airport at 5:30 this morning and I still haven't eaten anything else. Sounds like the Taylor organizers put out a good spread - I miss that ... Well I'm home and I had a couple more hours of sleep where I can relax then get back to work on this fairing for the race next Saturday at Llano, TX. These RV-8 guys are eating our lunch and I can't have that (they are fine folks actually but this is racing!). The new LASAR mag worked great and I have to do something for the folks at Aircraft Spruce and Champion for getting it in my hands in time to install it, time it, test it and make the race. I mean, on Thursday they hear the words airplane on the ground for a bad mag that they did not have in stock and it was registered to race on Saturday over 400 miles away... Most people would have said just scratch but they jumped on it like they were part of my team. They said if there was one to be found they would find it and get it in my hands the next day (Friday) AND THEY DID!

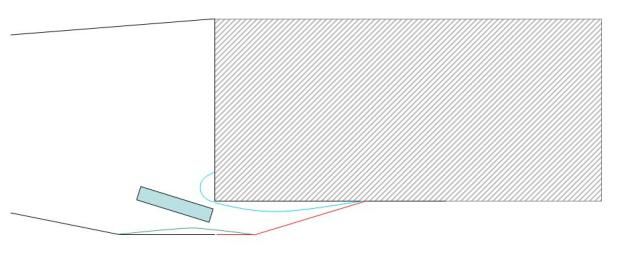
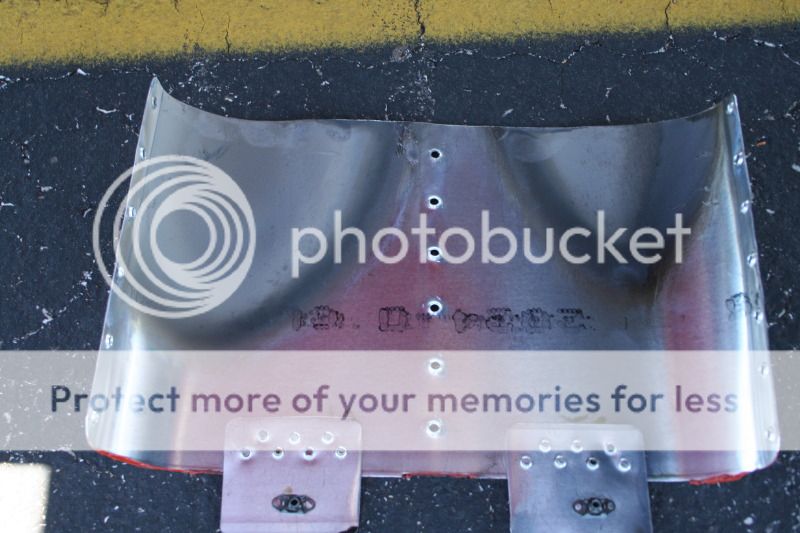
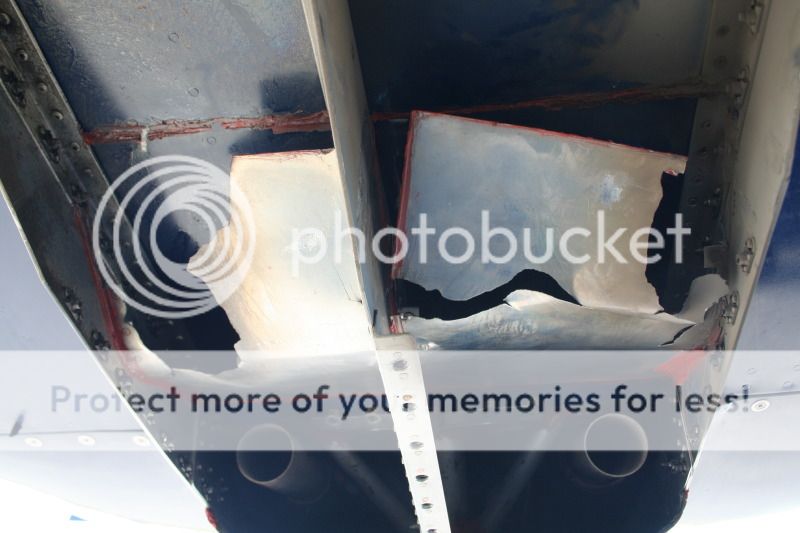
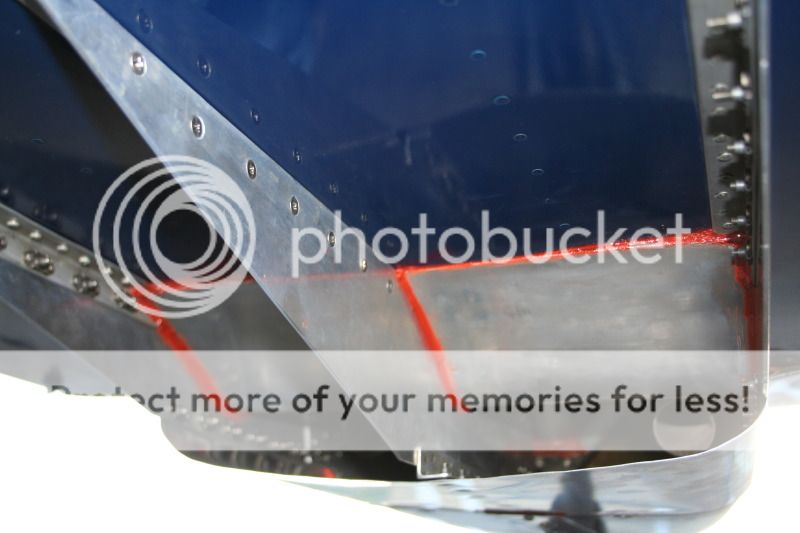
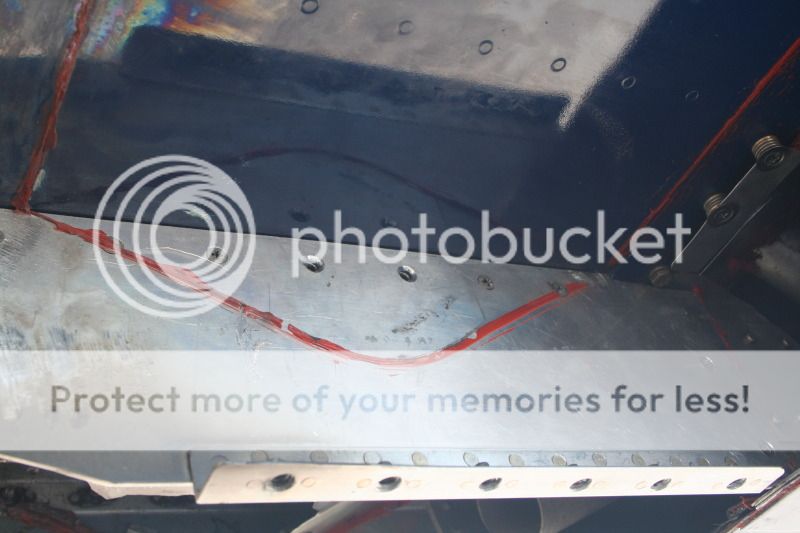
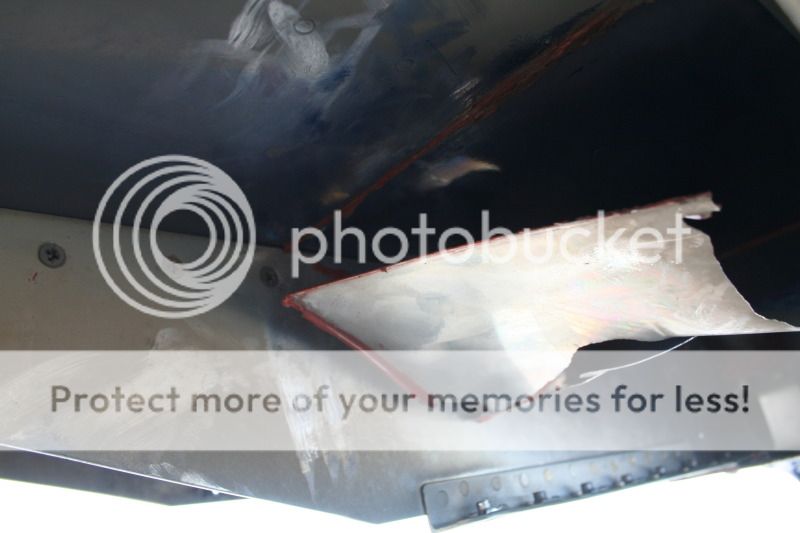
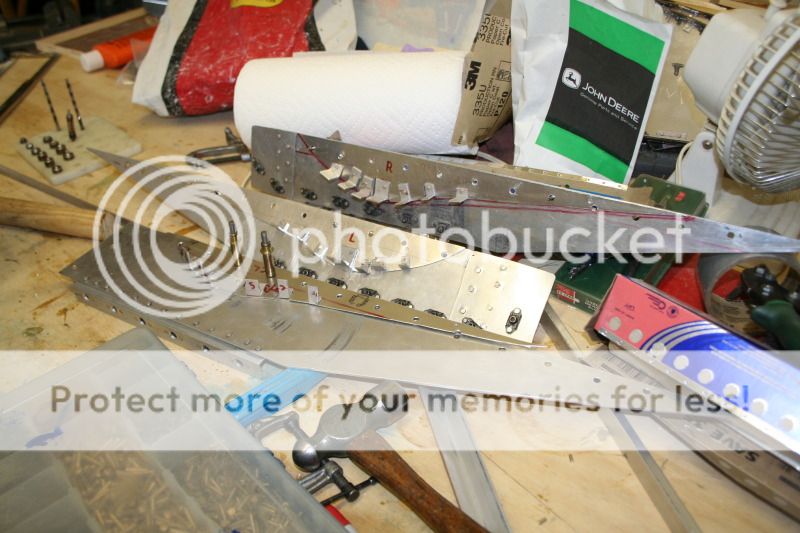
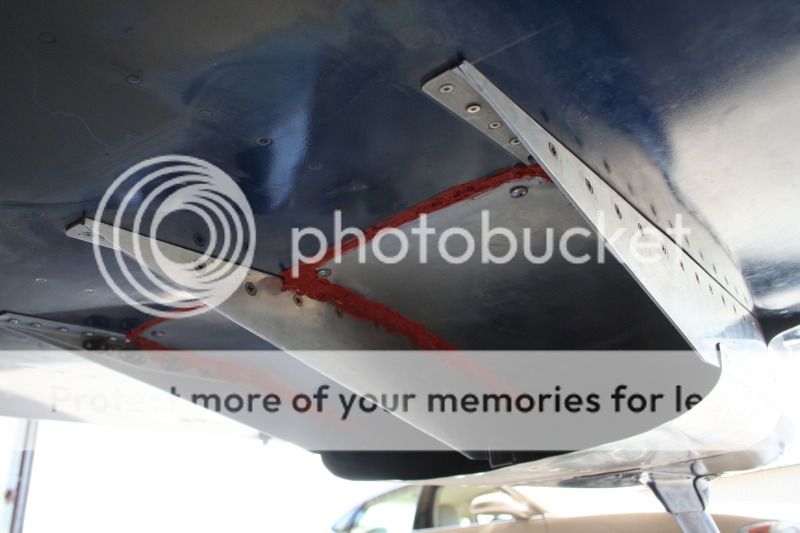
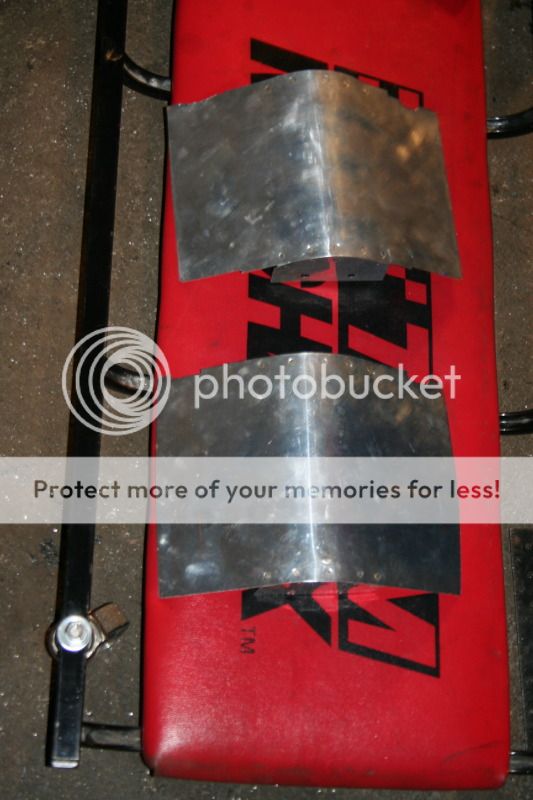
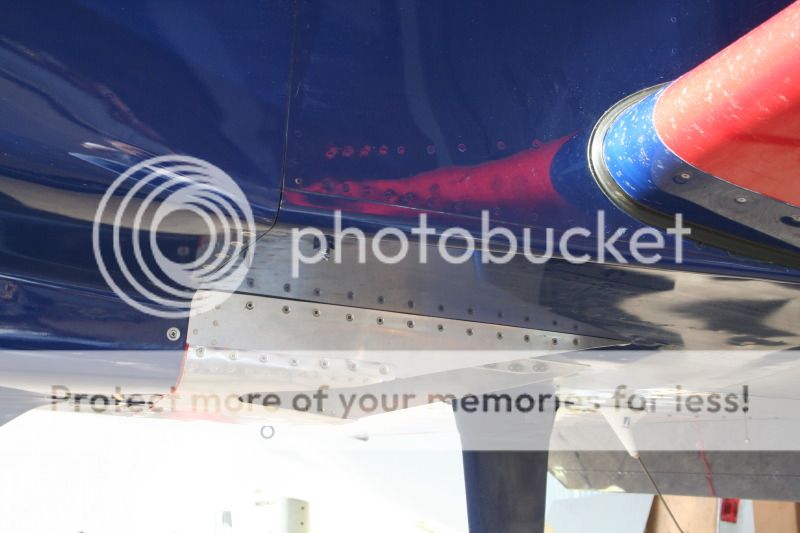
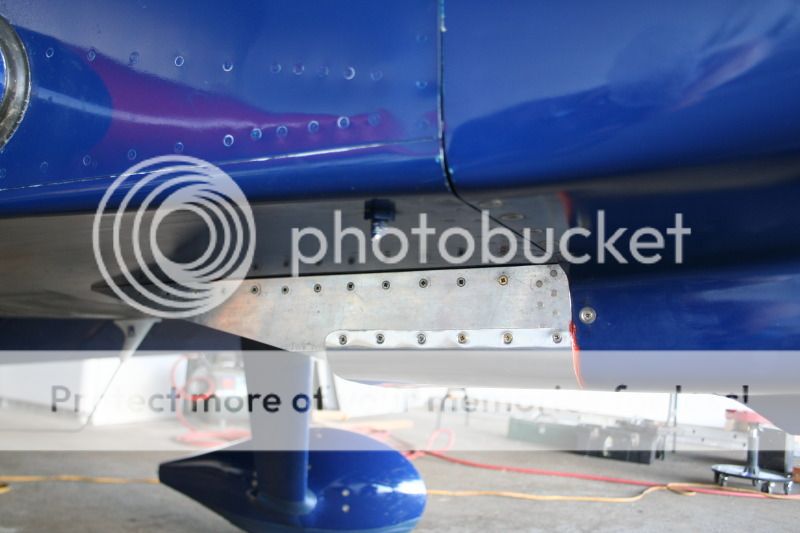
I got it at around 11 am Friday and I had trouble with everything I had to do to get the work done. I was already tired from all the late hours on the outlet fairing work so my efficiency was at the plodder level - just put one foot in front of the other and keep progressing it's only mechanical - it has a solution. One example, I had to get the drive gear off of the old mag's coned and keyed shaft. I tried with everything I had without success then I went to the nearby auto parts store and bought a little wheel puller. It was pitifully inadequate for the task. After at least two hours of effort and trips I went to SkyVenture's Maintenance department at Drake field and this mechanic that I didn't really recognize but had helped me once before said hi Mr. Axsom how is your wife doing - after I stopped crying I explained my problem with the gear on the mag shaft. He said they can be tough and said I hope you won't think less of me for this - and he pulled out a blow torch and a crowbar and had it off in seconds. It went on like that all day. I had this fear that as I was putting everything back together (including the custom baffling in the lower cowl) that the final blow would be a dead battery or that the problem was not the mag at all but the controller. At just a few minutes after midnight when the final screw was installed I climbed in and it fired off right away and the mag check was good.

At this point I was ready to just go to bed but how do you turn your back on the efforts of so many good people that helped you get there? I got to bed at around 2 am and slept til 4:15 then got up and cleaned up to make the trip. I hadn't shaved or bathed for days and barely brushed my teeth - I couldn't present myself that way as a racer in Taylor.

I refueled the plane before going home for the sleep so all I had to do was get a briefing, file an IFR flight plan, pull the plane out, get in the cockpit and take the checklist up to "ignition" and wait for some glimmer of sunlight since I have no lights in race configuration. When I got on my way the headwinds were between 50 and 60 knots but I knew the ceilings were too low for racing at Taylor so I had a shot at making it in time to race. I did and the rest is history.

On to Llano, TX for the Hill Country Air Race next Saturday - see you there.

Bob Axsom
 
Last edited:
Kudo's to Aircraft Spruce, that kind of advertising is hard to buy.

Glad you made the race, to bad you didn't stick around for some food and friendship.

I know what you mean about those -8's. I see the numbers they put up and only wish I could get there. I just keep trying to make mine smoother, slippery and learn from all you seasoned racers.

Get some good rest this week Bob. You need to be at your best to be fast and safe. See you next week Brian
 
"Bump" attachment

Where to place the Coanda bumps for best efficiency is an unknown to me but I think I have a way to attach them that will offer a chance to find it experimentally. It involves using the fin base mounting angles and a little more complex sequential installation procedure.

Bob Axsom
 
The Bumps are ready to install

I have made the "bumps" and I going to let the RTV cure over night. The height and curve of the surface is controlled by these four endplates:

IMG_5683.jpg


The surface exposed to the exhaust and cooling air outlet extends two inches below the fuselage and the max point is approximtey 8 inches aft of the fire wall.

IMG_5686.jpg


Bob Axsom
 
Beautiful day for a test flight

I'm going back out to assemble everything and test fly it. There are several configurations possible but this one is the most readily available:

- 2 inch high, 10 5/8" long (length of the metal plates when flat - as cut out of the sheet of aluminum), with the high point ~ 8" aft of the firewall
- the original 0.090" flow fences with the portion aft of the cover tapered up to the fuselage
- the development cover with the exhaust cutouts still open
F1 Boss sugested going back to the the cover configuration without the cutouts but I have to fly to Llano, Texas Friday so time is short. If this works out I will fly it this way in the Hill Country Air Race then come back and try the unvented cover before the Big Country Air Race at Dyess AFB the following Saturday.

Bob Axsom
 
cowl exit

http://www.youtube.com/embed/ribRRnhV30A

Sorry about the upside down. I have a cheapo walmart vivitar camera tie wrapped to a base screwed down to the wing fairing.

I have followed this thread closely. Here is an attempt at cowl flaps only. I want something that is variable. My thought was that if I can speed up the air around the exhaust tubes, there would be less speed difference and turbulence around the outside edges.

As is apparent in the video, when the flap goes closed, the air stalls around the top edge. I am not terribly surprised, but I wanted to try it any how.

This will probably take an after body such as Bob depicts. I am going to do some performance runs this afternoon. I have the cowl instrumented above the engine around the fuel divider, and below the engine about 6" above the exit.
 
OK then

Larry, Look at the tuft just outboard of the cowl exit - the one that is wiggling around like crazy (not flowing back in the streamlines). That is the one that I was trying to stream line with my exit fairing. Turbulence here is not only creating drag in the free stream, but it is also impeding smooth flow of the cooling air out of the cowl exit.

Guess I will have to tuft test to confirm that I eliminated this highly turbulent flow area.

Bob's flow fences will help, but in essence I believe that in his current configuration, that he has just moved this turbulent corner from the belly out to where his flow fence meets the cowl exit. Might be a slight improvement, but eliminating that flow tripping corner is a must IMHO.

Bob, I suspect that any benefit of the coanda bumps will be lost if located outside of the contained duct. I suspect, that the contained duct effectively ends at the point that the lower closure is opened to the free stream flow. If the coanda ramps are beyond that, I suspect that they will not serve the intended purpose. They can only accelerate flow by reducing the cross sectional area through which the flow is flowing. If the flow is open on the bottom (beyond the cutouts) that reduction in duct cross section can not occur.
 
Last edited:
notice on the video....

The tuft on the belly is all over the place. When the flap is raised the belly tuft is fixed, but the tufts on the flap go crazy.

Kent
 
....This will probably take an after body such as Bob depicts. I am going to do some performance runs this afternoon. I have the cowl instrumented above the engine around the fuel divider, and below the engine about 6" above the exit.

When the flap is roughly even with the pipes, the flow doesn't look bad. It's attached on the flap and on the belly.

Dave
 
cowl flaps

I went out to do some testing this afternoon, but it was so rough at 4000DA I couldn't even make notes on my paper, so a decent test will have to wait until a better day. The next couple don't sound so good.

I went up to 6000 and did a bit of full open/full closed, and even full closed, my chts only went up about 10 degrees. However my oil temp dropped 7 degrees with the cowl flap closed! what is up with that? airspeed went up maybe 1kt. Now I can't wait to do a decent test.
 
Can you test it partly closed? Okay, for some people that would be partly open. In the video it looked like that might be a sweet spot.

Dave
 
It took several on and offs to get the trim right

IMG_5690.jpg

IMG_5691.jpg

IMG_5692.jpg

IMG_5693.jpg

IMG_5697.jpg


Once I got it done I flew in very calm air at 6000 D alt as always. This configuration is exactly the same as the version tested on April 10 when the speed was 177.2. The earlier test on April 9 without the cutouts was exactly 3 knots faster at 180.2. Today's speed was 181.7 or 4.5 kts faster with the bumps than without them in the otherwise same configuration. Now this is good enough tp fly in the Llano race Saturday but if I had time to make the new cover I agree with Gary and F1 Boss, the test results indicate that it would be faster.

This test was flown with the nav antenna on, the cooling air vents closed but not covered, tie down rings on (same as the previous tests).

CHTs (1-4) 356, 373, 361, 335 (4 is not trustworthy)
After the flight the fairing was cold to the touch.
I measured the distance from the firewall to the high point of the bump and it is 6 3/8".

Bob Axsom
 
Last edited:
I'm gonna guess that you should cut the cowl bottom straight across at the forward end of the exhaust cutouts.
The coanda bump should be taller, and the trailing edge should have a more gentle slope, maybe even flush to the side strake's profile. then tune the exit duct by making the trailing cover longer or shorter as tests dictate?
Very encouraging. Bob, you have grabbed the bull by the horns. You can't let go now!!
 
Formula 1 link?

Looks like the tail end of an F1 race car. I believe the bumps and exhaust are interacting to make the airflow reattach to the lower fuselage skin. Very good work, thanks for putting the experimental back into Amatuer Built.
 
I'd concur with Shipchief and add that the bottom cover plate makes a diverging duct with the bumps in the center area. Besides slowing down the exit air in that area, it promotes some vorticity with the adjacent non-diverged duct area, which will tend to slow it further.

Dave
 
Thoughts about NACA duct geometry

IMG_5697.jpg


Bob,
I've been watching your excellent work and thinking about how to do mine in the future. One item that has been included in my thoughts is inclusion of the 7 degree ramp angle used on the "floor" of a NACA duct. It is designed to allow velocity change (expansion) with minimal separation turbulence and I really don't want to do the math to redesign it so 7 degrees is it. My books are too dusty.

So, where to apply it?

I will start by making the assumption the cowl exit air is slower than free stream. I think the coanda bump can be doing a reasonable job of accelerating the exit air via area reduction and possibly redirecting the exit air to be more parallel to the belly (if it is not separating on the rearward expansion ramp) Needs tuft test.

SO, my second assumption is that the exit air is still slower than free steam even with the good effort.

I postulate that a cover might work better if is at a 7 degree angle to the free stream. (Narrowing the exit)
The purpose is twofold:
1) Reduce the expansion area (slowing of velocity) on the backside of the coanda bump
2) Purposely expand the freesteam and slow it in the local region of the exit to better match the two stream velocities.

Use or discard at your pleasure. You are WAY ahead of me.
 
I postulate that a cover might work better if is at a 7 degree angle to the free stream. (Narrowing the exit)
The purpose is twofold:
1) Reduce the expansion area (slowing of velocity) on the backside of the coanda bump
2) Purposely expand the freesteam and slow it in the local region of the exit to better match the two stream velocities.
Is the "freestream" the air flowing outside the airplane or are you referring to the air flowing through the cowling exit?

Any chance you can submit some drawings of these ideas for those of us who are engineering challenged? A visual model of these ideas would go a long way for my understanding of what you are saying.
 
I will start by making the assumption the cowl exit air is slower than free stream.

It is, by measurement as well as in theory.

I think the coanda bump can be doing a reasonable job of accelerating the exit air via area reduction and possibly redirecting the exit air to be more parallel to the belly (if it is not separating on the rearward expansion ramp) Needs tuft test.

I don't see much area reduction.

Hard to tell if the exhaust jet is attaching to the curved surface, a proper Coanda Effect. Bob, are there now exhaust stains on the bumps?

If the tailpipes were pointed more directly at the curved surfaces and the belly cutouts were filled, I would then expect the exhaust flow to attach, and to entrain cooling outlet flow through a reduced area, increasing it's velocity.
 
re-attach flow....sounds like a job for.....

Looks like the tail end of an F1 race car. I believe the bumps and exhaust are interacting to make the airflow reattach to the lower fuselage skin. Very good work, thanks for putting the experimental back into Amatuer Built.

I may be ill-qualified to comment, but this is the part of home-building that excites me, too!
...and if it's too much work to re-profile the exit ramp, can we cheat a bit by using vortex generators at the right spot, to keep the flow attached, with little drag penalty?
 
I may be ill-qualified to comment, but this is the part of home-building that excites me, too!
...and if it's too much work to re-profile the exit ramp, can we cheat a bit by using vortex generators at the right spot, to keep the flow attached, with little drag penalty?

Actually, a properly shaped coanda surface will keep the flow well attached. You do not want vortex generators on the exit, they decrease the flow velocity and at the outlet you want to increase velocity as much as possible.

Now a good place for them would be on the inlet wall, that would allow a greater than the 7deg divergence angle.
 
4-19-12 work and observations

I went back to the airport today with the intention of patching the cutouts on the development cover but it looked liks a very messy job with the location of the mounting interface and a previous patch so I spent 6 hours making a new cover.

When I pulled the development cover off, the right Channel was free of any mark but the left channel had a elongated brown smudge on the high part of the bump.

IMG_5698.jpg


This is from the breather which is directed onto the left exhaust pipe. On the back side of the bump following the line of the streak there is a swirl to the left (counter clockwise) from near the center to the inside of the left flow fence (sorry I had to reverse the photo direction to get the picture):

IMG_5700.jpg


This indicates to me that the flow is not linear and may be influenced by the exhaust cutouts. I have no reason to believe the the flow in the right channel was not similar.

When I finally got the new cover fabricated it was near dark so I could not do a proper speed test.

IMG_5705.jpg


It sounded loud as you would think an exhaust pipe stuck in an enclosed chamber would sound. I only got up to 4,500 ft MSL but it would not surprise me to find that it was near 6,000 ft D alt. The highest ground speed I saw was in the 180s and the TAS on the AI was around 170. I was not impressed.

Tomorrow I have to fly to Llano, TX for a race on Saturday. I cannot do a formal speed test enroute because I do not have enough fuel. Maybe I can do one down there. I don't want to run the race with a suspect configuration. I have to try to remember to take the thin triangular flow fences that I can swap in tomorrow at Llano it the speed test is bad.

I am interested in the results of the covered test (gut feel - it's gonna be bad) and the open channels with the bumps (hopefully better). I have my thoughts on why but I'll let the results speak for themselves.

Bob Axsom
 
Last edited:
looks interesting

Looks to me like the bumps are working. The exhaust and airflow are staying attached to the bumps. If they were not staying attached, I think the swirl would not be there and you may see some reverse flow; I do not see this in the picture. I am curious to see the speed results, but I bet you are right. Maybe all it needs are some generous fillets on the inside?? Just guessing.

Thanks for all these experiments. I suspect there will be a new "stock" exit coming from all of this. I cannot question the speed increase, it seems very real.
 
I don't want you to get the wrong impression

I will continue working on this because I think there is something to be gained but I don't claim one microknot yet. My best speed to date is 184.4 KTAS. Until I pass that number I'm just thrashing around looking for speed.

Bob Axsom
 
Some very thought provoking discussion! I know Bob is gearing up for the Hill Country Air Race tonight, but this will give him some great post-race reading material...to bounce his results off of!

Comments below:

<snip> One item that has been included in my thoughts is inclusion of the 7 degree ramp angle used on the "floor" of a NACA duct. It is designed to allow velocity change (expansion) with minimal separation turbulence and I really don't want to do the math to redesign it so 7 degrees is it.

I think the coanda bump can be doing a reasonable job of accelerating the exit air via area reduction and possibly redirecting the exit air to be more parallel to the belly (if it is not separating on the rearward expansion ramp) Needs tuft test.

I postulate that a cover might work better if is at a 7 degree angle to the free stream. (Narrowing the exit)
The purpose is twofold:
1) Reduce the expansion area (slowing of velocity) on the backside of the coanda bump2)

Purposely expand the freesteam and slow it in the local region of the exit to better match the two stream velocities. <snip>

Paeser postulated the best angle for exit air was at 10 degrees to the free stream...not far from the NACA 7 degrees...though it may be a slightly different concept at work (not sure).

There may be some acceleration of the air on the first half of the bumps, but I would be concerned about separation on the aft side (as you and others have mentioned). There may be some coanda effect, but I doubt laminar flow can hack that angle, and it sort of has a venturi-like look to it. Only down side is the back half of the venturi would expand and slow the exit air...opposite the goal. (more on that below).

Also, I think slowing the freestream air locally would be counterproductive...I know you're talking about makiing the flows more compatible, but it would seem slowing anything in this area would be drag-producing. Just a comment for discussion...this is all facinating stuff! :)

<snip> I don't see much area reduction.

Hard to tell if the exhaust jet is attaching to the curved surface, a proper Coanda Effect. Bob, are there now exhaust stains on the bumps?

If the tailpipes were pointed more directly at the curved surfaces and the belly cutouts were filled, I would then expect the exhaust flow to attach, and to entrain cooling outlet flow through a reduced area, increasing it's velocity.

Dan, I think there is probably some area reduction...at least compared to Bob's previous configuration, without the bump. I do see your point about re-filling those cutouts (though I'm concerned about blocking the exhaust directly and causing odd flow patterns downstream), and I also wondered about exhaust stains on the bump. Looks like it is there, but the swirl pattern may indicate separation or turbulent flow.

My pea-brained effort at a similar concept to what your last paragraph says is pictured below (a mod of a picture I did earlier):
Exit%2520mods2sm.jpg


From discussions with Paul Lipps, the coanda radius at the base of the firewall might do the lion's share of redirecting and attaching the flow exiting the cowl. Then the continuation of that curve...a softened version of Bob's current bump, as others have suggested) might maintain laminar flow and continue that coanda effect further aft. Opposite that upper bump, on the lower surface, another bump that forms the front half of a venturi could add to the area reduction and exit flow acceleration. Tuning of the system would mean trying to direct the flow aft without reopening of the venturi prior to the end of the ramp (I think)...which I don't depict well in this picture. I do agree with you that decreasing the down-angle of the pipes might increase Bob's current coanda effect, and might allow the aft part of the bumps in my picture to be more aligned with the belly and the freestream.

My kluge of a bunch of stolen ideas, somewhat applied to what Bob is currently working...all FWIW! ;)

And great work Bob...as always! Good luck in the race!! :D

Cheers,
Bob
 
Last edited:
Thanks for looking at my results and providing observations

Thanks for looking at my results and providing observations. I just woke up in a sweat totally unprepared for the race tomorrow with a configuration that I think is slow and many thousands of Arkansas and Oklahoma but mostly Texas bug guts coating all the exposed forward surfaces of the Blue Bird. I have to bring: bucket, sponge, rags, tools, triangular light weight flow fences, RTV, computer, changing course info, ... It's all for points to stay in the season SARL National Championship hunt in this race I'm afraid. After I get there and refuel I need to fly the course as I understand it, do a proper speed test, start changing the configutation I suspect, wash the plane, look at and replan the course in my preparation for the race on Saturday, study the winds and determine my altitude strategy and perhaps eat and sleep in the Annual Crawfish Festival envirement. I'm hoping for VFR weather tomorrow so I can fly direct 385 nm instead of the 448 Victor airway route around Dallas Class B and Bush's Ranch. It's a fuel thing (I had red lights for both tanks when I arrived at Taylor last week against the 50-60 kt winds). My race speed was 208 plus a little for the first two races, I would like to break 210 tomorrow.

If I get to run the speed test in either or both configurations I will share the info when I get back.

Then there is the Big Country Air Fest Race at Dyess AFB next weekend in Abilene, TX that has to be prepared for.

Bob Axsom

P.S. I am already planning an easy mod the will allow extending the post bump configuration. I wanted a little reflex in this configuration but I may have brought it on too abruptly or maybe the shape should be convex to sustain the attachment? The work will continue and the results reported.

BA
 
Last edited:
Bob: I for one, consider your efforts here virtually 'heroic'! Good on you for picking a target challenge and going after it with such gusto and determination. Good luck---we're all pulling for you!


Lee...
 
Listen to Mr. Axsom, who is being realistic....he is getting speed changes, but so far none of it is actually making it go faster.

The latest photos pretty much confirm a lack of any actual Coanda Effect; little or no exhaust staining (exhaust jet not attached), and the oil swirl on the backside (separation).

Consider these sketches.

This is more or less what Bob has now. Red is the exhaust jet and pink is cooling exit flow.

f2o8x4.jpg


Realign the exhaust jet so it impinges on the curved surface and you see the Coanda effect....the attached flow turns the corner. Close the exit area by moving the hump forward and adding a bit to the lower cowl (cyan). The result is an entrained, exhaust-augmented cooling flow. Yes, you might lose a little power, as Bob noted earlier, because local pressure at the pipe mouth is higher than external static. After all, the engine is an air pump.

evdso3.jpg


Now consider the nursery rhyme.."All the kings horses and all the kings men...."

The theme here seems to be putting the air back together after you shoved it apart with the huge cattle chute cowl exit.....but as you've seen, it's not so easy to put Humpty Dumpty back together. So why not just shrink the cattle chute and do an augmented exhaust without all the humps and bumps?

fk7gv9.jpg


One possible "why not" is airframe noise; exhaust augmentation seems to generate reports of vibrating tin. Perhaps we should just think conventional. So far most of you are running a fixed outlet area based on the worst case cooling problem, which is hot day, slow speed climb. The required exit area for slow speed is way too large for high speed cooling, where it flows perhaps twice the necessary mass. We need a variable exit area, large for climb, small for cruise.

We have one cowl flap experiment in this thread. As noted, closing off the exit to the cattle chute with a flap doesn't work; it's the Humpty Dumpty problem again. So instead of trying to put the air back together behind the cattle chute, just cut the chute down to the cruise size, which is what you wanted for speed anyway:

r2ojdw.jpg


Now your only problem is flowing enough mass for slow speed climb.....so put a hinge in floor of the chute and make it variable. Yep, the low exit velocity will mean all kinds of vortex stuff behind the large, open exit.....but in slow speed climb, who cares?

23rsrxf.jpg


This is nothing new. Take a look under some production GA birds. Ken Kopp showed you a nice variation on the idea in a recent thread, and plotted the actual exit velocity, mass flow and drag reduction.

http://www.vansairforce.com/community/showthread.php?t=83310

Sorry, but this thread has been painful to watch.
 
Last edited:
DanH's final two sketches are similar to what my 1955 Cessna 180 has, stock from the factory. The cowl-flaps-closed air exit area is remarkably small, especially considering the inlet area, which is huge.

Overall performance of the plane is excellent.

The cowl flaps are stoutly-build and have side fences built-in for when open. They have openings to clear the exhaust pipes (3 into 1) and there's not a lot of clearance around them. The pipes are oriented down about 40 degrees, though, so there's lost energy there.

The firewall does not have the rounded bottom to aid in attaching the flow. That would probably be an improvement, were there room, and assuming it could get approved.

Dave
 
Some insights

I've been following this discussion and useful test results, but resisted chiming in. At this point, the discussion has narrowed and gotten distilled down to the point where I think I can add a couple of contructive observations.

First:
The sketches in DanH's last post show a very important distinction from the tested design with the bumps. The goal is to accelerate the exit flow. The bumps accelerate the flow, but then, BEST CASE, if the flow doesn't separate, they slow the flow back down again, giving back what they just did. Worst case, they separate, and although the flow then streams back from the separation point at a higher velocity, you pay for the pressure drag on the rear-facing surface. the only way that this bump makes any sense is to fair it out onto the belly of the airplane over a very long length. That will help some (as some results have shown) -- but it doesn't do anything to reduce the overall airplane frontal area -- a missed opportunity.

It is FAR better to do as Dan sketched, accelerate the flow by contouring the outer boundary to a smaller exit that is aligned well with the outer flow. This accelerates the exit flow and keeps it that way. Also you get to reduce the airplane frontal area at the same time. Hard to decide how to book-keep that as airplane form drag or cooling drag, but the benefit is the same either way.

Second: Less important, but worth thinking about -- A truism of fluid dynamics is that you can accelerate flow over a very short distance without incurring very much, if any, loss. This is because the accelerating flow is reducing static pressure (Bernouli's eq.) and so the boundary layer sees a strong "favorable pressure gradient" that guarantees that the flow won't separate, and suppresses turbulence.
The corollary is that you must be very careful about slowing flow down, this must be done very gently, or it will separate, because the boundary layer has to fight its way into the increasing pressure region.

So, the purpose for mentioning this here has to do with the size and radius of the curved fairing that covers the square corner at the bottom of the firewall. This fairing, BTW, is the SINGLE MOST IMPORTANT THING you can do to improve your cooling situation. But my point here is, it can be rather small, such as on the stock RV-8. As long as the flow doesn't separate, there is not much benefit from making this fairing more gradual, and in fact, there is a point where it will actually hurt. Guiding the flow to accelerate more gradually with big, smoothly curved surfaces means that the flow is scrubbing on those surfaces over more area, and the skin friction drag from that will at some point cancel any benefit from the more gradual acceleration. I don't think the stock RV-8 radius separates, but it might, its a pretty tight radius. (what happens if it is too tight a radius is that the flow accelerates too much around the tight curve, and then slows back down some) It might pay to make the radius a little bit bigger (say, 2.5" radius instead of 1.5" radius, for example). But I would avoid going to so much extra work to create a large gentle ramp that will have lots of scrubbing drag on it. Without some detailed study, it is impossible to say what the exact optimum is, but I can assure you that the smaller radius, like the stock RV-8, is not significantly worse than the optimum.

Third: A very minor symantic issue. Lots of people here are refering to the flow staying attached over a hump or curve as a coanda flow or coanda effect.
This is technically incorrect. A coanda flow is a very specific case where there is a high-energy jet flow added on the hump or curve that helps the outer flow stay attached around the curve. The jet is normally introduced through a thin slot just upstream of where the surface would curve dramatically away from the flow, and the jet "sticks" to the surface where a normal flow would just separate. In the whole discussion here, the only thing that remotely approaches a coanda jet would be if the exhaust flows were purposefully aimed to impinge on the upstream side of the bumps to try to help the flow stay attached over the back side of the bumps.

In our efforts to accelerate the exhaust flow, we are dealing with a stream that is deficient in velocity, not a high-energy jet that has exess velocity.

This is a small point - it's just a name after all, but it does add confusion when a term is used that only applies to a different situation.
 
Last edited:
I'm here in the Llano Best Western

The flight down here was interesting. The speed was much better than I expected - the slide rule function on the AI showed a constant 185 kts. It would be nice if that holds up in a valid speed test.

I am encourage by the quality of thought that everyone is giving this, pro and con.

There has been a lot of comment about the effect of corner at the bottom of the firewall which is the top of the cooling air outlet. I probably need to remind everyone that I have no corner in this area. I addressed that several years ago and I described it in this forum as I developed my approach.

When did Coanda discover the effect that is named after him? What is the scientific definition of the effect? Is the popular engineering application to aeronautics too restrictive a view? I think so.

Enough of that but it had to be said.

When I was leaving the hangar last night I went back and measured the new unvented cover because I thought you might want to know. It extends back 9 5/8" from the stock cowl outlet. The bump node is a little more than 3 inches back under the cover. I think it is important that we are all talking about the current configuration of the item under test.

Bob Axsom
 
Last edited:
Just finished wind study

If there is no improvement in speed from the mod with the forecast winds I should have a race speed of 209 MPH.

Bob Axsom
 
origin of Coanda effect

Wikipedia has a nice write-up and an animated graphic.

As I said above, a key is the fact that a high-energy jet is introduced into an otherwise normal flowfield, and the jet tends to stick to the surface when otherwise, the normal flowfield would separate.

Good luck tomorrow Bob.
 
Sorry about the slang

Steve, I've been properly chastized :D for continuing the misuse of "coanda".

And for whoever picked up on my comment about slowing the freestream being a subset of the perpetual motion machine (You can't get something for nothing), probably true but I have been surprised by experimental results before when they went against narrow theory application. BTW, Dan displayed my comments in his second image. My goal was to work on the flow after the bump.

My gut feel tells me that the oily vortex swirl means there is too much expansion in the exit ramp on the back side of the bump. It could be either the ramp angle or the flow fence, or both.

All good stuff. Lets keep having fun with it. (but not overwork Bob) :eek:
 
Checking in from a hotel PC....doing Atlanta with family this weekend.

Steve, sure appreciate your comments. I haven't forgotten what you said last year about the firewall corner, simple radius vs converging duct. I shouldn't have drawn the duct ceiling in the last two illustrations. The duct is not a sure thing and may (as you say) reduce exit velocity.

Have any thoughts on the basic premise of exit wake reduction or reduction of exit turbulence, given the standard exit area? To me it seems like no matter how smoothly you blend the freestream with the slow exit flow you still have the same drag.
 
Shattering Results

After the race today I examined the "bump" through the rear opening and was surprized to see:

IMG_5717.jpg


IMG_5718.jpg


I'm thinking...

Bob Axsom
 
Yikes! These were aluminum, right? I saw you ran 212 mph, so you've got to feel good about that. Maybe if you re-made these with SS before changing anything else.
 
More info on the Hill Country Air Race configuration

The cenrer separator/fin and the two flow fences are 0.090 2024 T3.
The Cover is 0.032 2024 0
The bump skins and the mounts/formers were 0.016 2024 T3
The angle segments attaching the skins to the formers 1/16"x1/2"x1/2"x1/2" 6061 angle stock
The RTV was Dow 736 (red - high temp)
The rivets attaching the bump skins to the formers were flathead 3/32 (NAS426-3 if I remember correctly)

I'm thinking of stainless skins with something securing the ends beside installation deflection pressure and RTV. Clearly something of energetic value is in there that needs to be exploited.

The first thing I did after I got out at the fuel pump following the race was to feel the cover, it was barely warm then I looked in the back.

Bob Axsom
 
Last edited:
The RTV is not a structural fastener. It provides neither stiffness nor strength. Structurally, you had a free edge there.

Also, there is turbulent flow on the bumps, especially on the back side. Turbulent flow causes high normal (that engineering word means perpendicular to the panel) loads on panels. The aft side's angle is so steep to the flow direction that it's basically stalled there. This was pointed out earlier.

It's also possible that the natural frequency of that thin bump with its free edge might have been close to the exhaust pulse frequency, leading to resonance, and that would hugely stress the bump.

The bending strength of a sheet of aluminum varies with the square of its thickness. Double the thickness and you've quadrupled its strength.

However, its natural frequency only goes up linearly with thickness. Double its thickness and its natural frequency only doubles.

Most readily-available 300 series stainless steels are annealed. They aren't all that much stronger than 2024-T3, and have lower yield strengths. They do have nearly 3 times the stiffness (Young's modulus) which will help, but their density is also nearly 3 times as great. As a result their natural frequency, for the same thickness, would not change. It's an interesting factoid that steel, titanium and aluminum all have the same stiffness to weight ratio.

Recommendation - Get some sleep, do your homework, come out with a new plan and discuss it here before implementing it.

Dave
 
Dave that is REALLY good info!

The RTV was not for structure, it was just to seal the edges. I had some pretty good sized openings rushing to accomodate the mounting base (1/16x3/4x3/4 aluminum angle) and interfering platenuts & mounting screws. I have plenty of 0.032 2024 both T3 and 0. I'll have to think about which might be more susceptible to the exhaust pulse frequency and choose the other. One thing to remember is the airplane with this mod had never flown at the speed it saw in this race nor had it seen the turn loads.

The failed design was not well documented so I will provide some more facts here. I wanted something a little blunt that I felt would be eazy for the outlet air to stay attached to and I wanted to cut the outlet minimum cross section in half (roughly) so I looked for something that resembled that. Half of the vertical height of the opening is just a little over 2 inches so I picked the two inch height. Most of the things I had laying around had too small a radius for the blunt node I was looking for. I saw one of the "I Can't Believe It's Not Butter" tub lids (4 3/4" diameter) that I lable and use to store parts in for each item removed from the airplane and selected it for the curve. The mounting would use two of the existing 1 1/2 " centered flow fence and center separater/fin mounting points which would allow the the node to be shifted to any point within the for and aft mounting range of the flow fences. The tails of the bump skin were chosen to be equal 5 3/8" fwd and aft of the node. When the units were mounted some pressure was required to deflect the tails outward and allow the mounting screws to be installed. The units were secured between the vertical members of the assemble and the aluminum angle mounting base on the fuselage by the mounting holes and the clamping action.

After the short test flight on Thursday night at max power 2720 rpm the inspection revealed no problem. The flight to Llano was at 2450 rpm. I felt the cover for temperature (not even warm) but I cannot assure anyone that I looked in the opening and inspected the condition of the bump. I checked my notes and nothing is recorded about it and I don't remember looking in there. The failed metal looks brittle but it feels quite tough. I tried to just rip it out rather than remove the vertical members but it didn't and I decided to leave it as undisturbed as I could and bring it home for further review.

I will insert a three relevant photos that show the profile of a bump on a side wall and the vertical flexture track of the trailing edge.

IMG_5709.jpg

IMG_5723.jpg

IMG_5719.jpg


I guess it is time to stop this thread.

THE END

Bob Axsom
 
Last edited:
This development is excellent !!

Don't give up on us Bob, I am completing my 7 and quite interested in your developments, it is excellent that you implement ideas directly in aluminum and share data. Thanks, this is helping a lot of us understand possible improvements for cooling drag reduction.

So, did the latest configuration (before the disintegration "issues") result in a gain ? Did it yield your 212 MPH?

Thanks sharing your trials and successes!
 
It was never tested

Don't give up on us Bob, I am completing my 7 and quite interested in your developments, it is excellent that you implement ideas directly in aluminum and share data. Thanks, this is helping a lot of us understand possible improvements for cooling drag reduction.

So, did the latest configuration (before the disintegration "issues") result in a gain ? Did it yield your 212 MPH?

Thanks sharing your trials and successes!

Sorry bill no formal test was run.

Bob Axsom
 
Bob,
I have a little theory about the broken coanda hump, perhaps as mentioned above that a new one could be made from thicker metal BUT also filled with spray foam and to provide physical support and absorb vibration.

I think you're close to finding you "acorn"


Glenn Wilkinson
 
Pressure differential

It sure doesn't look like there was anything to support the side edges of the coanda hump. I would imagine that having all of the edges sealed resulted in a pressure differential between the inside of the hump, and the outside due to static air inside and dynamic flow on the outside. The pressure diff may have caused the edge seals to fail resulting in destructive vibration.

Skylor
 
Last edited:
Brent Travis asked for more

I have not met Brent but I know he flies a very fast RV-4 in the RV Blue class. We should meet this season. I completed another experiment with a valid test. I am extremely tired after working on this on yesterday, all night last night and untill late this afternoon when I ran the test. I have to get up very early tomorrow and fly to Dyess AFB in Abilene, TX for a race on Saturday. I'll see what I can do.

Bob Axsom
 
Brent is a good guy. I've met him twice....or I should say he schooled me twice at the races. We can wait for the test results. Take care of Bob first....and good luck on Saturday.
 
4/26/12 configuration and results

This photo shows the basic profile former for the 4/26/12. The bump is a few inches from the fwd end it is 2" tall with a convex front and a very long convex to concave tail. Each former contains 7 tabs made from short lengths of aluminum angle. 3 of the tabs are later riveted to the ends of spanwise aluminum angle beams. All of the beams are 1/16" thick. The one at the node peak is 3/4" and the other two (one fwd and one aft) are the smaller 1/2" angle. The other 4 tabs are riveted directly to the bump skin.


IMG_5727.jpg


The next photo shows the 2 bump structures installed with the cover off.

http://i446.photobucket.com/albums/qq186/raxsom/IMG_5732.jpg
IMG_5732.jpg
[/IMG]

You can see that the bump skin is riveted to the beams as well as the tabs, the edges are sealed with hi-temp red RTV and the trailing edges are attached to the fuselage with screws.

The last photo shows the complete outlet with the cover installed:

IMG_5736.jpg


Working with this clone laptop in this motel is brutal - will write the test report in a separate post.

Bob Axsom
 
Last edited:
Back
Top