What's new
Van's Air Force

Don't miss anything! Register now for full access to the definitive RV support community.

RV-10 Cowling/Firewall Hinge Alternative??

Blizzard

Active Member
Vic Syracuse mentioned how he uses .040 or thicker sheet in place of the two 6 inch hinges on the bottom of the cowl. He then used #10 screws to secure the cowling Has anyone considered using this technique all the way around the firewall instead of using hinges? Could you secure the cowling just using #10 screws with nutplates attached to the the sheet? Or camlocks? I was wondering if you could use ie 1.5 inch by .060 aluminum strap riveted around the firewall in place of the hinges? The amount of strap that would extend to the cowling side would provide plenty of edge distance for a #10 screw. Countersink the cowling and use Tinnerman washers under the screws. All seems easier than dealing with the hinge pin alignment. So far all I've done is drill and cleco the hinges to the firewall. It would be very easy at this point to countersink the strap and rivet it to the firewall instead of the hinges. Would appreciate any and all pros and cons about this.
Thanks
 
The per plans 1/8" rolled hinges on the bottom do not last long. The firewall hinges on the sides and top fair better. The 3/32" side hinges never fail. On the first RV-10 I replaced the bottom hinges with extruded 3/32" ones (Van's use to sell this for "high vibration" applications). They have held up fine over 15 years or so.

Most people go with the hinges or Skybolt. Replacing just the bottom hinges with plates and nutplates is a reasonable compromise.

For the new RV-10 I'm using 1/8" extruded hinge for the firewall parts (MS20001P4) to end the problem.
Carl
 
I used the SkyBolts on my 7A, but on the 10 I just finished I used screws and nutplates. They hold more securely than the Skybolts and take just a little longer to remove the cowl, using a screw gun. If I built another RV, I use screws and nut plates again.
 
BTW - I did use the hinges on both planes to attach the sides of the upper and lower cowl, and would do that again
 
My RV-6 has screws and nutplates securing the top cowl to the firewall, with hinges down the sides, and screws securing the bottom cowl to the bottom of the firewall. Works very well. I did something very similar on the -10 except used Skybolts across the firewall on the top cowl.

I don't know that I have a preference from a convenience perspective. I know the screws/nutplates are cheaper and the initial installation is quicker.
 
I'm planning to use the piano hinges for the sides, but using screws around the firewall seems like a better and better idea the more I think about it. What material did you use? Is .060 overkill? It's still flexible enough to make the curve around the firewall area......I think. LOL Did you just countersink the cowling and attach it straight to the nutplated flange you fabricated? What spacing did you use between the screws? I'm also using a 3 bladed Hartzell so that'll be another cowling issue to deal with. Any pix you might have would be greatly appreciated.

Thanks
 
In both cases, I added a layer or three of glass to the flange on the cowl so there was plenty of depth and strength for countersinking, then shimmed the aluminum strip on the firewall so the cowl sat flush. On the -10, I have 14 camlocks across the top cowl. You could go 14, 15, or 16 camlocks or screws if you wanted.

I think I used 0.050 for the strip, but wouldn't swear that in court. One thing about that strip is the fuselage is tapering forward at that point, so the strip has to match that taper. Best to make a cardboard prototype before making the first strip - it isn't a straight, flat strip - there's a curve to it. Also, I scalloped the front edge of mine so I could adjust individual parts of the strip to make them parallel with the fuselage.

Right up until the end (installing the fasteners), the process is the same if you're going to use screws or camlocks. As I recall, Skybolt has downloadable instructions for their camlock kit, so you might look to that for detailed instructions.
 
Hinges top and sides. Shimmed appropriately to make the cowl to skin flush.
Bottom corners 040 tabs with nutplates and screws. One each side.
I have a showplanes cowl so the bottom isn’t as much of an issue as the vans one.
I have a Hartzell 3 blade as well. I split the lower cowl as I was nervous about it and only have a 1/8 spinner cowl gap.
Turns out that I can get the lower cowl on and off in one piece solo now that I’ve had some practice.
 
The per plans 1/8" rolled hinges on the bottom do not last long. The firewall hinges on the sides and top fair better. The 3/32" side hinges never fail. On the first RV-10 I replaced the bottom hinges with extruded 3/32" ones (Van's use to sell this for "high vibration" applications). They have held up fine over 15 years or so.

Most people go with the hinges or Skybolt. Replacing just the bottom hinges with plates and nutplates is a reasonable compromise.

For the new RV-10 I'm using 1/8" extruded hinge for the firewall parts (MS20001P4) to end the problem.
Carl

Same feeling and experience here. THough I used 1/16 stainless hinges from Mcmaster carr on the bottom. I used screws in the cowl nose area.
 
Last edited:
I'm planning to use the piano hinges for the sides, but using screws around the firewall seems like a better and better idea the more I think about it. What material did you use? Is .060 overkill? It's still flexible enough to make the curve around the firewall area......I think. LOL Did you just countersink the cowling and attach it straight to the nutplated flange you fabricated? What spacing did you use between the screws? I'm also using a 3 bladed Hartzell so that'll be another cowling issue to deal with. Any pix you might have would be greatly appreciated.

Thanks

On the 6, I used screws on the top and bottom cowl attach areas. On the 10, I have hinges everywhere. I find it easier to get the 10 cowl off than the 6. They are convenient.
 
No hinges...

On both of my -7's and the -14, I used several pieces of .032" x 1.5" flange material installed around the perimeter of the firewall -- drilled out the AN426-AD3nn rivets that held the hinges in place and upsized to NAS1097-AD4nn.

Screw holes are spaced at ~2". The cowl halves are then secured to the flange with #8-32 x1/2" screws, with K1000-08 plate nuts on the flange.

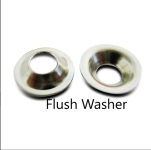
The screw holes are counter-sunk, and the screws have small flange "tinnerman" washers under the head -- A/S part number 04-03895/39006F style (small flange, 100° #6). The #6 fits better on the #8 screws and gives a nice, clean look.

IMHO this is far simpler (and cheaper) than skybolt/camlocs.
 

Attachments

  • Screenshot 2023-05-19 at 2.12.42 PM.png
    Screenshot 2023-05-19 at 2.12.42 PM.png
    572.7 KB · Views: 17
  • Screenshot 2023-05-19 at 2.16.59 PM.png
    Screenshot 2023-05-19 at 2.16.59 PM.png
    4 MB · Views: 67
Last edited:
Good Stuff. Thanks for the pix and the tip about the Tinnerman size. Should I use T6 aluminum for the flange or does it matter? T6-order. Doesn't matter-Lowes. LOL
 
Like others, my lower hinges started to smoke rivets early on. I added a small piece of angle and nut plate on the inboard end of each hinge, just one screw and a large area washer for each hinge. Problem solved. Original hinges still there and doing fine, 900 hours.
It was an east retrofit on a flying airplane. My intent was to go back and replace the hinges with screws but never did.
 
Last edited:
Back
Top