I got back from a lunch flight today with 551 hours on the clock, so I figured it was time to drain the oil yet again. My intent was to let it drain overnight and head home to get stuff done, but about the time I got the cowl off and the drain hose on, I heard rain on the hangar roof, and (since I was riding the motorcycle) I was stuck there for awhile. Looking for other stuff to do, I realized that it had been 150 hours since I'd checked the plugs, so I pulled those for cleaning, gapping, and rotation. Since I had the plugs out, I figured "why not check the timing?" since that had been untouched since the last condition inspection. One thing lead to another, and although I still have to put oil back in tomorrow, I basically pulled a complete FWF condition inspection before I headed home.
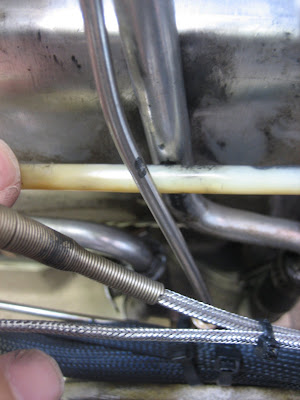
I am still mighty impressed at the maturity of th overall design. My FWF is bone stock (except for some extra reinforcement on the baffles), and I found very little to no wear or issues except for a groove being worn into the number four cylinder oil return line. This was caused by the safety wire ( running through nylon hose) that holds the fore and aft baffles tight underneath the cylinders. It's interesting that the nylon was wearing a hole in the aluminum, and not the other way around. I plan to give that a very careful inspection tomorrow with a good light, when it is cooler, and see if it is serviceable as-is until I can get a replacement.
I still have very few oil seeps after 20 months of flying, with only a few drips here and there to remind me that, after all, this is still a Lyclone - if it's not leaking, it doesn't have any oil in it! The Mag timing had drifted about 2 degrees early (I had checked it last October, and it was close enough not to fuss with), so I loosened up the nuts and reset them precisely - it gave me a chance to use my little laser pointer that clamps on the ring gear - too cool! I got extremely lucky in that after I tightened the nuts back up, the timing was as close to perfect as I have ever seen it - usually I screw it up a touch when the clamps move the mags as they are tightened.
The air box is still in good shape - the repair I did to the carb heat arm a few months back (drilled a new hole for the bug nut holding the cable) hasn't worn at all. If I can get another 450 hours out of it like the first one, I'll be a happy man! After seeing the thread on exhaust cracks the other day, I looked very carefully at mine, and it's in great shape at all. I think part of the reason I've had good luck is that I built carefully to have no pre-load in any parts that are fastened together. Fasteners hold things together, they don't PULL things together.
The oil screens and filter are clean as whistles - no metal or carbon particles that I could find. All the wiring looks new - no chafing or fraying. I really like having a clean engine compartment because it makes inspecting things like wiring so much easier, not having to deal with grime. I am also very impressed that the baffles are holding up so well - I had an awful lot of cracking on my old Grumman baffles in the equivalent time...once again, lack of preload probably heps in the wear department. The area around my oil cooler is also built like a tank - maybe that's why I have a slightly heavy left wing.....
I'll finish up tomorrow morning with fresh oil, safety wire on a few things, fix that rubbing oil line, and do a quick compression check before buttoning things up. It really doesn't take long to do a thorough inspection when you've kept things in good shape, and I try to do it every 100 hours or so. I'm curious how long I'll go on these Mags....I always considered Slicks to be "throw-aways" whose life started to ebb about 500 hours. They seem to still be doing great though, so I'll fly until I suspect a problem.
Just thought folks might want to know that if you stick to good practices and simple principles, these things can be trouble free!
Paul