What's new
Van's Air Force

Don't miss anything! Register now for full access to the definitive RV support community.

pant crack repair suggestions?

NM Doug

Well Known Member
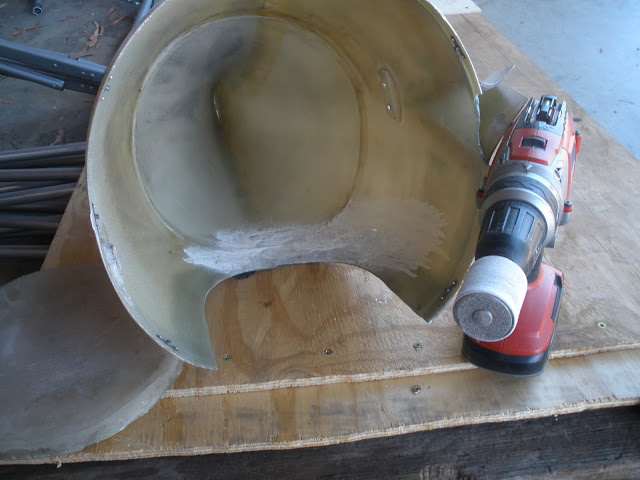
Both of my 9A's main gear pants have cracks, but the situation is bad enough on the right pant that my A&P said I need to repair or replace the right one. As a fiberglass newbie (not a builder), I've started reading the fiberglass guides and walkthroughs here on the forum but would welcome thoughts on what the general strategy should be in this case.

Here's the view from the outside - the crack above the top hole is not all the way through, but the bottom crack is:

t8sxnb.jpg


Here are two views on the inside - the second one is fairly straight on:

2hy7zf9.jpg


fbjkhj.jpg
 
Thanks for taking a look and saying it doesn't look alarming, Mike - I was worried that there might be some special problem with the cracks being where they are.

Your "carrier landing" repair posts will be very helpful...
 
Doesn't look like there were any reinforcement fiberglass patches put inside the pant at those spots as called for on the plans. (Maybe early plans didn't specify this) But like said should be easy fix and good first time with FG project.

Jim
Rv9a
 
pants are cracked a bit

I have been inside my 9A pants three times now for glass patching and repairs. It is not hard and doesn't show from the outside. Buy a whole box of disposable gloves. You will be changing them pretty often.
Cut your patch pieces before you mix up any resin. It all sticks to everything when your gloves get resin on them. Lay it up in layers. Sand smooth after it hardens. It will be strong as heck inside.
Outside, mask and spray some white (flat primer?) on and it will never show.
 
easy, but...

This is an easy fix. Sand the inside surface about two inches wider than the bracket. Remove all trace of the weave in existing part. Lay on five pieces progressively smaller bidirectional cloth. Use epoxy, not polyester or vinylester resin. Wrap saran wrap around bracket. Install pant. Use sharp awl to probe screw holes through the weave of the new cloth and resin. Wax screws, with mold release wax, install into the holes and tighten just until resin squeezes out. Wipe up drips. After the inside cures grind away the outside to the depth of the new cloth, taper edges, lay in four or five layers of bidirectional cloth, progressively larger.
Remove saran wrap from bracket. Dress inside as reqd. Feather and fill outside as reqd.
This really is an easy fix, but to a new guy there are so many new tools, materials, and operations... try to make local friends with someone who has the tools and wee bit of materials that you will need. A 24 can case would be much cheaper than buying all the tools and materials. The lesson will be valuable. Also, inspect and repair / reinforce the other pants and bracket locations. Good luck! I should have checked to see where you are located...
 
Square the round corners

I had some help from an experienced builder in this area and the basic problem is that you are matching flat pieces of aluminum to rounded pieces of fiberglass.

Mix some flox/ballon/epoxy and inject it into the void formed by the flat aluminum and the round fiberglass. Mutch easier to do before paint but well worth the effort. Be sure to use mold release/shipping tape to not glue the pant on permanently.
 
I hadn't thought about getting the inside of the pant to fit flush against the bracket (aft section of U-810, it looks like). Now I understand RKellogg's approach - it builds this fit in.

Also, I'm pretty sure my gear pants don't have the reinforcement layers of fiberglass. I'll take a closer look when I'm out at the airport today (KAEG EAA fly-in...should be able to talk more fiberglass there!)
 
In post #7, RKellogg wrote, "lay on five pieces progressively smaller bidirectional cloth." I'm trying to get a sense of what I would be doing here. Is the goal what is shown in the bottom "scarf layup schedule" shown here, in order to have more strength: http://www.vansairforce.com/community/showpost.php?p=698949&postcount=8

Also, what would be good to use with a cordless drill to do the sanding and grinding?

I'm thinking of buying and trying out the ACS practice kit first and then seeing what I can do with the pant.
 
Also, what would be good to use with a cordless drill to do the sanding and grinding?

I use a round "drum" style sander, most hardware stores should have something like this.

Wheelpant%2520repair%2520005.JPG


Not the only way to do things by any means, just one way of many.

The post above about cutting a wide groove in from the exterior after you get the inside done, (post 7) then building up the exterior, is right on, if you are looking for the maximum strength. I do not think it is really needed in your case but it certainly will not hurt at all. The biggest issue with doing it that way is doing the final shaping and finishing. Another way is to do what I did in this post---------dig out the cracked area, fill with flox and glass over. http://www.vansairforce.com/community/showpost.php?p=692100&postcount=2

Is there an EAA chapter in your area?? Might be able to find someone who is familiar with fiberglass, and get some hands on help.
 
Last edited:
Is there an EAA chapter in your area?? Might be able to find someone who is familiar with fiberglass, and get some hands on help.

Indeed - a good plan. I keep reading on VAF and finding the cats have been skinned many ways. I saw your post #2 on "Wheel pants, alignment and mounting" http://www.vansairforce.com/community/showpost.php?p=514883&postcount=2 and now I understand JohnInReno's post here.

I must say, the more I read here, the more intriguing the fiberglass work sounds. I really appreciate the pictures and walkthroughs Dan H and you have put up.
 
After reading Mike S's wheel pant repair post (http://www.vansairforce.com/community/showthread.php?p=692100) and the composite practice kit book and West System info, I decided dive in to try seeing if I could do a 3-ply scab inside the pant. I started by cleaning the area with Dawn soap and water and then acetone, and then I sanded. I've made it as far as cutting off the excess cloth with a utility knife, and then I tried to sand down the edges a bit. Does this look how it should at this point? What's a good way to clean up the edges (or is it necessary)?

Here's after I put the glass cloth down:
6tnziw.jpg


Here's after I trimmed off the excess cloth with a utility knife:
bed1yg.jpg
 
I've made it as far as cutting off the excess cloth with a utility knife, and then I tried to sand down the edges a bit. Does this look how it should at this point? What's a good way to clean up the edges (or is it necessary)?

Keep sanding until it is faired.

Some notes....

Scab plies will work, but scarf joints are used for a quality structural repair. Mr. Kellogg's inside/outside approach is very good. Grinding, then scarfing is the only structural way to return the outside to the original contour.

Slapping on random patches of cloth will also work, and sure, I've done plenty of it. However, wetting a stack of fabric between 4-mil plastic sheet is preferred. Stacking dry allows orienting the weave. There is no excess epoxy in the finished layup. The patch is cut to exact size, right through the plastic. One side is peeled, and the patch is placed in exact position. The other plastic sheet is peeled, and the patch is stippled in to place. Slap on a sheet of peel ply, wet and smooth, and you won't even need to sand an inside patch after cure. The peel ply will feather out the ply drop-off.

Dry cut all the plies:

Fabric.jpg


Stack, pour on epoxy, let it soak in a few minutes:

Epoxy.jpg


Add a plastic cover sheet, use a roller or squeegee to work the epoxy through all the fabric, then push all the excess epoxy out to the edges:

Roll.jpg


Draw the desired patch shape right on the plastic sheet, then cut the entire stack to shape. Peel, place, and stipple.

Cut.jpg
 
Last edited:
Dan, if that's BID shouldn't you be cutting from the roll on a 45?

Cut from the roll for least waste.

Weave orientation matters when you lay it on the part....in general, aligned with the bending load, or 45 to the bending load for torsion. In the case of a wheel pant repair patch, it doesn't matter at all.
 
Last edited:
I learned from a friend who used to be a training instructor at Scaled Composites that the best way to prep for additional layers is to sandblast rather than sanding. I did this when I had to add reinforcements to repair wheelpants and it literally took seconds to prep. If I had to do it over I would get some Kevlar to use here because it has excellent abrasion resistance qualities, hence why it is difficult to cut with scissors.
 
I learned from a friend who used to be a training instructor at Scaled Composites that the best way to prep for additional layers is to sandblast rather than sanding. I did this when I had to add reinforcements to repair wheelpants and it literally took seconds to prep. If I had to do it over I would get some Kevlar to use here because it has excellent abrasion resistance qualities, hence why it is difficult to cut with scissors.

+1 on the sandblasting. It abrades the surface, and if it was polyester (likely as it is lower cost) then they probably used unwaxed and sanding just clogs and abrades the top glass layer. This is especially true for large areas where you want to add filler, or an extra layer of glass, or affix a hinge.

On a small area like this one a 2" sanding disk works well to taper the layers.
 
Thank you, Dan - for this first pant, I'll keep sanding... For the other pant, which isn't cracked but which isn't yet reinforced, I'll certainly try the dry stack and peel ply approach.

(At some point, and when I find someone here to help me out, I may retackle the first pant with the inside/outside scarf.)

Keep sanding until it is faired.

Some notes....

Scab plies will work, but scarf joints are used for a quality structural repair. Mr. Kellogg's inside/outside approach is very good. Grinding, then scarfing is the only structural way to return the outside to the original contour.

Slapping on random patches of cloth will also work, and sure, I've done plenty of it. However, wetting a stack of fabric between 4-mil plastic sheet is preferred. Stacking dry allows orienting the weave. There is no excess epoxy in the finished layup. The patch is cut to exact size, right through the plastic. One side is peeled, and the patch is placed in exact position. The other plastic sheet is peeled, and the patch is stippled in to place. Slap on a sheet of peel ply, wet and smooth, and you won't even need to sand an inside patch after cure. The peel ply will feather out the ply drop-off.
 
prepping a border area around a repair

Sanding until faired on the inside of pant 1 worked out OK. I did the inside reinforcement of pant 2 using the dry stack and peel ply, and it worked OK, too.

On the outside of pant 1, I sanded away paint and primer and put down a single ply of glass. I've trimmed off the excess cloth but haven't sanded the edge at all yet. I'm trying to do something a la Mike S's repair: http://www.vansairforce.com/community/showthread.php?t=90114

Outside of the new glass, there is a border where my sanding had taken me down to the primer, and beyond that, there is a border where the sanding had taken off some of the original paint.

fum7ig.jpg


If this is on the right track so far, I know I'll have to clean, scuff/sand, clean to prepare the new glass for dry micro in order to start finishing. How do I prep the border areas?
 
Last edited:
Doug, looks like the edge of your layup is dry.

Also, probably just a photo oddity, but the weave looks like it is real course---what weight cloth did you use??

If the edge is actually as dry as it looks, you might want to brush on some straight resin, and get it out on the base pant area also, then when it all hardens up, sand it all to blend.
 
Hi Mike -

Aha. I did only wet the cloth over the area where I had sanded down all the way to glass. I'll clean up the outside area again with some acetone and brush on some resin as you suggest.

Looking ahead to when I address the other pant, should I have patched/wet over the transition, over onto the top of the base pant?

As far as the cloth, the photo is zoomed in somewhat - the BID is the glass cloth that came with the composite practice kit.

Doug, didn't read all the posts bu after looking at your picture and Mike's accurate comments here's a fast plan I use.

Sand an inch or so past the repair area, wet out the couple layers of glass between a top and bottom layer of clear plastic by squeegeeing with a credit card to completely wet out the layup, squeeze the excess resin out and cut the layup to the correct size. Easy way to do that is draw it on your work surface and when the layout is wetted out properly it's clear enough to see through. Make it fit .5 inch onto the old area.

Then peel one side of plastic off, lay it on your repair area, smooth it out with the card, pull the top layer of plastic and top it with a layer of peel ply. Work some epoxy onto the remaining .5 inch transition area where the peel ply should overlap to smooth the edges. Use the credit card again to smooth it out over the edges.

Let cure. When you pull the peel ply you'll have a smooth transition from new to old and can start sanding and filling and sanding and filling and .....
Am headed out to start mine (again) this morning.

PS: you'll make a better patch or part if you orient the weaves of the layers perpendicular to each other and, contrary to the view of others we always start with the first layer cut off the roll on a 45?.
 
I actually like doing wheel pant repairs. If you can save most of the pieces, I can usually make it look new again.
 
So, I'm making progress on the pant repair - finishing up now with epoxy sealing the micro I used for fairing on the outside.

If I shine a light from the inside of the pant, I can see where the original holes were. Any tips on re-drilling holes 1) in the exact same spots, and 2) without tearing up too much of the new fiberglass? Do I start with a #40 and then enlarge with a #19 reamer and then countersink? Any good ways to get the pilot hole right where I want it (besides luck :D)?
 
Back
Top